Whole Jowar Salad is not only a delightful culinary experience but also a powerhouse of health benefits. Jowar, a gluten-free ancient grain, forms the hearty base of this nutritious salad. Packed with essential nutrients like protein, fiber, vitamins, and minerals, jowar aids in digestion, promotes heart health, and helps regulate blood sugar levels. Combined with a colorful array of fresh vegetables and aromatic spices, this salad offers a burst of flavors and textures. With its low glycemic index and high satiety factor, it’s an ideal choice for weight management and maintaining overall well-being. Let’s delve into the recipe to discover the goodness of this wholesome delight.
Ingredients:
1 cup whole jowar
2 garlic cloves, crushed
Water (for soaking and boiling)
1 tablespoon oil
2 tablespoons mustard seeds
15-20 curry leaves
1 green chili, finely chopped
1 tablespoon ginger, finely chopped
1/2 onion, chopped
1/2 carrot, diced
1 capsicum, chopped
Salt to taste
Red chili powder to taste
Paneer (optional), diced
Lemon juice (from 1 lemon)
Fresh coriander leaves, chopped (for garnish)
Instructions:
Wash 1 cup of whole jowar thoroughly and soak it overnight with garlic cloves and in enough water to cover.
Boil the jowar in the same water with garlic cloves for about 15 minutes or until it becomes tender. Drain and set aside.
Heat 1 tablespoon of oil in a pan over medium heat. Add 2 tablespoons of mustard seeds to the hot oil and let them splutter.
Add 15-20 curry leaves, finely chopped green chili, and finely chopped ginger to the pan. Sauté for a minute.
Add 1/2 chopped onion, diced carrot, and chopped capsicum to the pan. Stir-fry until the vegetables are tender yet crisp.
Season with salt and red chili powder according to taste.
Add the cooked jowar to the pan with the stir-fried vegetables. Mix well to combine.
If desired, add diced paneer to the salad mixture. Stir gently to incorporate.
Transfer the prepared salad to a serving bowl. Squeeze the juice of 1 lemon over the salad.
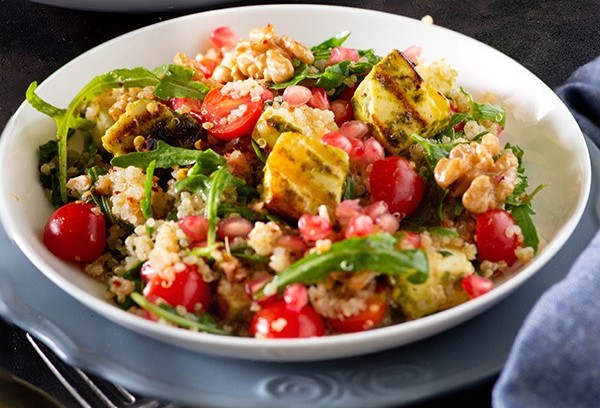
Paneer Quinoa Salad isn’t just a feast for the taste buds; it’s a nutritional powerhouse packed with health benefits. Combining protein-rich paneer, fiber-packed quinoa, and an array of colorful vegetables, this salad offers a diverse range of nutrients essential for overall well-being. Quinoa provides sustained energy, while black beans contribute protein and gut-friendly fiber. The addition of paneer offers a dose of calcium and protein, promoting muscle health and bone strength. Enhanced with antioxidant-rich veggies and a zesty lime dressing, this salad not only tantalizes the palate but also supports digestion, boosts immunity, and aids in weight management.
Ingredients:
1 cup quinoa
2 cups water
Salt, to taste
150g paneer, sliced
1 tablespoon olive oil
1 teaspoon paprika
1 teaspoon garlic powder
Assorted veggies (e.g., bell peppers, cherry tomatoes, cucumber), chopped
1/4 cup black beans, cooked
1 tablespoon olive oil
1/2 teaspoon garlic powder
1 teaspoon taco seasoning
Juice of 1 lime
2 tablespoons chopped cilantro leaves
Instructions:
Rinse quinoa thoroughly under cold water until the water runs clear. Drain well.
In a saucepan, combine rinsed quinoa, 2 cups of water, and a pinch of salt. Bring to a boil over medium heat. Reduce heat to low, cover, and simmer for 15-20 minutes, or until quinoa is tender and the water is absorbed. Remove from heat and let it sit covered for 5 minutes.
In a bowl, marinate the sliced paneer with olive oil, paprika, garlic powder, and salt.
Heat a skillet over medium heat. Add the marinated paneer slices and cook until golden brown on both sides, about 2-3 minutes per side. Remove from heat and set aside.
In a large mixing bowl, combine the cooked quinoa, chopped veggies, black beans, olive oil, garlic powder, taco seasoning, lime juice, and chopped cilantro leaves. Toss until well combined.
Add the cooked paneer to the salad mixture and gently toss to incorporate.
Serve the paneer quinoa salad immediately or refrigerate for later.
One serving of Paneer Quinoa salad approximately contains:
In a mixing bowl, combine ragi flour, semolina, water, and salt. Mix well to form a smooth batter. Set aside.
Heat oil in a small pan. Add urad dal, cumin seeds, and mustard seeds. Let them splutter.
Add asafoetida, green chili, ginger, and curry leaves to the tempering. Saute for a minute and then remove from heat.
Pour the tempering into the ragi batter and mix well. Cover the batter and let it rest for 15 minutes. If the batter thickens, adjust the consistency by adding water as needed.
Meanwhile, grease idli plates with oil. Boil water in a steamer.
Just before steaming, add Eno fruit salt to the ragi batter and mix gently.
Pour the prepared batter into the idli molds. Place the molds in the steamer and steam for 10-12 minutes on high heat.
Once done, switch off the heat and let it sit for 5 minutes before opening the steamer lid.
After 5 minutes, remove the lid and let the idlis cool slightly. Using a wet spoon, scoop out the idlis from the molds.
In a separate pan, heat a little oil. Add sliced onion and capsicum. Saute for a few minutes until they are slightly softened.
Add sambar masala, salt, and lemon juice to the sauteed veggies. Mix well.
Serve the hot ragi idlis with the sauteed veggies on top.
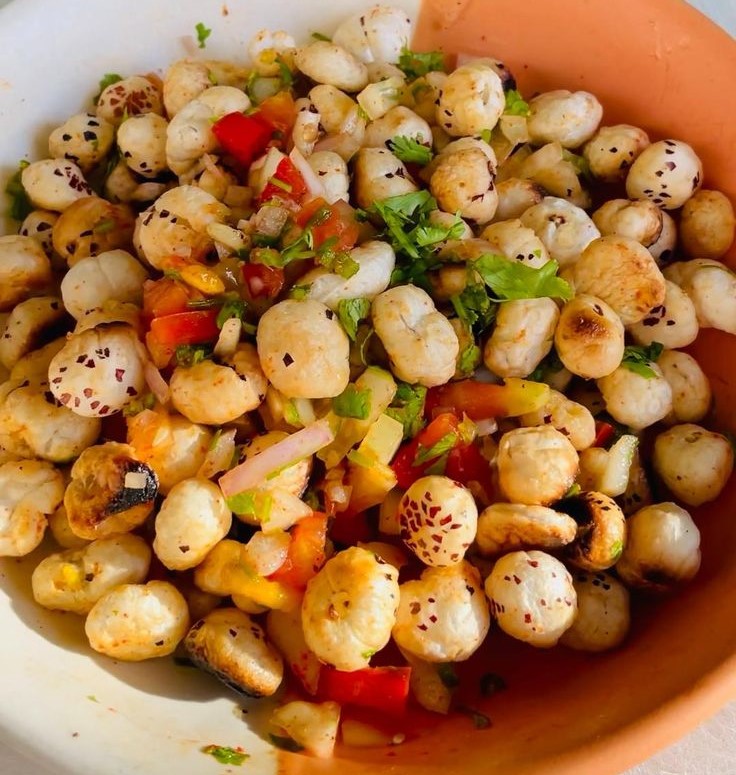
Makhana, also known as fox nuts or lotus seeds, is a nutritious and versatile ingredient packed with health benefits. This healthy Makhana chaat recipe combines the goodness of Makhana with a variety of spices and fresh vegetables to create a flavorful and satisfying snack that’s not only delicious but also nourishing.
Ingredients:
2 teaspoons ghee
Salt to taste
1/4 teaspoon turmeric powder
1 teaspoon red chili powder
1/2 teaspoon pepper powder
2 cups roasted Makhana
Chopped cucumber, onion, and tomato
1/2 teaspoon chaat masala
Lemon juice
Fresh coriander leaves
Instructions:
In a pan, heat 2 teaspoons of ghee over low flame.
Add salt to taste, 1/4 teaspoon of turmeric powder, 1 teaspoon of red chili powder, and 1/2 teaspoon of pepper powder to the ghee. Stir well to combine the spices.
Add 2 cups of roasted Makhana to the pan. Toss the Makhana in the spices for about 2 minutes, ensuring that they are evenly coated.
Once the spices are well coated, remove the pan from heat and let the Makhana mixture cool down to room temperature.
In a large mixing bowl, combine the spiced Makhana with chopped cucumber, onion, and tomato.
Sprinkle 1/2 teaspoon of chaat masala over the mixture.
Squeeze fresh lemon juice over the chaat according to taste preference.
Garnish the Makhana chaat with fresh coriander leaves and toss everything together until well combined.
Serve the healthy Makhana chaat immediately as a nutritious snack or appetizer.
One serving of Makhana chaat approximately contains:
Oats are renowned for their numerous health benefits, making them an excellent addition to your daily diet. Rich in fiber, oats can aid digestion, promote heart health, and even help manage weight. This recipe for oats pav buns combines the goodness of oats with whole wheat flour to create a nutritious and delicious alternative to traditional bread rolls.
Sprouting is a fascinating natural process wherein seeds germinate and develop into young plants. It’s a simple yet transformative method that enhances the nutritional value of seeds, grains, nuts, and beans. By soaking these raw ingredients and allowing them to sprout, enzymes are activated, making nutrients more accessible and digestible. Sprouting also decreases anti-nutrients like phytic acid, potentially improving nutrient absorption. This ancient technique dates back thousands of years and is valued for its health benefits, including increased vitamins, minerals, and enzymes. From salads to sandwiches, sprouts add a crunchy texture and vibrant flavor, elevating dishes with their freshness and vitality.
BROCCOLI SPROUTS
Broccoli sprouts are a powerhouse of nutrition, packing a punch of health benefits in their tiny form. Rich in vitamins, minerals, and antioxidants, these miniature greens offer a concentrated dose of goodness, promoting overall well-being and vitality. Incorporating broccoli sprouts into your diet may support immune function, aid in digestion, and even contribute to cardiovascular health. Whether grown in a jar or soil tray, cultivating broccoli sprouts at home is a simple and rewarding process. With just a few steps, you can harness the potent health benefits of these superfoods right in your own kitchen, ensuring a fresh and nutritious addition to your meals.
HOW TO MAKE BROCCOLI SPROUTS AT HOME IN A JAR?
REQUIREMENTS
Broccoli seeds
A glass jar
Cheesecloth or a lid to cover the jar
INSTRUCTIONS
Sanitize the Seeds:
Mix 2 tablespoons of seeds with 1 cup of water and 2 tablespoons of apple cider vinegar.
Let them soak for 10 minutes.
After soaking, drain and rinse the seeds with clean water.
Soaking the Seeds Overnight:
Transfer the sanitized seeds into a jar.
Fill the jar with water, enough to cover the seeds.
Cover the mouth of the jar with a lid, cloth, or screening.
Let the seeds soak overnight.
Rinsing and Draining:
In the morning, drain the water from the jar.
Place the jar on its side on the counter.
Every day, rinse the seeds twice with fresh water.
After rinsing, drain excess water from the jar.
Germination:
After a few days, the seeds will begin to germinate.
You can eat the sprouts anytime after they start sprouting.
Fill the growing tray with coco coir or potting soil, ensuring it’s evenly spread and pressed firmly into the tray.
Sowing the Seeds:
Sprinkle 30 grams of broccoli seeds evenly over the soil surface in the tray.
Misting and Covering:
Give the seeds a gentle mist of water to moisten them.
Place another tray on top to cover the seeds and create a dark environment for germination.
Germination:
Within a day or two, the broccoli seeds will germinate. Keep the tray in a warm area.
After germination, remove the covering tray and continue misting the seeds lightly.
Growth:
Over the next 5 to 6 days, the broccoli microgreens will begin to grow. Continue misting them daily to keep the soil moist.
Exposing to Sunlight:
After 5 or 6 days of growth, open the tray and place it in direct sunlight or under a grow light.
Exposing the microgreens to sunlight will encourage them to turn green and grow faster.
Harvesting:
Within a day of exposing them to sunlight, the broccoli microgreens will turn green and be ready for harvest.
Use scissors to cut the microgreens just above the soil line.
Enjoying Your Microgreens:
Your homegrown broccoli microgreens are now ready to be enjoyed! Add them to salads, and sandwiches, or garnish your favorite dishes for a nutritious boost.
Green gram sprouts, also known as mung bean sprouts, offer a plethora of health benefits in their tender form. Packed with protein, fiber, vitamins, and minerals, these sprouts contribute to a balanced diet and promote overall health. Incorporating green gram sprouts into your meals may aid digestion, boost metabolism, and support weight management. Sprouting green gram at home is a straightforward process that requires minimal effort and yields fresh, nutritious sprouts within days. By sprouting at home, you can ensure the highest quality and freshness of your sprouts, providing a convenient and sustainable source of wholesome nutrition for you and your family.
HOW TO MAKE GREEN GRAM SPROUTS AT HOME?
INGREDIENTS:
Whole mung beans
Filtered water or boiled and cooled water
INSTRUCTIONS:
Preparation:
Measure out the desired amount of whole mung beans and spread them out on a plate.
Pick through the beans to remove any stones or husks.
Place the cleaned beans in a mesh strainer or colander.
Rinsing the Beans:
Rinse the mung beans thoroughly under running water, washing them 3 to 4 times to remove any debris.
Transfer the rinsed beans to a clean bowl.
Soaking the Beans:
Add enough filtered water or boiled and cooled water to cover the mung beans by at least 2 to 3 inches.
Cover the bowl with a lid that is not too tight or airtight.
Allowing for Soaking:
Leave the beans to soak at room temperature for 1 to 2 days.
Place the bowl in a dry and clean area or corner of your kitchen.
BLACK GRAM SPROUTS
Black gram sprouts offer numerous health benefits, enriched with essential nutrients like protein, fiber, vitamins, and minerals. Incorporating these sprouts into your diet may aid in digestion, support heart health, and boost immunity. Their low glycemic index makes them ideal for regulating blood sugar levels. Sprouting black gram at home is a simple process that enhances its nutritional value and digestibility. With minimal effort and equipment, you can enjoy the fresh and crunchy texture of homegrown black gram sprouts, elevating your meals with their nutty flavor while reaping the numerous health rewards they offer.
HOW TO MAKE BLACK GRAM SPROUTS AT HOME?
INGREDIENTS:
Black gram (urad dal)
Water
INSTRUCTIONS:
Preparing the Black Gram:
Place the black gram in a bowl and wash it thoroughly, changing the water several times until the water runs clear.
Soaking the Black Gram:
Add 3 to 4 cups of water to the bowl, enough to completely cover the beans.
Choose a warm and dark place or a spot with warm indirect sunlight for soaking. The warmth aids in water absorption.
Allow the beans to soak until they swell up, indicating that they have absorbed enough water.
Rinsing and Draining:
After the beans have swollen, thoroughly rinse them again under running water.
Drain all the water out using a strainer, discarding any hard beans that have not swelled up.
Sprouting Process:
Cover the bowl with a slightly damp cheesecloth or a towel.
Place the bowl back in its warm spot.
Every 6 to 8 hours, rinse the beans with water, wetting the towel or cheesecloth each time before covering the bowl again.
Check periodically to ensure there is enough moisture for sprouting.
Observing Sprouting:
By the second day, you may begin to see sprouts emerging from the beans.
Continue the rinsing and draining process every 6 to 8 hours until you achieve the desired size of sprouts.
Final Rinse and Storage:
Once you have finished sprouting, give the beans a final rinse under running water.
Drain any excess water and transfer the sprouted beans to a clean container.
Store the sprouted beans in the refrigerator until ready to use.
METHI SEED SPROUTS
Methi seed sprouts, derived from fenugreek seeds, offers so many health benefits. Packed with nutrients like iron, protein, fiber, and vitamins, they aid in digestion, promote heart health, and regulate blood sugar levels. These sprouts are also known for their anti-inflammatory and antioxidant properties, supporting immune function and overall well-being. Sprouting methi seeds at home is a straightforward process, requiring only water, a container, and a few days of patience. By sprouting methi seeds in the comfort of your home, you can ensure a fresh and nutrient-rich addition to your diet, contributing to a healthier lifestyle.
HOW TO MAKE METHI SEEDS SPROUTS AT HOME?
INREDIENTS:
1/2 cup fenugreek seeds
Water
INSTRUCTIONS:
Day 1-3: Rinsing and Soaking
Rinse 1/2 cup of fenugreek seeds under cold water to remove debris.
Place seeds in a bowl, cover with water, and soak for 24 hours.
After 24 hours, drain and rinse the seeds, then soak them again for another 24 hours.
Repeat draining, rinsing, and soaking for a total of 3 days, ensuring seeds remain submerged.
Day 4-5: Sprouting
Drain soaked seeds using a sieve, rinse thoroughly, and place in a dark spot.
Cover with a damp cloth and let sit for 24 hours.
Repeat rinsing and covering for another day.
By Day 5, seeds should sprout; if not, repeat the rinsing process.
Once sprouted to satisfaction, give a final rinse under running water.
Final Steps:
After sprouting, ensure to rinse the fenugreek seeds well to remove any remaining husks or residue.
Allow the sprouts to dry partially before storing them in an airtight container.
Store the sprouted fenugreek seeds in the refrigerator, where they can be kept fresh for up to 10 days.
Sprouting seeds at home is not only a simple and cost-effective way to incorporate fresh, nutrient-rich greens into your diet, but it also offers a plethora of health benefits. Whether you’re growing broccoli sprouts, methi seed sprouts, or any other variety, the process is relatively straightforward and requires minimal equipment. By sprouting seeds in jars or soil trays, you can enjoy the satisfaction of nurturing your own fresh produce while reaping the rewards of enhanced nutrition and vitality. With just a little time and effort, you can cultivate a continuous supply of delicious and nutritious sprouts right in your own kitchen.
Ragi mudde, a traditional South Indian delicacy, stands as a testament to the rich culinary heritage of the region. Made primarily from ragi flour, also known as finger millet, this nutritious dish holds a special place in the hearts and diets of many. Its preparation involves a simple yet meticulous process, where ragi flour is combined with water, salt, and a touch of ghee, then cooked to perfection. The result is a soft, dough-like consistency that is shaped into balls by hand. Ragi mudde is not only revered for its distinct taste and texture but also cherished for its health benefits, being rich in fiber, calcium, and other essential nutrients. Whether enjoyed on its own or paired with a variety of side dishes, ragi mudde remains a beloved staple, offering both nourishment and culinary delight.
INGREDIENTS:
1 cup ragi flour
2 cups water (divided)
1/4 teaspoon salt
1/2 teaspoon ghee
INSTRUCTIONS:
In a mixing bowl, take 2 tablespoons of ragi flour and add 1/4 cup of water. Mix well until there are no lumps. Set aside.
In a saucepan, bring 1.75 cups of water to a boil. Add 1/4 teaspoon of salt and 1/2 teaspoon of ghee to the boiling water.
Gradually pour the ragi mixture into the boiling water while stirring continuously to prevent lumps from forming. Stir until the mixture turns glossy.
Reduce the heat to low and gradually add the remaining ragi flour while stirring continuously to combine well. Let it cook on low flame for a few minutes.
Once the mixture thickens, spread it slightly in the saucepan and allow it to boil for about 5 minutes, stirring continuously to prevent any lumps from forming.
After boiling, reduce the heat to a simmer and cook for an additional 3 minutes, stirring continuously until the mixture becomes glossy and non-sticky.
Once the ragi mudde is cooked to the desired consistency, remove it from the heat and allow it to cool slightly.
Take enough portion of the mixture to form a ball and place it in a greased bowl. Shape it into a round ball.
Repeat the process with the remaining mixture to form additional balls.
Serve the ragi mudde with your choice of accompaniment and enjoy!
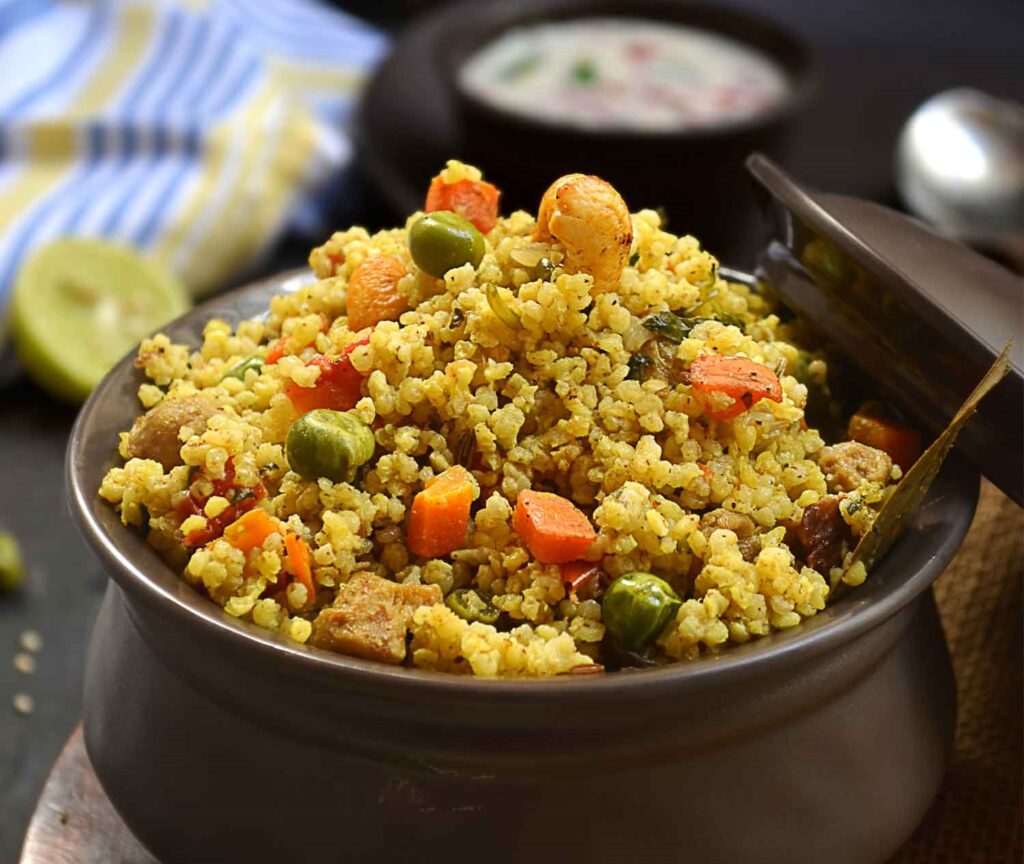
Foxtail Millet Vegetable Pulao is a wholesome and nutritious dish packed with a plethora of health benefits. This vibrant and flavorful pulao combines the goodness of foxtail millet, a nutrient-rich ancient grain, with an array of colorful vegetables and aromatic spices. Rich in fiber, foxtail millet aids digestion, promotes satiety, and helps regulate blood sugar levels. The addition of vegetables provides essential vitamins, minerals, and antioxidants, supporting overall well-being. Moreover, this dish is low in fat and cholesterol, making it heart-friendly and suitable for those seeking a balanced and nutritious diet.
INGREDIENTS:
1 cup foxtail millet, soaked in water for 3 hours
1 1/2 table spoon coconut oil
1 bay leaf
3 cloves
2 cinnamon sticks
1 star anise
1/2 teaspoon cumin seeds
1 table spoon ginger garlic paste
1 sliced onion
1/4 teaspoon turmeric powder
1/4 teaspoon salt
1/4 teaspoon red chili powder
3 green chilies, slit
Handful of curry leaves
1 chopped tomato
1 potato, diced
1/2 bell pepper, diced
1/2 cup carrots, diced
1/2 cup soy chunks
1/2 teaspoon coriander powder
1 teaspoon garam masala
1 table spoon yogurt
1 1/2 cups water
Salt to taste
Handful of coriander leaves
1 teaspoon kasoori methi (dried fenugreek leaves)
INSTRUCTION:
Heat coconut oil in a pressure cooker.
Add bay leaf, cloves, cinnamon sticks, star anise, and cumin seeds. Fry them until fragrant.
Stir in ginger garlic paste and sauté for a minute.
Add sliced onions, turmeric powder, salt, and red chili powder. Sauté the onions until translucent.
Add slit green chilies, curry leaves, chopped tomato, diced potato, bell pepper, carrots, and soy chunks. Sauté the vegetables for a few minutes.
Sprinkle coriander powder and garam masala. Mix well to coat the vegetables.
Stir in yogurt and sauté for a minute.
Drain the soaked foxtail millet and add it to the cooker. Sauté for another minute.
Pour in 1 1/2 cups of water and add salt to taste. Mix well.
Add coriander leaves and kasoori methi. Close the lid of the pressure cooker.
Pressure cook for 2 whistles or until the millet and vegetables are cooked through.
Once done, allow the pressure to release naturally. Serve hot and enjoy the nutritious Foxtail Millet Vegetable Pulao!
One serving of foxtail millet veggie pulao approximately contains:
Paneer moong tikki offers a plethora of nutritional benefits. Moong dal is rich in protein, essential for muscle repair and growth, while paneer provides calcium for strong bones and teeth. Capsicum and carrots add a dose of vitamins A and C, promoting healthy vision and boosting immunity. Additionally, these tikkis are high in fiber, aiding digestion and promoting satiety. The use of olive oil for shallow frying ensures healthy fats, beneficial for heart health. Overall, this snack is a nutritious blend of protein, vitamins, and fiber, making it a wholesome option for those seeking a balanced diet.
INGREDIENTS:
1 cup soaked yellow moong dal
1 cup grated paneer (cottage cheese)
1/2 cup chopped capsicum (bell pepper)
2 chopped green chillies
1/2 cup grated carrot
1 chopped onion
Handful of coriander leaves
1/2 teaspoon ginger garlic paste
2 teaspoon rice flour
Salt to taste
1/2 teaspoon turmeric powder
1/2 teaspoon garam masala
1 teaspoon olive oil (for shallow frying)
INSTRUCTIONS:
Begin by soaking 1 cup of yellow moong dal in water for a few hours until it softens.
Drain the soaked dal and blend it into a coarse paste.
In a mixing bowl, combine the blended dal, grated paneer, chopped capsicum, green chillies, grated carrot, chopped onion, coriander leaves, ginger garlic paste, rice flour, salt, turmeric powder, and garam masala.
Mix all the ingredients well to form a uniform mixture.
Shape the mixture into round or oval tikkis.
Heat a non-stick pan and spread 1 teaspoon of olive oil on it.
Place the shaped tikkis on the pan and shallow fry them on medium heat until they turn golden brown on both sides.
Once done, remove the tikkis from the pan and place them on a plate lined with kitchen paper to absorb any excess oil.
Serve the hot and crispy Paneer Moong Tikkis with green chutney or sauce of your choice
Ragi cheela, made from nutrient-rich ragi flour, offers numerous health benefits. Ragi, or finger millet, is packed with essential nutrients like calcium, iron, and dietary fiber, making it a valuable addition to any diet. The inclusion of vegetables further enhances its nutritional profile by providing vitamins, minerals, and antioxidants. This low-fat and gluten-free dish is not only delicious but also aids in weight management, promotes digestion, and helps regulate blood sugar levels. With its high protein content and slow-releasing carbohydrates, ragi cheela provides sustained energy and keeps you feeling full longer.
INGREDIENTS
Ragi flour: 1 cup
Water
Carrot grated: 1 medium sized
Cabbage: 1/4 cup
Beans: 1/4 cup
Capsicum: 1/4 cup
Green chillies: 2-3
Coriander leaves: 2 tablespoon
Chilli powder: 1/2 teaspoon
Salt to taste
Ghee: 1 teaspoon
INSTRUCTION
In a mixing bowl, add 1 cup of ragi flour. Gradually pour water while stirring continuously to avoid lumps until you achieve a smooth batter consistency similar to dosa or pancake batter.
Add grated carrot, finely chopped cabbage, beans, capsicum, green chilies, and chopped coriander leaves to the ragi batter.
Season the batter with chili powder and salt according to your taste preferences. Mix everything well to ensure the vegetables are evenly distributed throughout the batter.
Heat a non-stick pan or griddle over medium heat. Grease it lightly with oil.
Pour a ladleful of the ragi batter onto the pan and spread it evenly to form a thin circle.
Cook the cheela on medium-low heat until the bottom side turns golden brown and crispy. Flip it carefully using a spatula and cook the other side until golden brown as well.
Once both sides are cooked, remove the cheela from the pan and transfer it to a plate.
Repeat the process with the remaining batter to make more cheelas.