Mehar Jamil

How to make Healthy Roti Pizza
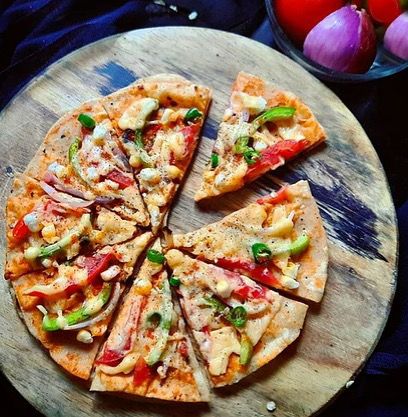
Roti Pizza

Roti Pizza is a Super healthy recipe with high protein (approx 20gms), good fats, low Calories…. Trust me !!! You will forget Dominos, Pizza hut and the likes .

When you Don’t have pizza bases at home but want to make pizza? And If you want healthy Pizza? Don’t worry we have a solution for you. This Roti Pizza will help you to try a new pizza recipe where you will not need unhealthy refined flour pizza bases. You can use any type of pre-cooked roti or even rotis left from the previous day to make these delicious pizzas.

This is a quick recipe for when you have guests over and can’t think of making some delicious appetiser. You will just need homemade sauce, cheese, some vegetables and roti to make these pizzas. You can also make this pizza for your little ones and they won’t even know that you have used roti as a base instead of actual pizza bases. If you want to avoid the heavy maida base of pizza that is available in the market, then you can easily give the pizza a healthier twist by using a whole wheat base in the form of roti. We have added some regular veggies here, however, you can customize the pizza by adding veggies of your choice. Do try this recipe, rate it and let us know how it turned out to be.

Also you can try our recipe of pizza-paratha

INGREDIENTS –

For pesto for 3 Roti pizza:

  1. 2 cups basil leaves
  2. Two tbsp olive oil
  3. 4 garlic cloves
  4. 4-5 walnuts
  5. Salt as per taste

For Pizza:

  1. Roti (You can use any ragi/jowar/wheat etc leftover or fresh roti), Here I am using amaranth, jowar, wheat mixed roti – because to improve protein and other nutrient content.
  2. 2 cups of chopped vegetables like mushroom, bell peppers, onion, cherry tomatoes, basil leaves, jalapenos (if available)
  3. 1/2 cup olives (optional)
  4. 100 gms fresh mozzarella
  5. Salt as per taste
  6. Pepper as per taste
  7. Italian seasoning for sprinkling

Here 100 gm of mozzarella has 17 gms of protein. Its rich in probiotics too, so gut friendly, you can also use it fresh in salads. Here we are heating the cheese so of course the bacteria wont survive.

Method for making healthy Roti Pizza

  1. Take your leftover/fresh either millet or wheat roti.
  2. Spread pesto over your roti
  3. Put vegetable toppings of Mushroom, Cherry tomatoes, onion, jalapenos (optional), olives, peppers etc
  4. Add few basil leaves.
  5. put mozzarella cheese on to it.
  6. sprinkle all the seasoning.

And your high protein , super easy and so so delicious recipe is ready to eat….

For more information click here

If you are struggling shedding weight. You can talk to us by taking this assessment: Click here

Paneer stuffed parwal

Paneer Stuffed Parwal

Paneer stuffed parwal

Paneer Stuffed Parwal (Cottage Cheese Stuffed Pointed Gourd) is delicious and nutritious dish made from parwal and paneer. This side dish is easy and quick to make. Parwal is blanched and then stuffed with paneer filling and then sautéed. Some people find Parwal quite boring but trust me’ this Bharwan Parwal is quite unique in taste.

You may like to try our other similar recipes stuffed-paneer-moonglet

Ingredients for Paneer Stuffed Parwal

300 grams parwal (pointed gourd)
100 grams paneer crumbles
Medium size onion chopped fine
1 teaspoon ginger & garlic chopped fine (can use paste also)
2 small green chilli chopped fine
1 tablespoon lemon juice
2 tablespoon coriander chopped fine
1 teaspoon dhania powder (coriander)
½ teaspoon chilli powder
1/4 teaspoon haldi
½ teaspoon garam masala
Half teaspoon jeera powder
½ teaspoon jeera
Salt to taste
1+1 tablespoon oil

Method

  • Peel the parwal and blanch it. Make a slit and scrape out the flesh. Set aside.
  • Heat 1spoon oil in a pan: add jeera, and then add ginger, garlic, chilli, onion and saute for 2 to 3 minutes.
  • Add all the dry masala, salt, paneer, lemon juice and saute for 2 to 3 minutes.
  • Switch off the heat, add coriander and mix.
  • Now stuff all the parwlas with this paneer mixture.
  • Heat oil in a pan; transfer the parwals, add a pinch of salt  and saute for a minute, cover with a lid with water on it and cook for 5 minutes on low heat.
  • Open the lid and saute on high heat for 1 minute.
  • Serve

Health benefits of Pointed Gourd

Pointed Gourds are good source of minerals and vitamins like vitamin A, vitamin C, vitamin B1 etc. They have very less calories. If you are trying for weight loss, then Pointed Gourds may become your best friend. Regular consumption of Pointed Gourds may help us to get rid of many diseases. Pointed Gourds help us in controlling cholesterol. They are full of fibre and helps to immune our digestive system. They are natural blood purifier and keeps our blood clean and healthy.

Health benefits of Paneer

Paneer is rich in calcium content, and calcium is known to strengthen both the teeth and bones. Apart from this, the intake of calcium also helps in the smooth functioning of the nervous system and the heart muscles stay healthy. Also

  • It reduces the risk of cancer
  • Build better bones and teeth.
  • An essential component in weight loss programs.
  • Aids in the normal functioning of the digestive system.
  • Ideal food for diabetic patients.
  • Building a strong immune system.

For more weight loss recipes: Click here

Hope you like this recipe.

If you are facing issues in dropping your weight, please take this free-body type assessment: Click here

Oats Veggie Nutri Cutlets

VEGETABLE OATS CUTLET RECIPE

Oats Nutri Veggie Cutlet – A Healthy breakfast recipe, Give this easy Oats Cutlet Recipe a try!

Wondering how to make oats cutlet at home? This super quick and easy oats cutlet recipe will help. If you are always looking for a healthy breakfast recipe to try, then your search stops here. Never made cutlets before? Don’t worry, as this easy oats cutlet recipe with step by step instructions will help you. If you are looking for oats cutlet recipe without potatoes, you can use spinach and green peas instead. However, having potatoes in oats cutlet recipe actually gives it a much better form and taste. This North Indian breakfast recipe is prepared with boiled potatoes, ginger-green chilli paste, paneer, carrot and a mélange of spices that will be an absolute delight for your taste buds and can surely make you crave for more. This oats cutlet recipe is an easy-to-make nutritious dish that you can cook on occasions like kitty party, game night, and picnic. It tastes best, when had along with a hot cup of tea or coffee during the monsoon or winter season. Try this healthy oats nutri veggie cutlets and enjoy with your loved ones!

You can also try our chana-dal-cutlet recipe

Benefits –

Health benefits of Oats nutri Veggie Cutlet: Veg Cutlets, unlike potato tikkis, are a powerhouse of vitamins, minerals and nutrition. The soya granules are high on protein content, good source of omega-3 fatty acids. Soya granules help to increase bone density and aid digestion.

Also, Benefits include lower blood sugar and cholesterol levels, protection against skin irritation, and reduced constipation. In addition, they are very filling and have many properties that should make them a food helpful for weight loss.

Ingredients –

  1. 2-3 medium size raw banana (pressure cook for 1 whistle,cool,peel)
  2. 1/2 cup oats
  3. 3 tbsp soay granules (soak in warm water for 10 mins, squeeze)
  4. Three tbsp carrot (grated)
  5. 3 tbsp cabbage (grated)
  6. Three tbsp capsicum (grated)
  7. 2 tbsp onion (finely chopped)
  8. 3 tbsp roasted peanuts (peel & crush)
  9. 2 tsp flaxseeds (slightly roasted)
  10. Two tsp til (slightly roasted)
  11. 2-3 tsp ginger garlic paste
  12. 3 tbsp coriander leaves (finely chopped)
  13. 2-3 green chillies (finely chopped)
  14. 1/2 tsp red chillies
  15. Half tsp garam masala
  16. salt as per taste
  17. 1 lemon juice
  18. Vegetable oil as needed
  19. 2 tbsp oats (powdered0 as needed for dry coating
  20. Two tbsp corn flour as needed for dry caoting
  21. 1 tbsp fine rawa as needed for dry coating.

Method for making healthy oats nutri veggie cutlet –

  1. In a large mixing bowl, add the boiled peeled bananas, soya granules, oats, carrot, cabbage, capsicum, onion, ginger garlic paste.
  2. Also add coriander leaves, chilies, dry spices, salt as required, crushed peanuts, flaxseeds, til, and lemon juice.
  3. Mix well till evenly blended
  4. Taste and adjust seasoning
  5. Divide the mixture into 12-14 portions.
  6. Now Dampen your palms and shape each portion into oval or oblong shaped cutlets about half an inch thick.
  7. Mix corn flour and oats powder with 1 tbsp fine rawa
  8. Coat each cutlet in this dry mixture
  9. Press gently and dust off excess of flour mixture.
  10. Heat a non stick pan or flat tawa.
  11. Smear a little oil on the pan.
  12. Place the cutlets on the pan and cook on medium heat. On either side till done and crispy.
  13. Serve hot with mint chutney or ketchup

Your hot tempting breakfast/rainy season snack is ready to serve!!!

If you are struggling shedding weight. You can talk to us by taking this assessment: Click here

For more information click here

How to make Khajoor Mishti Doi

A Healthier version of wonderful and Famous Traditional Bengali Dessert

Khajoor Mishti Doi

What is Mishti Doi ?

Mishti Doi or Mithi Dahi is possibly the most popular and beloved sweet dish in Bengal, and arguably the state’s second most important culinary export after the roshogolla. Fans of this iconic Bengali dessert—fermented set yogurt sweetened with caramelized sugar—are found all over the subcontinent, including Bangladesh, and even further afield.

Mishti Doi is an essential part of a Bengali meal and is traditionally made for religious and festive occasions like Durga Puja, Bengali New Year (Pohela Baisakh), and weddings. In the Vedas, curd or yogurt is described as the food of the gods, which may explain why it is an essential part of religious rituals. Plus, this easy Mishti Doi recipe, chilled, is a delicious way to beat the heat and is a perfect thirst-quencher in a hot and humid climate.

Despite its immense popularity, Mishti Doi is rarely prepared at home, possibly because it is widely available in practically every mithai shop in every neighbourhood in Bengal. Also, it takes planning and you need to make it at least a day in advance before you can eat it.

Although the misti doi recipe requires minimal ingredients, and even though the process is fairly simple and hassle-free, you need patience to make this scrumptious sweet – it has a waiting time of around 12 hours for the yogurt to set.

Healthier Twist in Mishti Doi –

Khajur mishti doi is a healthy twist to the traditional Bengali sweet. As the name says healthy mishti doi with dates, is devoid of refined and sugar and made with dates.
To make Khajur mishti doi, you need to soak the dates in warm water for about half an hour. Then drain the water, deseed the dates and combine with water to make a smooth puree. Then boil the milk for 8 to 10 minutes and after cooling it slightly add the dates puree and curd for the mishiti doi to set. Pour into individual serving glasses or cups of your choice and allow it to set for 5 hours. Cooling milk in this healthy Bengali sweet for 10 minutes after boiling is very important as curd added in hot milk will not set the mishiti doi well. Similarly soaking the dates in the beginning in hot water is also important to get a uniform texture.

Healthy mishti doi with dates has been made with cow’s milk as it has slightly lower fat content than full-fat milk. If you wish you can make this sweet with low- fat milk also. That will bring down the fat content to almost nil. Turn to about half a portion of this comparatively healthy Indian sweet to satisfy your sweet tooth. You will not load your body with refined sugar and thus avoid inflammation too with this khajur mishti doi. While heart patients and others aiming to eat healthy sweet can include this healthy mishti doi with dates as an occasional treat, diabetics should avoid it because of the addition of dates. Kids also need not hesitate to indulge in this sweet delicacy.

Recipe how to make Khajoor mishti doi – Healthy Bengali sweet

Soaking Time: 30 minutes

Setting time: 8 to 10 hours

Preparation Time: 2 mins

Cooking Time: 10 mins

Total Time: 10 hours 42 minutes

Ingredients –


1/2 cup dates (khajur)
21/2 cups cow’s milk
1 tbsp whisked curds (dahi)
For The Garnish
a few saffron (kesar) strands and nuts of your choice (Almonds/pistachios)

Method –

  1. To make khajur mishti doi, combine the dates and enough hot water in a bowl, cover with a lid and keep it aside for 30 minutes.
  2. Drain, deseed the dates and put in a mixer jar.
  3. Add ¼ cup of water and blend well till smooth. Keep aside.
  4. Put the milk in a deep non-stick pan, mix well and boil on a medium flame for 8 to 10 minutes, while stirring occasionally.
  5. Cool slightly for approx. 10 minutes, while stirring occasionally,
  6. Add the dates puree and whisk Well keep aside
  7. Put the curds in a deep bowl and whisk well.
  8. Pour the milk-dates mixture in it and whisk very well.
  9. Pour the mixture into 5 individual cups or bowls, cover with a lid and keep aside in a warm place for atleast 8 to 10 hours or till set.
  10. Refrigerate the khajur mishti doi for atleast 1 hour and serve chilled garnished with saffron strands.
    Nutrient values per serving
    Energy 116 kacl
    Protein 5 gm
    Carbohydrates 15.6 gm

Health benefits of Khajoor Mishti doi

  • As the name says the ingredient that lends sweetness in this Bengali dessert is dates and not sugar. This substitution has been done to avoid the use of refined sugar which has many ill-effects
    on the body.
  • Curd is probiotic and thus healthy for gut too.
  • Curd lends 2 important nutrients calcium and protein. Both these are twin pillars of our bones.
  • Heart patients can enjoy this dessert They can opt for low-fat milk instead of cow’s milk if they wish to enjoy a completely fat-free delicacy.
  • For kids, on the other hand, this dessert is a healthy option too. Try serving them healthy sweets like this dates based mishti doi since childhood, so as to avoid developing their taste buds for
    sugar based sweets.

For more Healthier recipes: Click here

Hope you like this recipe.

If you are facing issues in dropping your weight, please take this free-body type assessment: Click here

How to make easy homemade MOMOS using leftovers

JUGAAD RECIPE

HOMEMADE DELICIOUS MOMOS

About this trending and popular dish

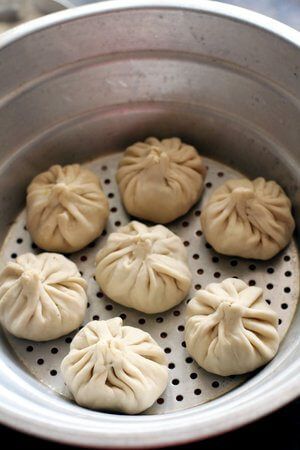
MOMOS are bite-size dumplings made with a spoonful of stuffing wrapped in dough. Momos are usually steamed, though they are sometimes fried or steam-fried. Meat or vegetables fillings becomes succulent as it produces an intensively flavored broth sealed inside the wrappers.

Term momo is traditionally used in northern China for buns without stuffing. Momo is the colloquial form of the Tibetan word “mog mog”.The word mo means food related to flour.

Momo has become a delicacy in Nepal and Tibetan communities in Bhutan, as well as people of the Indian regions of Darjeeling, Ladakh, Sikkim, Assam, Uttarakhand, Himachal Pradesh and Arunachal Pradesh.

Now before coming over to recipe try not to waste food as many people around the globe sleep hungry. If in case you have done the excess cooking than we should conserve the leftovers and make something interesting out of it and avoid the habit of wasting food.

I did the same today and it turned out really well. Here’s the recipe:

For the filling of momos –

Take some oil, saute one onion, add any leftover subzi/ Paneer/ chicken you have. I used shredded chicken pieces from leftover chili chicken I made last night. You can also add some vegetables like peppers, mushrooms, beans etc. to this mixture.

For the chutney of momos –

  1. Char two tomatoes and soak 2-4 chillies in warm water for 10 minutes. In a blender, grind the two with some salt.
  2. In a small pan take some oil, add one minced garlic, 1 bulb of spring onion, chopped (You can take regular onion too) and little soy sauce. Grind again, if you feel the need.

Let’s prepare MOMOS –

1.Knead a dough using 1 cup of refined wheat flour.

2. Roll out very small and thin circles. place the filling, gather it and pinch from the top.

3. You can steam it if you have the equipment. And in case, if you don’t have one than use appe pan to make it. Maybe in appe pan it will loose the shape a little. But will taste so good !! you can deep fry too, but this version of steamed momos are much healthier.

Steamed MOMOS

Do try this super delicious and easy homemade momos recipe from leftover subzi/chicken/paneer at your home.

For more recipes: Click here

Hope you like this recipe.

If you are facing issues in dropping your weight, please take this free-body type assessment: Click here

RECIPE FOR KETO CHICKEN NUGGETS

EASY KETO COOKING !!!

YUMMY KETO NUGGETS

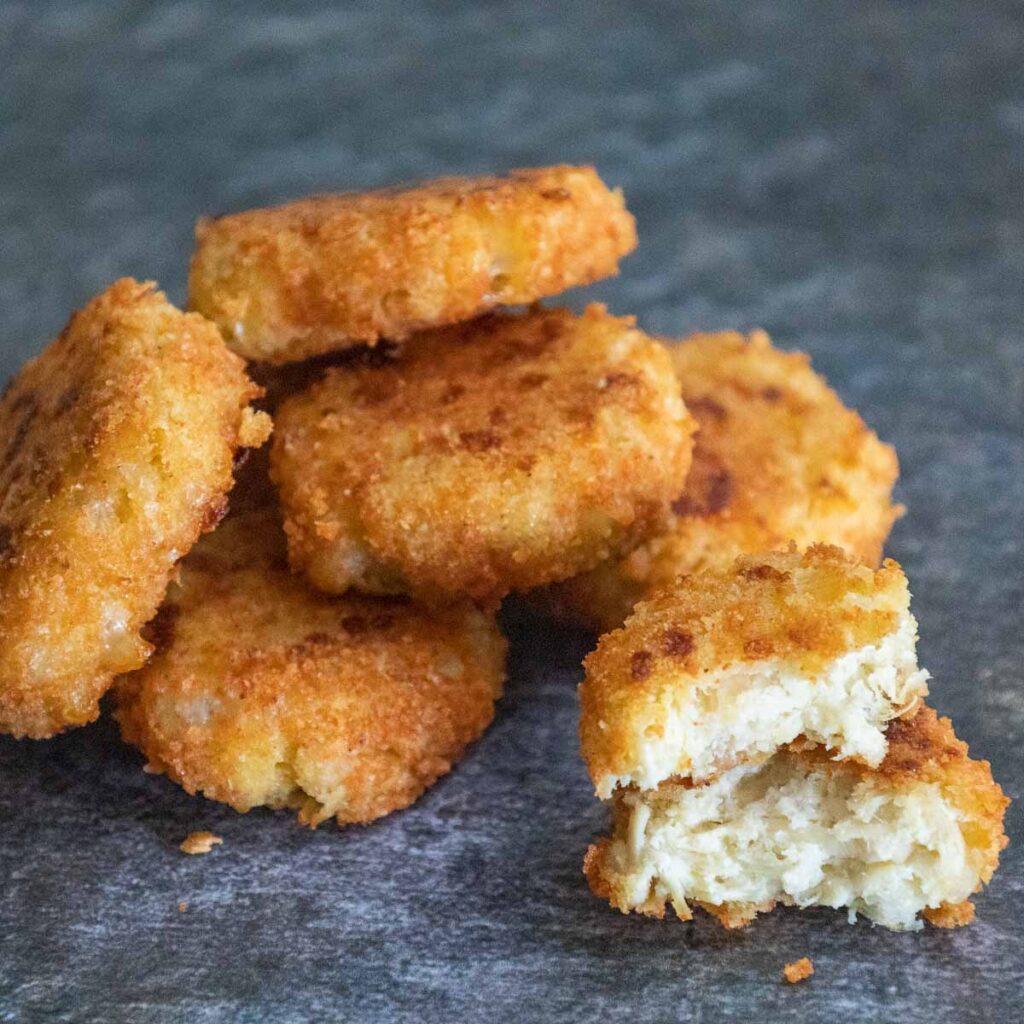
This Keto Chicken Nuggets recipe is about to change the way you think about eating low carb! They are everyone’s favorite keto recipes made with simple ingredients found right in the kitchen, and it is the best way to enjoy a quick and easy lunch that fits the keto diet.

Homemade chicken nuggets are a super easy keto recipe to make using Chicken, shredded mozzarella cheese, almond flour and few spices. They are a recipe that the entire family will love and are far healthier than the fast food restaurant version of chicken nuggets.

Ingredients

  • 2 Eggs, Whisked
  • 4 Medium-Sized Chicken Breast
  • 1 Cup Psyllium husk (more if needed)
  • ½ Teaspoon Salt
  • ½ Teaspoon Garlic powder
  • ¼ Teaspoon Paprika (optional)
  • ¼ Teaspoon ground black Pepper
  • ½-1 Cup Oil For Frying

Super simple stuff, right? let’s dive into the recipe Now……

How to make keto chicken nuggets

  1. Chop your chicken breasts into small nugget-shaped pieces – and depending on how big you want them, that could be about 1½ to 2 inches thick. 
  2. Place the nuggets in a bowl, and set them aside.
  3. Now Mix your seasonings – the salt, garlic powder, paprika, and pepper – in a small bowl accordingly, until well-combined.
  4. After that, Sprinkle your seasoning mixture over your chicken, and stir until each piece is completely coated with it.
  5. Crack the eggs into a small bowl.
  6. Add the egg mixture to your bowl of chicken pieces. Now, Mix everything up until each chicken pieces are thoroughly coated in the egg wash.
  7. Add the psyllium husk in a separate bowl to make your breading. 
  8. Now all that’s left to do is to dip the chicken pieces in the breading, and coat evenly.
  9. After seasoning and breading the chicken nuggets appropriately, you can start frying them.
  10. Now after all this preparation, Heat your oil in a pan over medium-high heat, and fry the nuggets in batches until golden brown and fully cooked – and it should take about 3-5 minutes on each side to do this.

Note : By the way, it’s really important during this step not to overcrowd the pan- you’ll not only risk dropping the temperature of the oil but also will end up with greasy chicken nuggets.

Then, just serve on their own, or with some sugar free ketchup or your favorite dipping sauce and enjoy!

For more recipes: Click here

Hope you like this recipe.

If you are facing issues in dropping your weight, please take this free-body type assessment: Click here

How to make Paneer Jalfrezi

TEMPTING PANEER JALFREZI

What is Paneer Jalfrezi ?

Paneer Jalfrezi is an easy and healthy restaurant-style vegetable stir fry recipe made with cottage cheese, vegetables like bell peppers, and Indian spices. You can make this Spiced cottage cheese stir fry in just 15 minutes. Keto, Low carb, and Gluten-free.

The word ‘jalfrezi‘ comes from the Bengali language ‘jhal’ means hot or spicy, and ‘frezi’ means suitable for a diet.

This is a semi-dry curry recipe made with a mix of vegetables and paneer. Ensure to cut all vegetables and paneer lengthwise of the same size to make Veg Jalfrezi similar to what is served in Indian restaurants.

Ingredients for Paneer Jalfrezi

  • Paneer: Homemade fresh paneer always tastes best. However, you can buy from market as well. Also, the paneer should cut lengthwise.
  • Vegetables: All three colored bell peppers (if available) cut length-wise. You can also use other vegetables like carrot, beans, mushrooms.
  • Onion: Dice the onion lengthwise.
  • Ginger and garlic: Mince them finely.
  • Tomato: Diced the tomato lengthwise.
  • Tomato puree: Used ½ cup of tomato puree prepared from 1 large tomato.
  • Spices: 1/4 tsp turmeric, 1/2 tsp red chili powder, 1/2 tsp coriander powder, and 1/4 tsp garam masala.
  • Oil or ghee: 1tbsp
  • Lemon juice: Squeeze juice of half lime into the stir-fry for added flavor.
  • Coriander leaves: for garnish.

How to make Paneer Jalfrezi

  1. In a Pan, heat oil. Once the oil is hot, add cumin seeds and let them sizzle.
  2. Then add sliced onions, minced ginger, garlic and sauté for 2-3 minutes on medium heat until light brown.
  3. Next, add the spices like turmeric powder, red chili powder, coriander powder, salt, a splash of water (So that masala would not burn) , and sauté the masala on medium-high heat for another minute.
  4. Add the bell peppers and continue sautéing them till they are tender and cooked. 
  5. Add sliced tomato and tomato puree and sauté for a minute until the tomatoes soften.
  6. Finally, add the paneer, garam masala, and toss well to coat with all the spices.
  7. Cover and simmer for 2-3 minutes.
  8. Lastly, squeeze from fresh lime juice and sprinkle some freshly chopped coriander leaves.

AND IT’S READY TO SERVE

You can serve this dish with chapati, naan, paratha, kulcha, pulao, rice, poori, zeera rice.

Tips & Variations

  1. If you have store-brought paneer, then soak paneer in hot water for 15 minutes to keep them soft.
  2. Do not overcook the veggies else they will turn mushy.
  3. You can increase the quantity of paneer and vegetables accordingly to your preference
  4. If you have leftover paneer jalfrezi, you can use it as a filling for making Paneer Frankie Roll.

If you are struggling shedding weight. You can talk to us by taking this assessment: Click here

For more information click here

DESI DESSERT “GUD KI MITHAI” –

GUR KI MITHAI

Introduction –

Jaggery is a traditional non-centrifugal cane sugar mostly consumed in the Indian Subcontinent, Southeast Asia, and Africa. It is a concentrated product of cane juice and often date or palm sap without separation of the molasses and crystals, and can vary from golden brown to dark brown in colour. It not only contains sucrose but also invert sugars, and moisture, with the remainder of other insoluble matter, such as wood ash, proteins, and bagasse fibres. 

Jaggery “THE HERO”

It is packed with calcium, magnesium, iron, potassium and phosphorus and even has trace amounts of zinc, copper, thiamin, riboflavin and niacin. Studies suggest that jaggery has B vitamins, some amounts of plant proteins and loads of phytochemicals and antioxidants. Few benefits are as follows-

  1. Cleanses the whole body

jaggery not only contains antioxidants but also many minerals and altogether they give it a cytoprotective quality to it, meaning that not only can it clear the mucus off the lungs but also cleans the respiratory and digestive tracts from the inside out.

2. Improves digestion 

Jaggery helps to stimulates the bowels and aids the release of digestive enzymes. It is also believed that jaggery is great for people who suffer from constipation and other digestive issues.

3. Prevents anemia

Jaggery is rich in minerals like iron and phosphorus, which aid in the production of hemoglobin in the body. For people with low-iron in their diet or at risk of developing iron-deficiency anemia, consuming jaggery is an effective preventive measure.

4. Improves immune function

Any food that is packed with nutrients and helps detox the body is usually consider great for your immune system and so jaggery is believed to be one of the best immune-boosting foods available to us. That’s why jaggery is consumed more during winter when your body needs that extra immunity boost to help keep the cold, flu and other diseases at bay.

5. Aids glucose control and weight loss

Jaggery is a great alternative to white sugar. Although Opting for jaggery as a sweetener can not only keep your blood sugar levels in check but also help you control your weight better. It can also keep yo full for longer, which can also help you control your cravings when you’re trying to lose weight.

COME ON LETS TRY SOME AWESOME HEALTHY DESSERT MADE UP OF OUR OWN DESI GUD !!!!

INGRDIENTS –

  1. Ghee 1tbsp
  2. Cumin seeds 1/2 tsp
  3. Crushed almonds 2tsp
  4. 2 tsp Crushed peanuts
  5. Jaggery 250gm
  6. Fennel powder 1/2tsp
  7. Ginger powder 1/4 tsp
  8. Black pepper powder as per taste

METHOD –

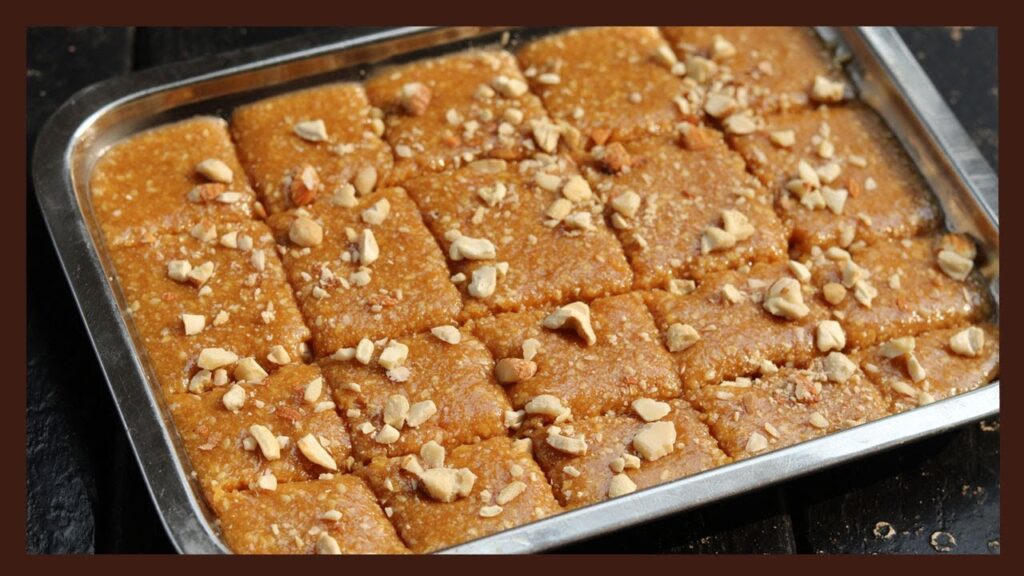
Take ghee on non stick pan, add cumin, crushed almonds and peanuts and roast them slightly. Now add shredded jaggery, let it melts down on medium flame. Add fennel, pepper and ginger powder to it. At the end grease the mold and set the jaggery.

BENEFITS OF THIS RECIPE –

  1. Completes the 5 flavors on your plate.
  2. Brings in more nutrients than a pieces of Dark chocolate can. So NO SWEET CRAVINGS
  3. Enhance absorption of iron from your saag/spinach based meals and increases the upatek of protein from your dal/gatte etc.

For more recipes: Click here

Hope you like this recipe.

If you are facing issues in dropping your weight, please take this free-body type assessment: Click here

Chicken Quesadilla: Healthier Mexican dish

CHICKEN QUESADILLA

Quesadilla is a Mexican delicacy which also happens to be most peoples favorite dish. A quesadilla is a heated tortilla with melted cheese inside. But in addition to cheese, you can put practically anything in a quesadilla.

What Is a Quesadilla?

A quesadilla is a Mexican dish that dates back to the 16th century. Traditional quesadillas were made with a corn tortilla that was warmed on a griddle, filled with cheese and various other fillings (meat, vegetables), and then folded over to be eaten by hand.

The addition of toppings like guacamole, salsa, and sour cream seems to have come along later. And, as Americans have adopted quesadillas, they’ve put their own spin on them, adding untraditional fillings such as scrambled eggs to make breakfast quesadilla and often swapping out flour tortillas for the corn tortillas.

Corn or Flour Tortillas for Quesadillas?

Traditionally in Mexico quesadillas are made with corn tortillas, not wheat flour tortillas, and a melty, white cheese.

But here with an Indian twist we make it from our regular Indian Chapati aka Roti. You can Also use Millet roti for making Quesadillas. I often make this when I am running late or when out of options. And it is so so delicious, you would be licking your fingers, I promise!!

LET’S BEGIN WITH THE RECIPE

INGREDIENTS –

  1. Chicken 250gm
  2. 1/2 tsp pepper powder
  3. Cumin seeds powder as per taste
  4. Peri Peri (optional)
  5. 1/2 tsp chili powder
  6. Salt as per taste
  7. 1 tsp Mixed Italian herbs and garlic powder (minced garlic will also do)
  8. Finely sliced capsicum (any of them green, red, yellow) and onions – 1 cup
  9. Grated half cup cheese
  10. Oil as per requirement
  11. Wheat flour dough

METHOD OF MAKING QUESADILLA-

  1. Wash and dry the chicken well
  2. now cut it into very small pieces and Marinate chicken strips with pepper powder, cumin seeds powder, peri peri (optional), chili powder, salt, mixed Italian herbs and garlic powder.
  3. In a pan, take 1 tsp oil and shallow fry the chicken pieces. Now take out this mixture in a bowl.
  4. In the same pan, take some oil and sauté thinly sliced peppers and onions.
  5. Once crisp, add the chicken and toss together. You can add more salt, pepper powder and peri peri seasoning if needed.
  6. Roll a chapati and cook on one side properly.
  7. Flip and spread some ketchup on it.
  8. Next place generous amount of chicken filling that we have prepared.
  9. Grate some chees on it.
  10. Cook well on both sides until crispy. Your Quesadilla is ready!!

TIP –

You can also add olives, mushrooms, corns, broccoli or any other vegetable of your choice.

If you are struggling shedding weight. You can talk to us by taking this assessment: Click here
For more information click here

HOW TO MAKE ARBI KEBABS

ARBI KEBAB

Arbi Kebab Recipe is a vegetarian appetizer that you can make for your parties. It is a vegetable when cooked and mashed tends to be very gooey. Pan frying these kebabs brings out delicious flavors of this vegetable and makes it nutritious too. It is a super easy dish to prepare for beginners.

INTRODUCTION OF ARBI KEBAB

When it comes to fulfilling our nutritional requirement, we really don’t need to look far for foods. Dig into the deep well of the Indian cuisine and you’ll find everything you need to fulfill your nutrition requirement. It is a starchy root vegetable that has a brown-coloured fibrous exterior and a white, slightly slimy flesh inside. 

Both the leaves and root/tuber/corm of arbi are used for cooking. It carries a unique mix of a deep nutty and a mild sweet taste. Although The vegetable is usually turned into a savoury dish but it can also be used to create sweet dishes. Its soft, creamy flesh makes for a luscious meal. More than its great taste, arbi should be included in the diet for its innumerable health benefits.

Health Benefits Of Arbi ke Kebab

1. Weight Loss

Arbi is an excellent source of dietary fibre that keeps us full for a long time and prevents high intake of food. low caloric content of arbi also facilitates weight management and aids in losing extra kilos.

2. Helps In Combating Diabetes

Arbi is a known low glycaemic food that slows down the process of breaking down of glucose in the liver. Arbi contains resistant starch that is not easily absorbed and digested. This slows down the rise of blood sugar level after a meal. Its corm is packed with complex carbohydrates, which is again not easily digestible.

3. Protects Heart

The high fibre content of arbi reduces the cholesterol level in the body. Arbi is a zero fat and zero cholesterol food. Also it contains a good amount of vitamin E that fights off cardiovascular issues to a large extent.

4. Provides A Number Of Antioxidants 

Arbi contains plant-based compounds called polyphenols (mainly quercetin) that may provide protection from deadly diseases like cancer. 

5. May Control Hypertension

Arbi is a zero fat and low sodium food that meets the requirement of a diet charted out for patients with high blood pressure.

NOW ITS TIME FOR SUPER EASY RECIPE OF ARBI KEBAB

INGREDIENTS:

  1. 250gm peeled and Boiled Arbi/Arvi/Taroo
  2. 2 tsp coriander powder
  3. 1 tsp fennel powder
  4. 2 tsp kasmiri lal mirch
  5. 1 tsp ginger powder
  6. Pink salt as per taste
  7. 1 tsp garam masala
  8. 1 tsp turmeric powder
  9. Table salt as per taste
  10. 1 tsp kasuri methi leaves
  11. 2 tsp dried amchur powder

METHOD:

  1. Boil, cool and peel the Arbi.
  2. Make a mix of all these dry ingredients.
  3. Red chillies, corriander and amchur have to be 2 spoon each
  4. Light press them in your palm as per their shape.
  5. Cover them with this masala.
  6. If you want you can freeze them too.
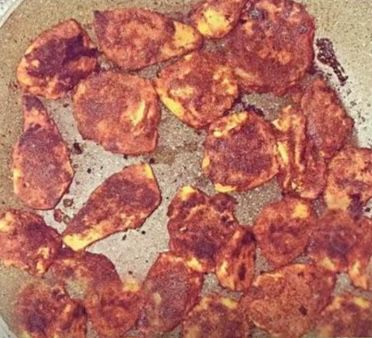
  7. Shallow fry or pan fry these on a pan.

You can enjoy them with dal & rice or any simple khicdi. Enjoy your healthy KEBABS!!!

If you are struggling shedding weight. You can talk to us by taking this assessment: Click here

For more information click here