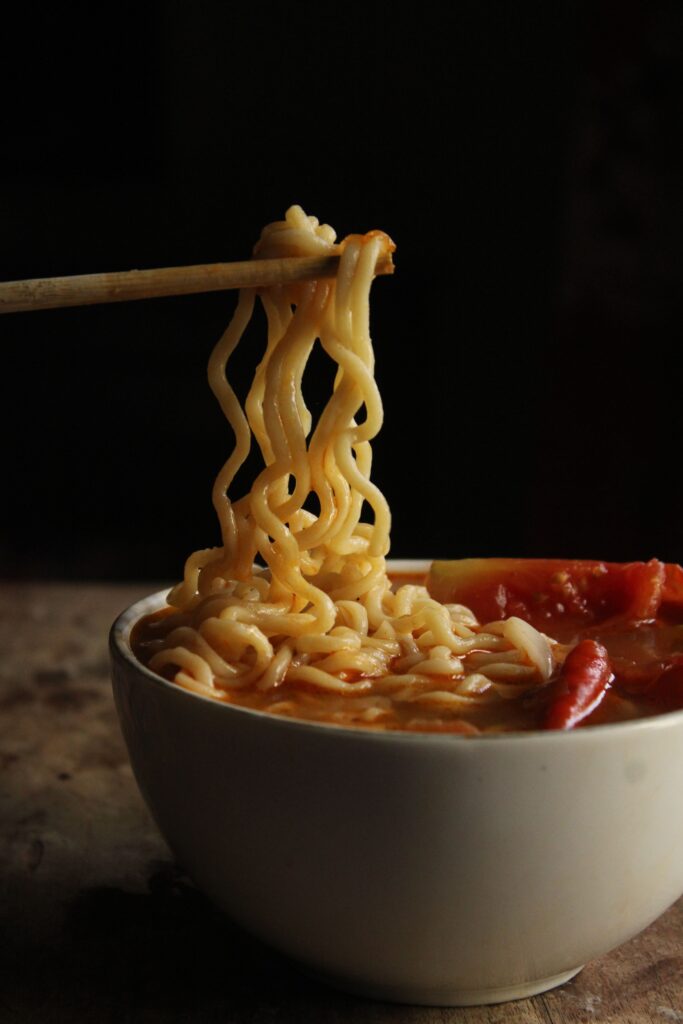
Weight Loss Recipes

Weight Loss Recipes are very much required for us. These Recipes would help you lose weight and burn fat in the most effective manner.


Use them in your current meal options and start seeing the difference. A healthy weight is an important element of good health.


How much you eat and what you eat play central roles in maintaining a healthy weight or losing weight.


Exercise is the other key actor. For years, low-fat diets were thought to be the best way to lose weight.


A growing body of evidence shows that low-fat diets often don’t work,

In partly because these diets often replace fat with easily digested carbohydrates.


Hundreds of diets have been created, many promising fast and permanent weight loss.


The truth is, almost any diet will work if it helps you take in fewer calories. Diets do this in two main ways:

  1. getting you to eat certain, Weight Loss Recipes and “good” foods and/or avoid “bad” ones
  2. changing how you behave & the ways you think or feel about food


The best diet for losing weight is one that is good for all parts of your body, from your brain to your toes, and not just for your waistline.


It is also one you can live with for a long time. In other words, a diet that offers plenty of good tasting and healthy choices banishes few foods

And doesn’t require an extensive and expensive list of groceries or supplements.


One diet that fills the bill is a Mediterranean type diet. Such a diet and there are many variations usually includes:

step1:

Several servings of fruits & vegetables a day

step2:

Whole-grain bread & cereals

step3:

Healthy fats from nuts, seeds, olive oil\

Lean protein from fish, poultry & bean

Limited red meat

Moderate wine consumption with meals, not more than 2 glasses a day for men & not more than 1 a day for women


A Mediterranean-style diet is a flexible eating pattern. as well, People who follow such diets tend to have lower rates of heart disease, diabetes, dementia, and other chronic conditions.


How to Make Coconut Curd Salad at Home

🥥 Coconut Curd Salad

A refreshing, creamy salad made with coconut, curd and crunchy vegetables. It pairs beautifully with roti, dosa, cheela or a light meal.

Ingredients of Coconut Curd Salad

  • ½ cup thick curd
  • 2 tbsp fresh grated coconut
  • ½ cup cucumber, finely chopped
  • ¼ cup carrot, finely chopped or grated
  • 1 tbsp coriander, chopped
  • ½ green chilli, finely chopped
  • ¼ tsp roasted cumin powder
  • Salt to taste
  • A pinch of black pepper
  • ½ tsp lemon juice

Method

  1. Add thick curd to a bowl and whisk until smooth.
  2. Add grated coconut, cucumber, carrot, coriander and green chilli.
  3. Add roasted cumin powder, salt, black pepper and lemon juice.
  4. Mix everything gently.
  5. Refrigerate for 10–15 minutes before serving for the best flavour.

🌿 Healthy Tip

For a more filling and protein-rich version, use thick Greek yogurt or high-protein curd instead of regular curd.

⚡ Quick Advance Prep

Chop the cucumber, carrot and coriander in advance and refrigerate them separately. When ready to eat, simply mix them with curd and coconut.

How to make Soft & Spongy Suji Bun Dosa at Home

Soft & Spongy Suji Bun Dosa

A soft, fluffy and wholesome breakfast made with suji, curd and vegetables. You can make it either instantly or use natural fermentation for an even softer texture.

Version 1: Quick & Easy No-Eno Bun Dosa

Ingredients

  • 1 cup suji/rava
  • ½ cup thick curd
  • ¼–½ cup water, as required
  • 1 tbsp rice flour
  • 1 tbsp grated carrot
  • 1 tbsp finely chopped capsicum
  • 1 tbsp finely chopped onion
  • 1 tbsp coriander
  • 1 green chilli, finely chopped
  • ½ tsp grated ginger
  • ½ tsp cumin seeds
  • Salt to taste
  • 1 tsp oil for cooking

Method

  1. Add suji, rice flour, curd and salt to a bowl.
  2. Gradually add water and make a thick, smooth batter.
  3. Cover and rest for 30–40 minutes.
  4. Add the vegetables, ginger, chilli, coriander and cumin.
  5. Add a little water if needed. The batter should be thick like pancake batter.
  6. Heat a non-stick pan and lightly grease it.
  7. Pour a ladleful of batter and spread it slightly thicker than a regular dosa.
  8. Cover and cook on low-medium heat until the top is cooked and the bottom is golden.
  9. Flip gently and cook for another 1–2 minutes.

Result: Soft and fluffy inside with a lightly golden outside — without Eno or baking soda.


Version 2: Naturally Fermented Bun Dosa

This version takes a little more planning but gives a softer and naturally fermented texture.

Ingredients

Use the same ingredients as Version 1.

Method

  1. Mix suji, rice flour, curd and water into a thick batter.
  2. Cover and keep it in a warm place for 4–6 hours.
  3. Once slightly fermented, gently mix the batter.
  4. Add the vegetables, spices, coriander and salt.
  5. Adjust the consistency with a little water.
  6. Cook thickly on a lightly greased pan, covered, over low-medium heat.
  7. Flip once the base is golden and the top is cooked.

Tip: If your kitchen is cool, fermentation may take longer. Slightly sour curd works particularly well.


⚡ Quick Advance-Prep Tips

Night-before prep:
Mix suji + curd + water + salt and refrigerate overnight. In the morning, add vegetables and adjust the consistency before cooking.

Vegetable prep:
Chop carrot, capsicum, onion, coriander and chilli together and store in an airtight container for 2–3 days.

Batch batter:
Prepare the basic suji-curd batter in advance and refrigerate. Add fresh vegetables just before cooking.

For an extra-soft texture:
Don’t make the batter watery and don’t spread the dosa too thin. A thick dosa + covered cooking + low-medium heat gives the best bun-dosa texture.

Healthy Serving Options

Serve with:

  • Mint-coriander chutney
  • Vegetable sambar
  • Fresh curd
  • Coconut chutney in a controlled portion

Best for busy mornings: Keep the basic batter ready overnight and simply add vegetables and cook fresh in the morning.

How to Make Banana Caramelised Protein Bowl

🍌 Caramelised Banana Protein Bowl | Easy High-Protein Breakfast

Looking for an easy, healthy and protein-rich breakfast for weight loss? Try this delicious Caramelised Banana Protein Bowl made with Greek yogurt, soaked chia seeds, fresh blueberries, nuts and seeds.

It is creamy, naturally sweet, crunchy and super easy to prepare

🥣 Ingredients

  • 150 g Greek yogurt
  • 10 g chia seeds, soaked
  • 50 g red banana, sliced
  • ½ tbsp cinnamon powder
  • ½ tbsp honey
  • 20 g blueberries
  • 5 g sunflower seeds
  • 5 g pumpkin seeds
  • 4 almonds, chopped

👩‍🍳 How to Make Caramelised Banana Protein Bowl

1. Soak the Chia Seeds

Soak 10 g chia seeds in a little water for 15–20 minutes, or until they become soft and gel-like.

2. Make the Caramelised Banana 🍌

Heat a pan on low flame. Add sliced banana, honey and cinnamon powder.

Cook for 2–3 minutes, gently mixing until the banana becomes soft and lightly caramelised.

3. Prepare the Protein Base 🥣

Add Greek yogurt to a bowl and mix in the soaked chia seeds.

4. Build Your Bowl ✨

Add the warm caramelised banana and fresh blueberries over the Greek yogurt.

5. Add the Crunch 🌻

Top with chopped almonds, sunflower seeds and pumpkin seeds.

💚 Why You’ll Love This Healthy Breakfast

  • High in protein
  • Contains healthy fats and seeds
  • Chia seeds provide fibre
  • Naturally sweet and satisfying
  • Quick and easy to prepare
  • Great option for a weight-loss breakfast
  • No complicated cooking required

🌟 Easy Tip

For a lower-calorie version, reduce the honey or skip it if your banana is naturally sweet enough.

Creamy Greek yogurt + caramelised banana + soaked chia seeds + crunchy nuts and seeds = a delicious high-protein breakfast bowl!

Your creamy, crunchy and protein-rich bowl is ready to enjoy! 💛

Perfect for busy mornings when you want a quick, filling and nutritious breakfast without spending much time in the kitchen.

https://www.instagram.com/reel/Dc3EhB4T4-Y/?stkn=N2hnajdseGZrOHN2

How to Make Paneer Bhurji Rice with Cucumber Raita at Home

🍚 Paneer Bhurji Rice with Cucumber Raita

A simple, tasty and filling meal made with paneer, rice, veggies and refreshing cucumber raita.

🧀 For Paneer Bhurji Rice

Ingredients

  • Paneer – homemade or market-bought
  • 2–3 tbsp curd
  • 1 tbsp oil
  • 1 tsp jeera
  • 2 tbsp chopped ginger, garlic & green chilli
  • 1 onion, thinly sliced
  • 1 tomato, thinly sliced
  • ½ tsp haldi
  • 1 tsp red chilli powder
  • ½ tsp coriander powder
  • 1 tsp pav bhaji masala
  • Salt as needed
  • 100 g spinach, finely chopped
  • Cooked rice as needed

🥛 Option 1: Homemade Paneer

  1. Boil 1 litre milk.
  2. Add lemon juice or vinegar little by little until the milk curdles.
  3. Strain it using a clean cloth.
  4. Wash and squeeze out the extra water.
  5. Your homemade paneer is ready!
  6. Crumble the paneer and mix it with 2–3 tbsp curd.

🛒 Option 2: Market-Bought Paneer

  • Use ready-made paneer from the market.
  • Crumble it with your hands or grate it.
  • Mix it with 2–3 tbsp curd and keep aside.

🍳 Making the Paneer Bhurji Rice

  1. Heat oil in a pan and add jeera.
  2. Add ginger, garlic and green chilli. Sauté for a few seconds.
  3. Add onion and tomato. Cook until soft.
  4. Add haldi, chilli powder, coriander powder, pav bhaji masala and salt.
  5. Add a little water and cook until the masala becomes soft.
  6. Add chopped spinach and cook for 1–2 minutes.
  7. Add the paneer-curd mixture and mix well.
  8. Cook for another 2–3 minutes.
  9. Add cooked rice and gently mix everything together.
  10. Finish with lemon juice, fresh coriander and a little kasuri methi.

🥒 Easy Cucumber Raita

Ingredients

  • 1 cup curd
  • 1 grated cucumber
  • 1 green chilli, finely chopped
  • ½–1 tsp jeera powder
  • ½ tsp black salt
  • Salt as needed
  • Little water, if required

Method

  1. Whisk the curd until smooth.
  2. Add a little water if needed.
  3. Add grated cucumber, green chilli, jeera powder, black salt and salt.
  4. Mix well and garnish with fresh coriander.

💚 Serve & Enjoy!

Serve hot Paneer Bhurji Rice with chilled Cucumber Raita for an easy, wholesome and delicious meal.

This version makes it clear that both homemade and market paneer can be used, without making the recipe complicated.

How to Make High-Protein Mutter Paneer Cheela Wrap

Mutter Paneer Chilla Wrap A healthy and filling roll made with a peas & paneer wrap, crunchy vegetables, and your choice of sauce.

Ingredients of Mutter Paneer Chilla Wrap

For the Mutter Paneer Chilla Wrap

  • Green peas – boiled
  • Paneer
  • Besan – for binding
  • Ginger
  • Green chilli
  • Cumin powder
  • Red chilli powder
  • Black pepper
  • Chaat masala
  • Salt
  • Water, as required

For the Vegetable Filling

  • Cabbage – finely shredded
  • Carrot – grated
  • Capsicum – thinly sliced
  • Onion – thinly sliced
  • Black pepper
  • Chaat masala
  • Lemon juice
  • Salt

For the Sauce – Choose Any One

Option 1: Homemade Yogurt Sauce

  • Thick hung curd/Greek yogurt
  • Grated garlic
  • Coriander or mint
  • Chilli flakes
  • Black pepper
  • Lemon juice
  • Salt

Option 2: Ready-Made Sauce

  • Mint chutney
  • Green chutney
  • Chilli-garlic sauce
  • Sandwich sauce

Option 3: Mayonnaise

  • Regular mayonnaise
  • Light mayonnaise
  • Eggless mayonnaise

Method to Make Mutter Paneer Chilla Wrap at Home

1. Make the wrap batter
Blend boiled peas, paneer, ginger and green chilli into a smooth paste. Add besan, cumin powder, red chilli powder, black pepper, chaat masala and salt. Mix into a thick, spreadable batter.

2. Cook the wrap
Heat a non-stick tawa and lightly grease it. Spread the batter thinly like a cheela. Cook until golden and easy to release. Flip and cook the other side.

3. Prepare the vegetables
Mix cabbage, carrot, capsicum and onion with black pepper, chaat masala, lemon juice and salt. Keep them crunchy.

4. Assemble
Place the Mutter Paneer wrap on a plate. Spread your chosen sauce over it. Add the crunchy vegetables and roll tightly.

5. Make it crisp
Toast the roll on a tawa from both sides until lightly golden and crisp.

💡 Advanced Prep

The Mutter Paneer batter and homemade sauce can be prepared in advance and refrigerated. Keep the vegetables separately and assemble the roll fresh.

https://www.instagram.com/reel/DcskxPsCM9j/?igsi=a25rdWFhN2U4cWZk

Idhal Kadhi

🌿 Idhal Kadhi

Ingredients of Idhai Kadhi

For the Idhal Rolls

  • 8–10 kochai (colocasia) leaves
  • 1 cup urad dal, soaked for 4–5 hours
  • 1–2 green chillies
  • 1-inch ginger
  • 3–4 garlic cloves
  • ½ tsp turmeric
  • 1 tsp red chilli powder
  • 1 tsp coriander powder
  • ½ tsp cumin powder
  • ½ tsp ajwain
  • Salt to taste
  • 1–2 tbsp water, as needed

For the Kadhi

  • 2 tomatoes, finely chopped or pureed
  • 1 cup curd
  • 1–1½ tbsp besan
  • 2–3 garlic cloves, chopped
  • ½ tsp cumin
  • ½ tsp mustard seeds
  • 1–2 dry red chillies
  • ½ tsp turmeric
  • ½–1 tsp red chilli powder
  • ½ tsp coriander powder
  • Salt to taste
  • 2–3 cups water
  • 1 tbsp oil

Method to make idhai kadhi

1. Prepare the urad dal paste

  1. Drain the soaked urad dal.
  2. Grind it with green chilli, ginger, garlic and a little water into a thick, smooth paste.
  3. Add turmeric, chilli powder, coriander powder, cumin powder, ajwain and salt.
  4. Mix well.

2. Make the kochai rolls

  1. Wash the kochai leaves thoroughly and pat them dry.
  2. Place one leaf flat, with the vein side facing up.
  3. Spread a thin layer of the urad dal-spice paste evenly over the leaf.
  4. Place another leaf on top and repeat the process.
  5. Roll the leaves tightly from one end to the other, tucking the sides in as you roll.
  6. Steam the rolls for 20–25 minutes, or until the dal mixture is completely cooked.
  7. Allow them to cool slightly, then cut into bite-sized slices.

3. Fry the Idhal pieces

  1. Heat a little oil in a pan.
  2. Shallow-fry or deep-fry the sliced rolls until they become golden and crisp on the outside.
  3. Keep them aside.

4. Prepare the tomato kadhi

  1. Whisk curd and besan together until completely smooth.
  2. Add turmeric, chilli powder, coriander powder, salt and water. Mix well.
  3. Heat oil and add mustard seeds and cumin.
  4. Add dry red chillies and chopped garlic.
  5. Add the tomatoes and cook until soft and the oil begins to separate.
  6. Lower the flame and add the prepared curd-besan mixture.
  7. Stir continuously while bringing it to a gentle boil so the curd does not split.
  8. Simmer for 8–10 minutes, adding water if needed to get a medium-thick kadhi consistency.

5. Add the Idhal

  • Gently add the fried kochai rolls to the hot kadhi.
  • Simmer for 2–3 minutes so the rolls absorb the flavour while still retaining some texture.
  • Turn off the heat and let it rest for 5 minutes before serving.

🌿 Serving

Serve hot with steamed rice, jeera rice or roti. The combination of tangy tomato kadhi + spicy urad dal kochai rolls makes this a delicious traditional-style meal.

https://www.instagram.com/reel/Dcd5krKSgda/?igsi=MWk3NDlkY2k0ejR0aw==

Vegetable and Paneer Pasta

Serves: 1

Ingredients

  • Pasta – 30 g dry
  • Paneer – 75 g
  • Tomatoes – 2 medium
  • Garlic – 3 cloves
  • Onion – ¼ small
  • Capsicum – ¼ cup
  • Thick yogurt – 1 tbsp
  • Chilli flakes – ½ tsp
  • Oregano – ½ tsp
  • Black pepper – ¼ tsp
  • Kashmiri chilli powder – ½ tsp
  • Salt – to taste
  • Cheese – 10 g
  • Oil – ½ tsp

👩‍🍳 Method

  1. Cook the pasta until al dente and keep aside.
  2. Roughly chop tomatoes, onion and garlic.
  3. Heat ½ tsp oil and sauté garlic, onion and tomatoes until soft.
  4. Add Kashmiri chilli powder, chilli flakes, oregano and pepper.
  5. Cool slightly and blend the tomato mixture + paneer + yogurt into a smooth, creamy paste.
  6. Return the sauce to the pan and cook on low heat for 2–3 minutes.
  7. Add the cooked pasta and toss well. Add a little pasta water if needed.
  8. Finish with 10 g grated cheese and oregano.

💡 For a smoother sauce

Soak the paneer in warm water for 5–10 minutes before blending. This makes the paneer easier to blend and gives the sauce a much creamier texture.

Advanced prep: Make the paneer-tomato sauce in advance and refrigerate. Cook fresh pasta and combine when ready.

How to Make Paneer Reshmi Kebab

Paneer Reshmi Kebab

Makes: 6–8 small kebabs

Ingredients of Paneer Reshmi Kebab

  • Paneer – 100 g, grated/crumbled
  • Hung curd – 2 tbsp
  • Besan – 1 tbsp
  • Capsicum – 2 tbsp, very finely chopped
  • Carrot – 2 tbsp, very finely chopped
  • Onion – 1 tbsp, very finely chopped
  • Green chilli – 1, finely chopped
  • Ginger-garlic paste – ½ tsp
  • Kasuri methi – ½ tsp
  • Roasted cumin powder – ½ tsp
  • Garam masala – ¼ tsp
  • Black pepper – ¼ tsp
  • Chaat masala – ¼ tsp
  • Salt – to taste
  • Oil – ½–1 tsp for cooking

👩‍🍳 Method

  1. Dry roast the besan in a pan on low heat for 2–3 minutes. Let it cool.
  2. In a bowl, combine crumbled paneer + hung curd.
  3. Add finely chopped capsicum, carrot, onion, green chilli and ginger-garlic paste.
  4. Add roasted besan and all the spices.
  5. Mix well until you get a thick, soft mixture.
  6. Refrigerate for 20–30 minutes. This makes shaping much easier.
  7. Shape into small flat kebabs using slightly wet hands.
  8. Heat a non-stick pan and brush with a little oil.
  9. Cook the kebabs on medium-low heat, gently turning them until golden on both sides.
  10. Serve hot with mint-yogurt chutney and salad.

❄️ Advanced Prep

You can prepare the complete kebab mixture the night before and refrigerate it. Shape and cook when needed.

Important: Make sure the vegetables are very finely chopped and don’t add excess moisture. If the mixture feels loose, add another ½–1 tsp roasted besan rather than adding lots of flour.

Cheesy Garlic Bhaji with Pav

🧄🌿 Garlic Leaves Palak with Cheese & Pav

Serves: 1

Ingredients of Cheesy Garlic Bhaji with Pav

  • Palak – 2 cups
  • Garlic leaves – 1–1½ cups, finely chopped
  • Garlic cloves – 6–7, finely chopped
  • Green chilli – 1–2
  • Ginger – ½ inch
  • Cumin – ¼ tsp
  • Turmeric – ¼ tsp
  • Coriander powder – ½ tsp
  • Black pepper – ¼ tsp
  • Garam masala – ¼ tsp
  • Cream – 1 tsp
  • Cheese – 15–20 g, grated
  • Oil – ½ tsp
  • Salt – to taste
  • Pav – 1–2

👩‍🍳 Method og Making Cheesy Garlic Bhaji with Pav at home

  1. Make the palak paste: Blanch palak for 1–2 minutes. Blend it with green chilli + ginger and a little water until smooth.
  2. Heat ½ tsp oil in a pan.
  3. Add cumin and chopped garlic cloves. Sauté on low heat until fragrant.
  4. Add the chopped garlic leaves and sauté for 2–3 minutes.
  5. Add turmeric, coriander powder, black pepper and salt.
  6. Pour in the palak-chilli-ginger paste and cook for 3–4 minutes.
  7. Lower the flame and add cream + grated cheese together. Mix until the cheese melts and the palak becomes creamy.
  8. Finish with garam masala and serve hot with toasted pav.

Advanced prep: Make the palak + chilli + ginger paste in advance and refrigerate. Chop the garlic and garlic leaves beforehand. At mealtime, sauté → add paste → add cream & cheese → serve.

How to Make Scrambled Egg Rice Bowl

Serves: 1 | Quick & healthy

Ingredients of Scrambled Egg Rice Bowl

  • Cooked rice – 1 katori
  • Eggs – 2
  • Onion – ¼, finely chopped
  • Capsicum – ¼, finely chopped
  • Carrot – 2 tbsp, finely chopped
  • Spring onion – 1 tbsp
  • Garlic – ½ tsp, finely chopped
  • Soy sauce – 1 tsp
  • Chilli flakes – ½ tsp
  • Black pepper – ¼ tsp
  • Salt – as needed
  • Oil – ½ tsp
  • Coriander or spring onion – for garnish

👩‍🍳 Method

  1. Heat ½ tsp oil in a non-stick pan.
  2. Add garlic and onion. Sauté for 1–2 minutes.
  3. Add carrot and capsicum. Cook on high heat for 2–3 minutes so they remain slightly crunchy.
  4. Push the vegetables to one side and crack in 2 eggs.
  5. Scramble the eggs until almost cooked.
  6. Add 1 katori cooked rice, soy sauce, chilli flakes and pepper.
  7. Toss everything together on high heat for 2–3 minutes.
  8. Finish with spring onion and coriander.

🔥 Advanced Prep of Scrambled Egg Rice Bowl

You can prepare the rice + chopped vegetables in advance and refrigerate them. At mealtime, simply stir-fry the vegetables, add eggs and rice, and you’re done in 5–7 minutes.

Tip: For a more weight-loss-friendly version, use plenty of vegetables and keep the rice to 1 katori cooked rice rather than increasing the rice portion.