Author name: Shruti Mishra

How to MakeChickpea Pea Tacos at Home

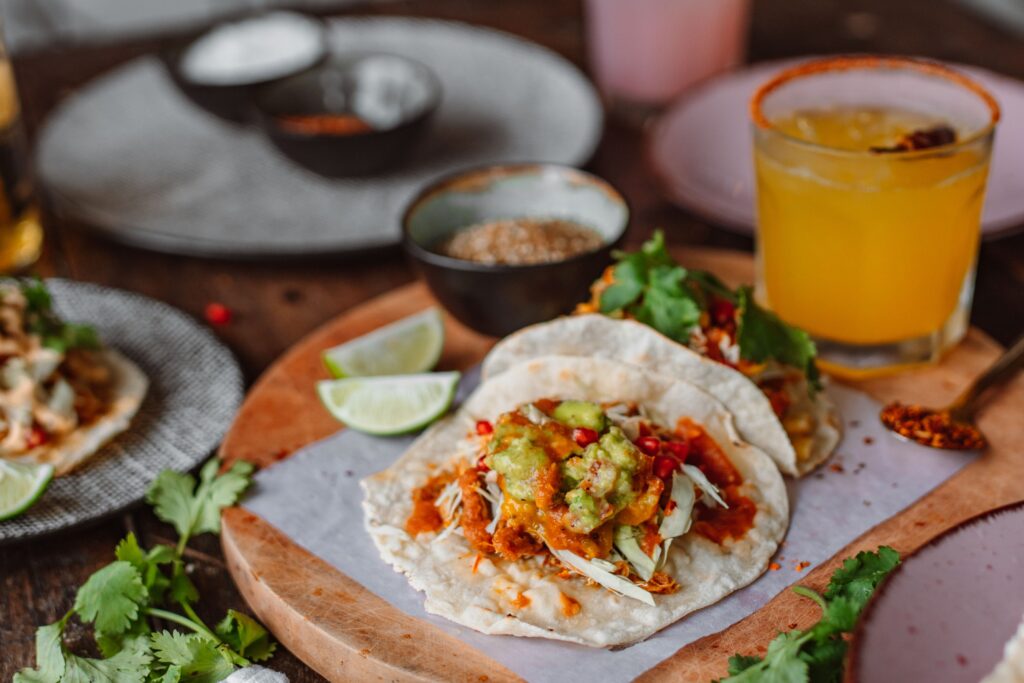
These delicious Indian-style roti tacos are filled with spiced chickpeas, green peas and crunchy lettuce, topped with a creamy, tangy yogurt sauce with caramelised onion and chilli achaar. A wholesome vegetarian meal that’s flavourful, satisfying and easy to prepare.

Prep time: 15 minutes Cook time: 10 minutes Servings: 2 tacos

Ingredients

For the tacos

  • 2 small whole-wheat rotis (approximately 25 g flour per roti)
  • 1 handful lettuce, shredded
  • Oil spray, as needed

For the chickpea and green pea filling

  • ½ cup boiled chickpeas (80–85 g)
  • ¼ cup green peas (35–40 g)
  • 2 green chillies
  • 1 tsp white sesame seeds
  • ½ tsp cumin seeds (jeera)
  • ½ tsp red chilli powder
  • ½ tsp coriander powder
  • ¼ tsp turmeric powder
  • ¼ tsp black pepper powder
  • Juice of ½ lemon (approximately 1 tbsp)
  • Salt to taste

For the creamy taco sauce

  • 120 g plain skyr or thick Greek yogurt
  • 1 medium onion (approximately 80–100 g), finely chopped
  • 1 tsp olive oil
  • ½ tsp red chilli powder
  • ½ tsp garlic powder
  • ¼ tsp black pepper powder
  • ½ tsp mixed herbs
  • 1 tsp chilli achaar, finely mashed
  • Salt to taste

Method

1. Prepare the chickpea filling

  1. Add the boiled chickpeas, green peas, green chillies, sesame seeds, lemon juice, cumin seeds and all the powdered spices to a blender.
  2. Pulse until you get a coarse, thick mash. Avoid blending it into a completely smooth paste.
  3. If needed, add 1–2 teaspoons of water to help the mixture blend. Taste and adjust the salt, lemon juice and spices.

2. Fill the rotis

  1. Place the two whole-wheat rotis on a clean surface.
  2. Divide the chickpea-pea mixture equally between them.
  3. Spread the filling over one half of each roti, pressing it gently so it adheres.

3. Toast the tacos

  1. Heat a non-stick pan over medium heat and lightly grease it with oil spray.
  2. Place each roti with the filling side down and cook for 2–3 minutes until lightly golden.
  3. Flip carefully and toast the other side for another 1–2 minutes until crisp and heated through.

4. Make the creamy taco sauce

  1. Heat 1 teaspoon of olive oil in a pan.
  2. Add the finely chopped onion and sauté over medium-low heat for 5–7 minutes until soft and golden brown. Add a teaspoon of water if needed to prevent sticking.
  3. Allow the onion to cool completely.
  4. In a bowl, combine the skyr or Greek yogurt, caramelised onion, chilli powder, garlic powder, black pepper, mixed herbs, chilli achaar and salt.
  5. Mix until creamy and smooth. Adjust the seasoning to taste.

5. Assemble the tacos

  1. Add shredded lettuce over the chickpea filling.
  2. Spoon the creamy yogurt sauce generously over the top.
  3. Fold each roti into a taco shape and serve immediately.

Nutrition tips

  • For more protein: Use high-protein skyr or Greek yogurt and check the label for its protein content.
  • For extra crunch: Add finely sliced cabbage or cucumber.
  • For less oil: Use a good non-stick pan and water-sauté the onion if preferred.
  • For a vegan version: Replace the yogurt with unsweetened, high-protein soy yogurt.

How to MakeChickpea Pea Tacos at Home Read More »
How to Make Crunchy Carrot & Cucumber Salad with Lemon Honey Dressing

Crunchy Carrot & Cucumber Salad with Lemon Honey Dressing

For the salad

  • 1 medium carrot (80 g), julienned
  • 1 medium cucumber (150 g), julienned
  • ¼ medium red onion (25 g), thinly sliced
  • 2 tbsp fresh coriander (8 g), chopped
  • 1 tbsp roasted peanuts (10 g), roughly crushed
  • 1 tsp sesame seeds (3 g), toasted

For the lemon-honey dressing

  • 1 tbsp lemon juice (15 ml)
  • 1 tsp honey (7 g)
  • 1 tsp olive oil (5 ml)
  • 1 small garlic clove (3 g), finely grated
  • ¼ tsp red chilli flakes
  • ¼ tsp salt, or to taste
  • ⅛ tsp black pepper (optional)

Instructions

  1. Prepare the vegetables: Wash the carrot and cucumber. Cut them into thin strips using a julienne peeler or a knife. Thinly slice the onion and chop the coriander.
  2. Prepare the dressing: In a small bowl, combine lemon juice, honey, olive oil, grated garlic, chilli flakes, salt and black pepper. Whisk until well mixed.
  3. Mix the salad: Add the carrot, cucumber, onion and coriander to a mixing bowl.
  4. Add the dressing: Pour the prepared dressing over the vegetables and toss thoroughly.
  5. Add the crunch: Sprinkle the crushed roasted peanuts and toasted sesame seeds over the salad.
  6. Serve immediately: Toss once more and enjoy while the vegetables are fresh and crunchy.

Tip: For the best taste, add the dressing just before serving. The combination of tangy lemon, sweet honey, garlic and chilli makes this simple salad especially flavourful.

How to Make Crunchy Carrot & Cucumber Salad with Lemon Honey Dressing Read More »

How to Make Creamy Garlic Pepper Soya Chunks at Home

Creamy Garlic Pepper Soya Chunks 🧄🌶️

High-Protein | Healthy Dinner

Creamy, garlicky and full of flavour! 😍 These creamy garlic pepper soya chunks are made with soya, low-fat paneer and a smooth cashew sauce. A perfect high-protein vegetarian meal for lunch or dinner that tastes delicious and keeps you satisfied.

📝 Ingredients

  • 75 g soya chunks
  • 90–100 g low-fat paneer
  • 5–6 soaked cashews
  • 3 tsp olive oil
  • 2 tsp cornflour
  • 6–7 garlic cloves, finely chopped
  • 2 green chillies, slit
  • 1 small onion, sliced
  • ½ green capsicum, chopped
  • 10–12 curry leaves
  • 3–4 tbsp milk
  • 1 tsp soy sauce
  • 1 tsp crushed kasuri methi
  • ½ tsp Kashmiri red chilli powder
  • ½ tsp freshly crushed black pepper
  • Salt as per taste
  • 1 tsp lemon juice
  • Fresh coriander for garnish

👩‍🍳 Method

1. Prepare the soya chunks

Boil the soya chunks in salted water for 8–10 minutes. Rinse with cold water and squeeze out all the excess water.

2. Roast the soya chunks

Add cornflour, Kashmiri red chilli powder, crushed black pepper and salt to the soya chunks. Mix well and roast in olive oil until lightly golden.

3. Sauté the vegetables

In the same pan, add garlic, green chillies, sliced onion, capsicum and curry leaves. Sauté until fragrant and the vegetables soften slightly.

4. Prepare the creamy sauce

Blend the low-fat paneer, soaked cashews and milk into a smooth paste.

5. Make the creamy pepper gravy

Add the prepared paste to the pan. Mix in soy sauce, kasuri methi, black pepper and salt. Cook on low heat for 2–3 minutes. Add a little water or milk if needed to adjust the consistency.

6. Combine and serve

Add the roasted soya chunks and toss until everything is well coated in the creamy garlic pepper sauce. Finish with lemon juice and fresh coriander.

Serve hot and enjoy this delicious, protein-packed meal! ❤️

Tip: For a lighter version, reduce the olive oil and adjust the sauce consistency with milk or water.

How to Make Creamy Garlic Pepper Soya Chunks at Home Read More »

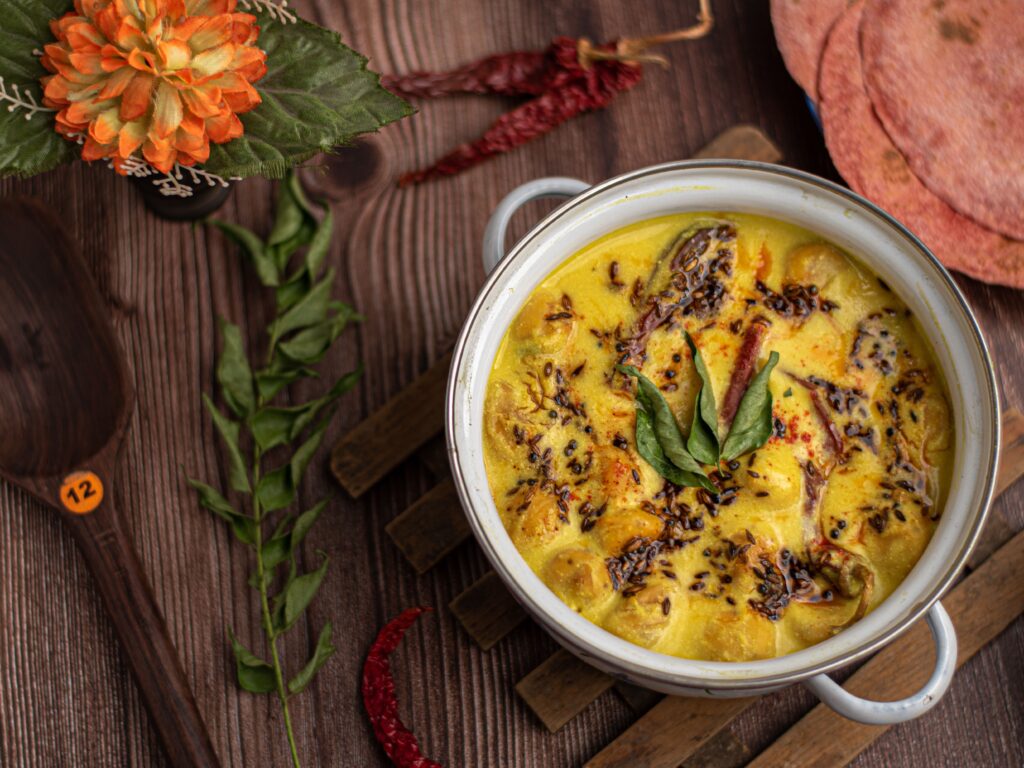
How to Make High-Protein Soya Palak Kadhi at Home

High-Protein Soya Palak Kadhi 🥣🌿

A healthy twist on traditional kadhi, made with protein-rich curd, besan, soya chunks and spinach. Creamy, flavourful and perfect for a wholesome Indian meal!

📝 Ingredients

For the Kadhi

  • 6 tbsp besan
  • 1 cup (250 g) Greek yogurt or high-protein curd
  • Salt to taste
  • 1 tsp red chilli powder
  • 1 tsp turmeric powder
  • 7–8 cups water, or as required

For the Tadka and Vegetables

  • 1½ tsp ghee
  • 6–7 curry leaves
  • 1 tsp mustard seeds
  • ½ tsp methi seeds
  • 2–3 black peppercorns
  • A pinch of hing
  • 1 tsp cumin seeds (jeera)
  • 2 dried red chillies
  • 1 medium onion, thinly sliced
  • 30 g soya chunks, boiled and squeezed well
  • 1 cup chopped spinach
  • 1 tbsp ginger-garlic paste
  • ½ tbsp jaggery powder
  • A handful of fresh coriander, chopped

👩‍🍳 Method

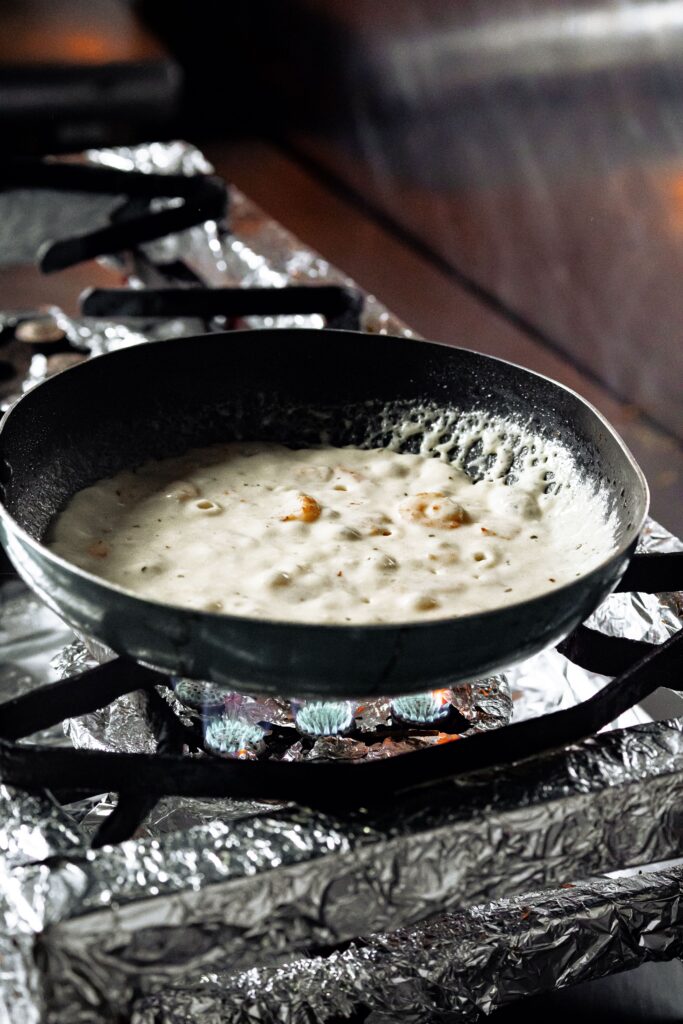
  1. In a large bowl, whisk together the curd, besan, salt, red chilli powder and turmeric powder until smooth.
  2. Add the water gradually and mix well until there are no lumps. Keep the mixture quite watery, as the kadhi will thicken while cooking.
  3. Heat ghee in a deep pan. Add mustard seeds, cumin seeds, methi seeds, peppercorns, dried red chillies, curry leaves and hing. Let the spices release their aroma.
  4. Add the sliced onion and sauté for 3–4 minutes until slightly soft.
  5. Add the chopped spinach and boiled, squeezed soya chunks. Cook for another 3–4 minutes.
  6. Lower the flame and slowly pour in the prepared besan-curd mixture, stirring continuously.
  7. Cover and cook for 4–5 minutes. Add the ginger-garlic paste and jaggery powder, and mix well. Add more water if the kadhi becomes too thick.
  8. Cover and simmer on low heat for another 15 minutes, stirring occasionally, until the kadhi is cooked and slightly thickened.
  9. Finish with freshly chopped coriander and serve hot.

🍽️ Serving Suggestion

Enjoy this high-protein soya palak kadhi with steaming hot basmati rice or jeera rice for a comforting and nutritious meal. ❤️

How to Make High-Protein Soya Palak Kadhi at Home Read More »

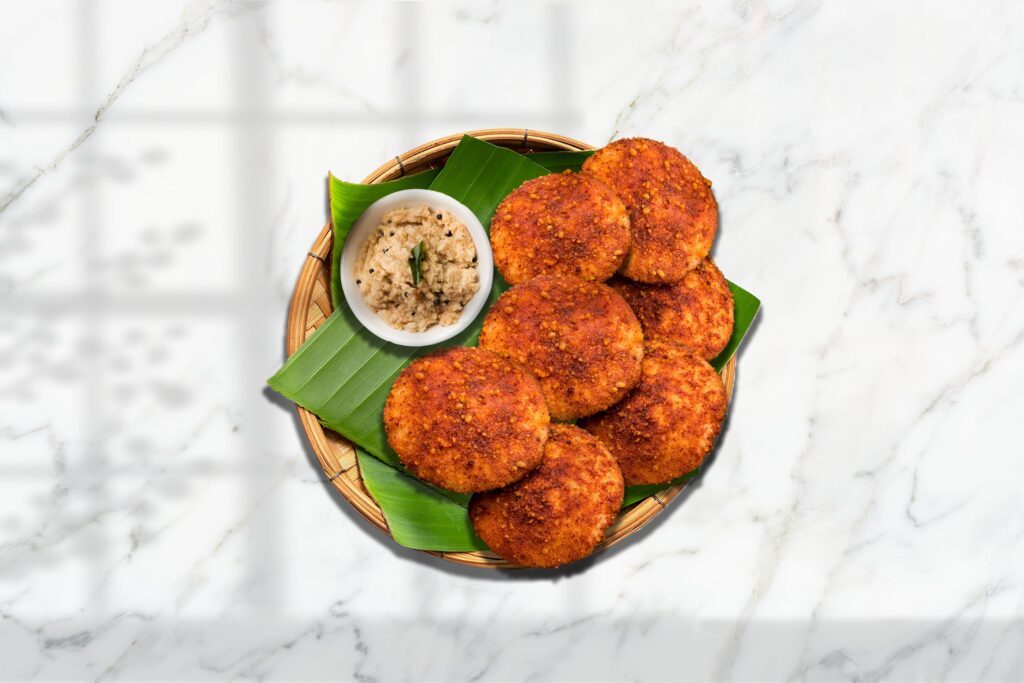
How to Make Oats Paneer Adai at Home

Oats Paneer Adai 🥕🧀

A healthy, fibre-rich and protein-packed South Indian-style Adai made with oats, fresh vegetables and paneer. Perfect for a nutritious breakfast or a light meal!

📝 Ingredients (Makes 3–4 Adai)

  • ½ cup oats, powdered
  • 1 medium carrot, grated
  • 1 medium onion, finely chopped
  • ½ beetroot, grated
  • 100–150 g low-fat paneer, grated
  • ½ tsp red chilli powder
  • 1 green chilli, finely chopped
  • 2 tsp fresh coriander, chopped
  • 2 sprigs curry leaves, finely chopped
  • 1–2 tsp oil, for cooking
  • Salt to taste
  • Water as required

👩‍🍳 Method

  1. Grind the oats into a fine powder and transfer them to a mixing bowl.
  2. Add the grated carrot, beetroot, onion, paneer, green chilli, coriander, curry leaves, red chilli powder and salt.
  3. Mix everything well, adding water little by little until you get a thick, spreadable batter.
  4. Lightly grease a banana leaf or parchment paper with a little oil. Take a portion of the mixture and spread it into a thin, even Adai.
  5. Heat a non-stick pan and lightly grease it with oil.
  6. Carefully transfer the prepared Adai onto the hot pan. Cook on medium-low heat until the bottom turns golden and crisp.
  7. Gently flip and cook the other side until golden and the Adai is cooked through.
  8. Repeat with the remaining batter.

🍽️ Serving Suggestion

Serve hot with coconut chutney, mint chutney or a bowl of fresh curd for a wholesome and satisfying meal.

How to Make Oats Paneer Adai at Home Read More »

How to Make Dal Dhokla with Homemade Kadhi at Home

Dal Dhokla with Homemade Kadhi 😍

A traditional, wholesome and comforting meal made with a mix of dals, whole wheat flour and flavourful homemade kadhi. Perfect for a satisfying Indian meal!

📝 Ingredients

For Dal Dhokla (Makes 8)

  • 1 cup whole wheat flour (aata)
  • ⅓ cup mixed dals of your choice (green chilka moong dal and chana dal work well), soaked for 2–3 hours
  • ½ tsp each cumin seeds (jeera), carom seeds (ajwain) and coriander seeds (dhania)
  • 1 tsp ginger and green chilli, finely chopped or crushed
  • ½ tsp red chilli powder
  • ¼ tsp turmeric powder
  • Salt to taste
  • 1 tbsp curd
  • 1 tsp Eno
  • 2–3 tsp oil for kneading

👩‍🍳 Method

  1. Drain the soaked dals and grind them coarsely.
  2. In a bowl, combine the wheat flour, ground dal, cumin, ajwain, coriander seeds, ginger-green chilli, red chilli powder, turmeric, salt and curd.
  3. Add the oil and knead everything into a firm dough. Add a little water only if required.
  4. Divide the dough into 8 equal portions and shape them into dhoklas.
  5. Add the Eno just before steaming, knead it in quickly and shape the dhoklas.
  6. Grease a steamer plate or idli moulds and arrange the dhoklas, leaving some space between them.
  7. Steam for around 10–18 minutes, or until cooked through. Check by inserting a knife or toothpick into the centre.
  8. Serve hot with homemade kadhi, a little ghee and a sprinkle of bura sugar or jaggery powder, if desired.

🥣 Homemade Kadhi

Ingredients

  • 1 cup curd
  • 3 tbsp besan
  • 3 cups water, plus extra as needed
  • 1 tsp salt, or as per taste
  • ¼ tsp red chilli powder
  • ¼ tsp turmeric powder
  • 2 tbsp ghee
  • 1 tsp mustard seeds
  • ½ tsp cumin seeds
  • 2 cloves
  • ½ tsp methi dana (fenugreek seeds)
  • ¼ tsp hing
  • 2 dried red chillies
  • 7 curry leaves
  • 1 tsp minced ginger and green chilli
  • 2 tbsp chopped coriander leaves

🍲 Method

  1. In a bowl, whisk the curd and besan together until smooth and lump-free.
  2. Add the water, salt, turmeric and red chilli powder. Mix well.
  3. Heat ghee in a deep pan. Add mustard seeds and let them crackle, then add cumin seeds, cloves, methi dana, dried red chillies and hing.
  4. Add the curry leaves and ginger-green chilli mixture. Sauté briefly until aromatic.
  5. Lower the heat and slowly pour in the curd-besan mixture, stirring continuously to prevent curdling.
  6. Bring it to a gentle boil while stirring, then simmer on low heat for 15–20 minutes.
  7. Add more water if needed to adjust the consistency, and finish with freshly chopped coriander leaves.

🍽️ Serving Suggestion

Serve the warm dal dhoklas with a generous bowl of homemade kadhi. Add a little ghee on top for that traditional homemade taste.

How to Make Dal Dhokla with Homemade Kadhi at Home Read More »

How to Make Paneer Bhapa at Home

Paneer Bhapa 🧀🌶️

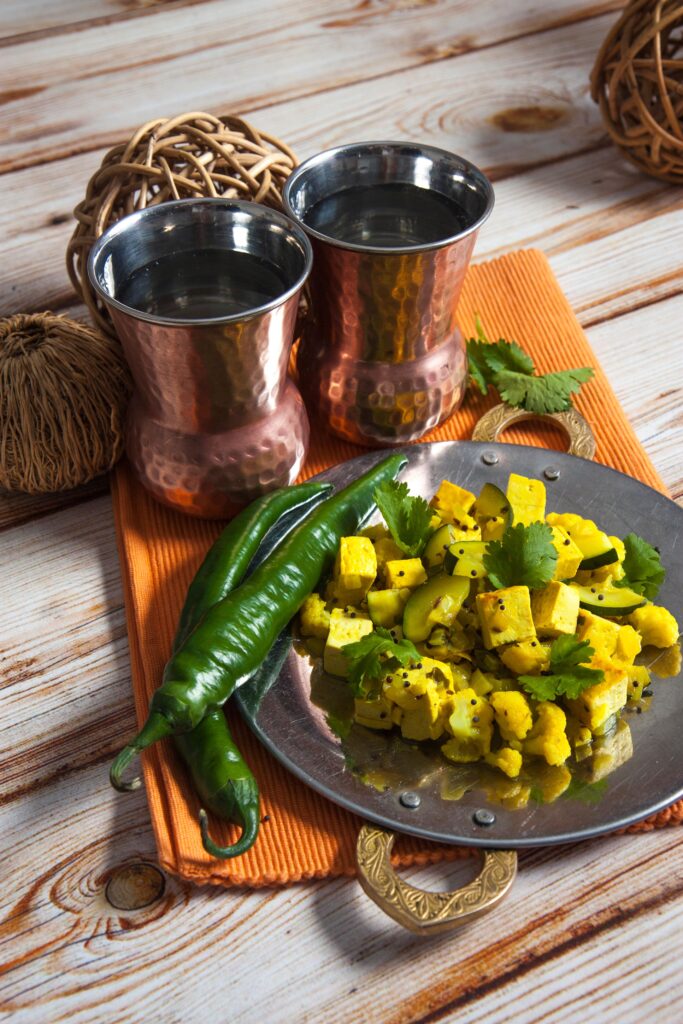
A flavourful Bengali-style steamed paneer recipe made with mustard, poppy seeds and a hint of mustard oil. Simple, creamy and full of flavour!

📝 Ingredients

  • 250 g paneer, cut into cubes
  • 1 tbsp yellow mustard seeds
  • 1 tbsp black mustard seeds
  • 1 tbsp posto (poppy seeds)
  • 3–4 green chillies
  • ½ tsp turmeric powder
  • ½ tsp red chilli powder
  • Salt as per taste
  • 3 tbsp thick curd
  • 1–2 tbsp mustard oil
  • 2–3 green chillies, slit

👩‍🍳 Preparation

  1. Soak the yellow mustard seeds, black mustard seeds and posto in warm water for 10–15 minutes.
  2. Drain the water and grind everything with 3–4 green chillies into a smooth paste.
  3. In a bowl, add the prepared paste, turmeric powder, red chilli powder, salt and thick curd. Mix everything well to make a creamy marinade.
  4. Add the paneer cubes and gently coat them with the marinade. Let them rest for a few minutes so the flavours can blend.

🍳 Cooking Method

  1. Transfer the marinated paneer into a steel tiffin box or any heatproof container.
  2. Drizzle mustard oil over the paneer and add the slit green chillies on top.
  3. Cover the container and place it in a steamer or a pan with water.
  4. Cover and steam on medium heat for 15–20 minutes, until the paneer is cooked and the mustard flavours are well absorbed.
  5. Let it rest for a few minutes before opening and serving.

🍽️ Serving Suggestion

Serve hot with steamed rice for a delicious Bengali-style meal.

Add nutrition estimates and serving sizeInclude a pan-steaming alternative

How to Make Paneer Bhapa at Home Read More »

How to Make Kashmiri Chicken Resha Wali Dal at Home

Kashmiri Chicken Resha Wali Dal 🍗🥣

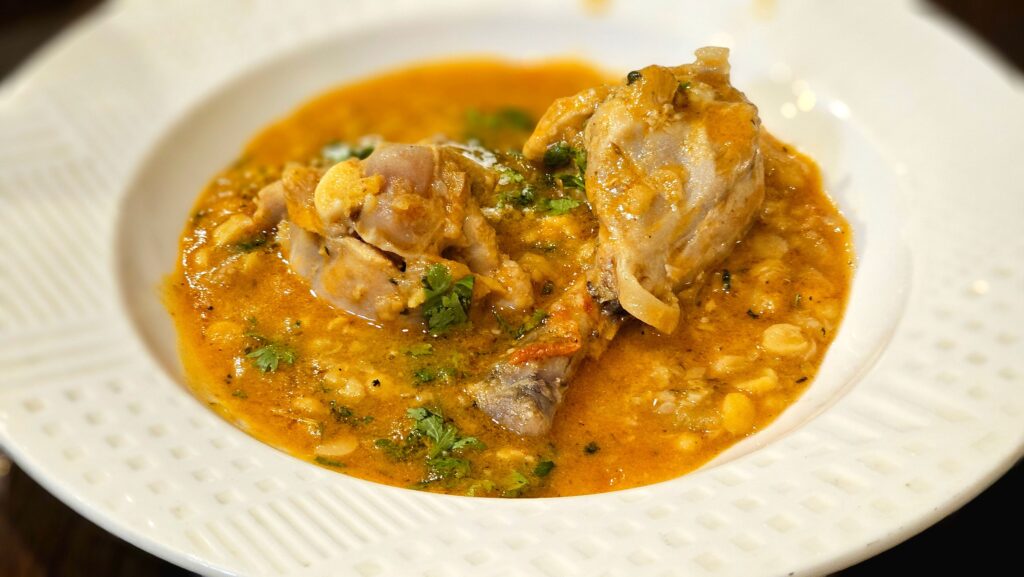
A comforting, protein-rich dal loaded with shredded chicken, three types of lentils, and a flavourful garlic tadka. Creamy, spicy, and perfect to enjoy with rice!

📝 Ingredients

For Dal & Chicken

  • 1 cup chana dal
  • 1 cup red masoor dal
  • 1 cup moong dal
  • 1–2 chicken breasts
  • 1 onion, finely chopped
  • 1 tbsp ginger-garlic paste
  • 2–3 tomatoes
  • 4–5 green chillies
  • 1 tsp cumin seeds
  • 1 tsp red chilli powder
  • ½ tsp turmeric powder
  • 1 tsp coriander powder
  • 1 tsp Kashmiri red chilli powder
  • Salt to taste
  • Oil as required
  • Water as required

For the Garlic Tadka

  • 2–3 tbsp oil
  • 4 garlic cloves, finely chopped
  • 1 tsp cumin seeds
  • A pinch of hing
  • 3–4 dry red chillies
  • 1 tsp Kashmiri red chilli powder

For Serving

  • Fresh coriander, chopped
  • Steamed rice
  • Sliced onion
  • Green chillies
  • Fresh salad

👩‍🍳 Method

  1. Soak the dals: Wash chana dal, red masoor dal, and moong dal thoroughly. Soak them for 1–1½ hours.
  2. Prepare the masala: Heat oil in a pressure cooker. Add chopped onion and sauté until golden brown. Add ginger-garlic paste and cook until its raw smell disappears.
  3. Cook the chicken: Add the chicken breasts and sauté for a few minutes.
  4. Add tomato-chilli puree: Blend the tomatoes and green chillies into a smooth puree. Add it to the cooker and mix well.
  5. Add the spices: Add cumin, red chilli powder, turmeric, coriander powder, Kashmiri red chilli powder, and salt. Cook until the masala is well roasted and the oil starts separating.
  6. Add the dals: Drain the soaked dals and add them to the cooker. Mix everything well and add enough water, approximately twice the volume of the soaked dals, adjusting as needed for the desired consistency.
  7. Pressure cook: Close the cooker and cook for 4–5 whistles, or until the dals and chicken are completely cooked. Allow the pressure to release naturally.
  8. Make the chicken resha: Take out the cooked chicken breasts and shred them finely using two forks.
  9. Mash the dal: Mash the cooked dals thoroughly until smooth, thick, and creamy. Add a little hot water if needed.
  10. Combine: Add the shredded chicken back to the dal and mix well. Let it simmer for a few minutes so the flavours come together.
  11. Prepare the tadka: Heat oil in a separate pan. Add chopped garlic, cumin seeds, hing, and dry red chillies. Sauté until the garlic turns lightly golden.
  12. Add Kashmiri chilli powder: Switch off the flame or keep it very low, add Kashmiri red chilli powder, and immediately pour the tadka over the hot dal.
  13. Garnish and serve: Finish with fresh coriander and serve hot with steamed rice, sliced onion, green chillies, and salad.

Tip: Mash the dal really well and shred the chicken into fine, thin strands for that perfect creamy, resha-style texture. Adjust the water according to how thick you like your dal.

Add servings and nutrition informationSpecify exact oil quantities

How to Make Kashmiri Chicken Resha Wali Dal at Home Read More »

How to Make Black Sesame Milk (Kala Til Milk) at Home

Black Sesame Milk

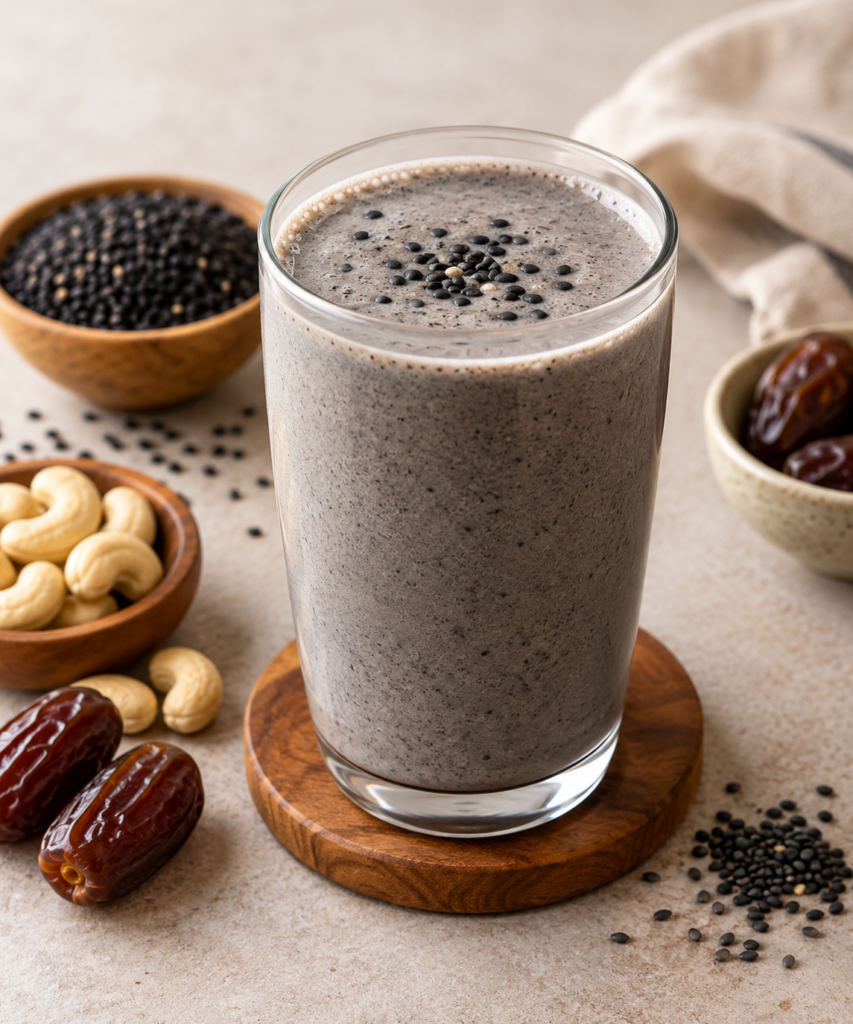
A creamy, naturally sweetened, nutrient-rich drink made with roasted black sesame seeds, cashews, dates, and water. This homemade black milk is a delicious dairy-free option for your daily wellness routine.

Ingredients

  • 2 tbsp black sesame seeds (kala til)
  • 5–6 cashews
  • 2–3 seedless dates, according to taste
  • 1½–2 cups water
  • A small pinch of salt

Method

  1. Roast the seeds: Dry roast the black sesame seeds on low flame for 2–3 minutes until aromatic.
  2. Roast the cashews: Add the cashews and roast until lightly golden. Allow everything to cool slightly.
  3. Grind: Transfer the roasted sesame seeds and cashews to a blender. Add dates, salt, and a little water.
  4. Blend: Blend until smooth, gradually adding the remaining water to achieve your preferred consistency.
  5. Serve: Pour into a glass and enjoy fresh. Strain if you prefer a smoother texture, or drink unstrained to retain more fibre.

Preparation time: 5 minutes Cooking time: 5 minutes Servings: 1–2 glasses

Benefits of Black Sesame Milk

  • Supports bone health: Black sesame seeds provide calcium, which contributes to maintaining strong bones and teeth.
  • Provides healthy fats: Sesame seeds and cashews contain unsaturated fats that support overall health.
  • Offers antioxidant compounds: Sesame seeds contain lignans and other compounds that help protect cells from oxidative damage.
  • Supports energy levels: Dates provide natural sugars for energy, while cashews contribute fats and some protein.
  • Provides essential minerals: Sesame seeds and cashews supply minerals such as magnesium, copper, and iron.
  • Dairy-free alternative: This drink can be enjoyed by people avoiding dairy, although it does not provide the same protein as cow’s milk.

Healthy tip: For a less sweet version, use just 1–2 dates. Blend and consume the milk without straining to retain more fibre.

How to Make Black Sesame Milk (Kala Til Milk) at Home Read More »

How to Make Healthy Aglio e Olio Pasta at Home

Healthy Aglio e Olio Pasta

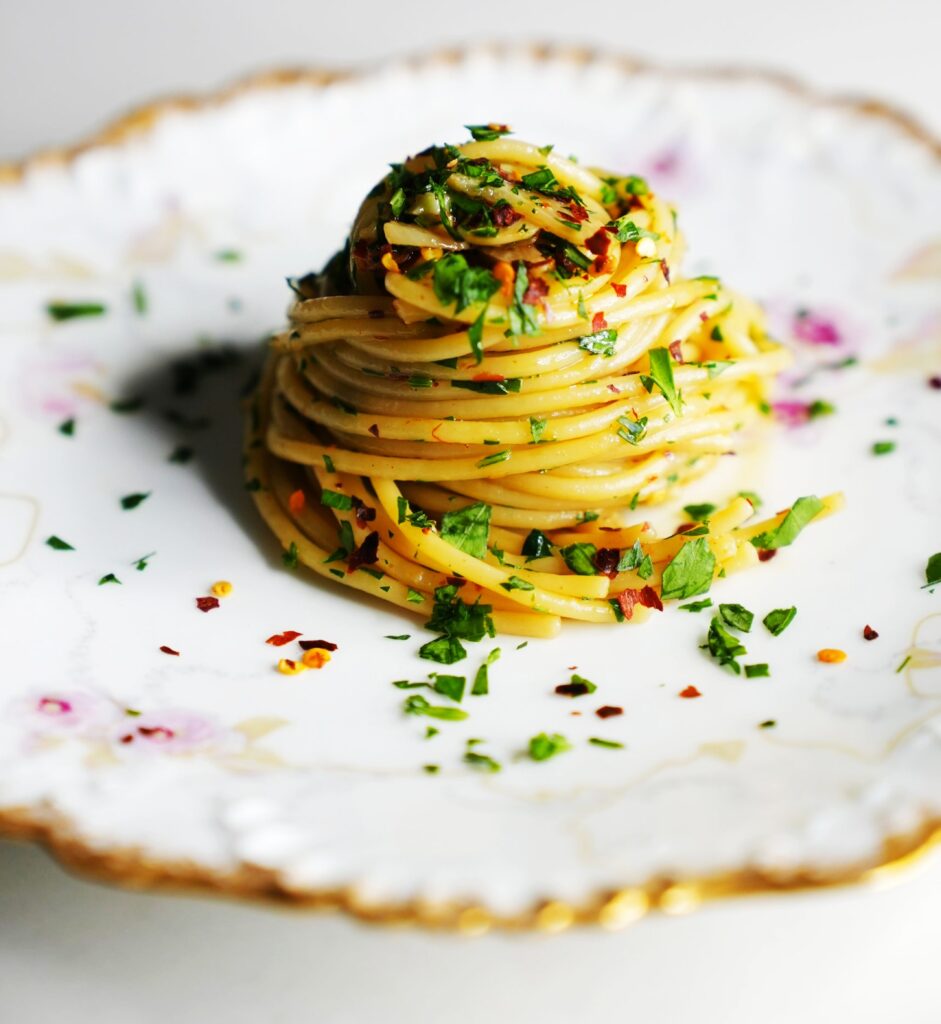
A light, flavourful Italian pasta made with garlic, chilli flakes, olive oil and fresh herbs. This healthier version uses less oil while retaining the classic garlicky flavour.

Preparation time: 10 minutes Cooking time: 15 minutes Servings: 2

Ingredients

  • 120 g whole-wheat pasta
  • 1 tbsp olive oil
  • 6–8 garlic cloves, thinly sliced
  • ½ tsp red chilli flakes
  • ½ tsp mixed Italian herbs
  • ¼ tsp black pepper
  • Salt to taste
  • ½ cup reserved pasta water, as needed
  • 1 tbsp chopped fresh parsley or coriander
  • 1 tsp lemon juice (optional)
  • 1 tbsp grated Parmesan cheese (optional)

Detailed Method

Step 1: Boil the pasta

Bring water to a boil in a large pot. Add salt and whole-wheat pasta. Cook according to the package instructions until al dente. Reserve ½ cup of pasta water before draining.

Step 2: Prepare the garlic oil

Heat olive oil in a wide pan over low heat. Add the sliced garlic and sauté gently for 1–2 minutes until fragrant and lightly golden. Do not brown or burn the garlic, as it can become bitter.

Step 3: Add the spices

Add red chilli flakes, black pepper and Italian herbs. Stir for 20–30 seconds over low heat to release their aroma.

Step 4: Toss the pasta

Add the boiled pasta to the pan and toss well until coated with the garlic and chilli mixture. Gradually add a few tablespoons of reserved pasta water and toss again. The starchy water helps the oil coat the pasta evenly without needing extra oil.

Step 5: Finish and serve

Turn off the heat. Add chopped parsley or coriander and lemon juice, if desired. Top with a little Parmesan cheese, if using. Serve immediately while hot.

Values depend on the pasta brand and exact ingredients used.

Healthy Tips

  • Choose whole-wheat pasta for more fibre.
  • Measure the olive oil instead of pouring freely.
  • Add sautéed mushrooms, broccoli, spinach or capsicum for extra vegetables.
  • For a higher-protein meal, add grilled chicken, tofu or cooked soya chunks.
  • Skip excess cheese and butter to keep the recipe lighter.

Chef’s tip: The secret to delicious aglio e olio is gently infusing the oil with garlic and emulsifying it with starchy pasta water. You get a glossy, flavourful coating without needing a heavy sauce.

How to Make Healthy Aglio e Olio Pasta at Home Read More »