Healthy non vegetarian Recipes

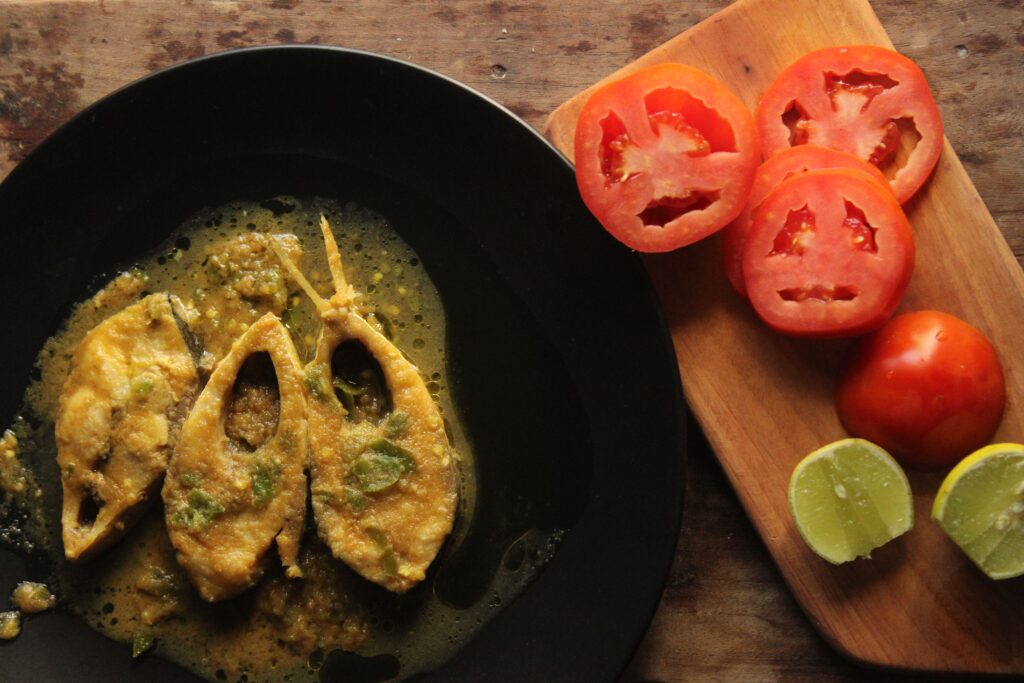
Bengali Bhapa Fish 🐟 | Steamed Mustard Fish

A traditional Bengali-style fish recipe made with a spicy mustard paste, yogurt, and aromatic spices. This bhapa fish is soft, flavourful, and requires very little oil, making it a great option for a healthy, protein-rich meal.

Ingredients

  • 250–300 g fish (Rohu, Katla, or any firm fish)
  • 2 tbsp mustard seeds
  • 1 tbsp poppy seeds (optional)
  • 2 green chillies
  • 2 tbsp hung curd
  • ½ tsp turmeric powder
  • ½ tsp red chilli powder
  • 1 tbsp mustard oil
  • Salt to taste
  • 1–2 tbsp water, as needed
  • 1 tsp lemon juice (optional)

Method

  1. Prepare the mustard paste: Soak the mustard seeds in water for 15–20 minutes. Grind them with green chillies and a little water to make a smooth paste. Add poppy seeds if using.
  2. Prepare the marinade: In a bowl, combine the mustard paste, hung curd, turmeric, red chilli powder, mustard oil, and salt. Mix well.
  3. Marinate the fish: Gently coat the fish pieces with the marinade and let them rest for 20–30 minutes in the refrigerator.
  4. Prepare for steaming: Place the marinated fish in a heatproof bowl or a container that fits inside your steamer. Cover with a lid or foil.
  5. Steam the fish: Place the container in a steamer and cook for approximately 15–20 minutes, depending on the thickness of the fish pieces. Check that the fish is cooked through.
  6. Finish and serve: Drizzle a little mustard oil on top and garnish with green chillies. Serve hot with steamed rice.

Extra Tips

  • For authentic Bengali flavour: Use mustard oil and green chillies generously according to your spice preference.
  • Avoid bitterness: Don’t over-grind mustard seeds, and use a small amount of yellow mustard along with black mustard if needed.
  • For a creamy marinade: Hung curd helps balance the sharpness of mustard.
  • For a healthier version: Steam rather than fry the fish, and measure the oil carefully.
  • For best results: Avoid over-steaming, as fish can become dry and break apart.

Serving suggestion: Pair with steamed rice and lightly sautéed vegetables for a balanced meal.

Clarify fish preparation stepsAdd cooking time and serving size

Bengali Bhapa Fish 🐟 | Steamed Mustard Fish Read More »
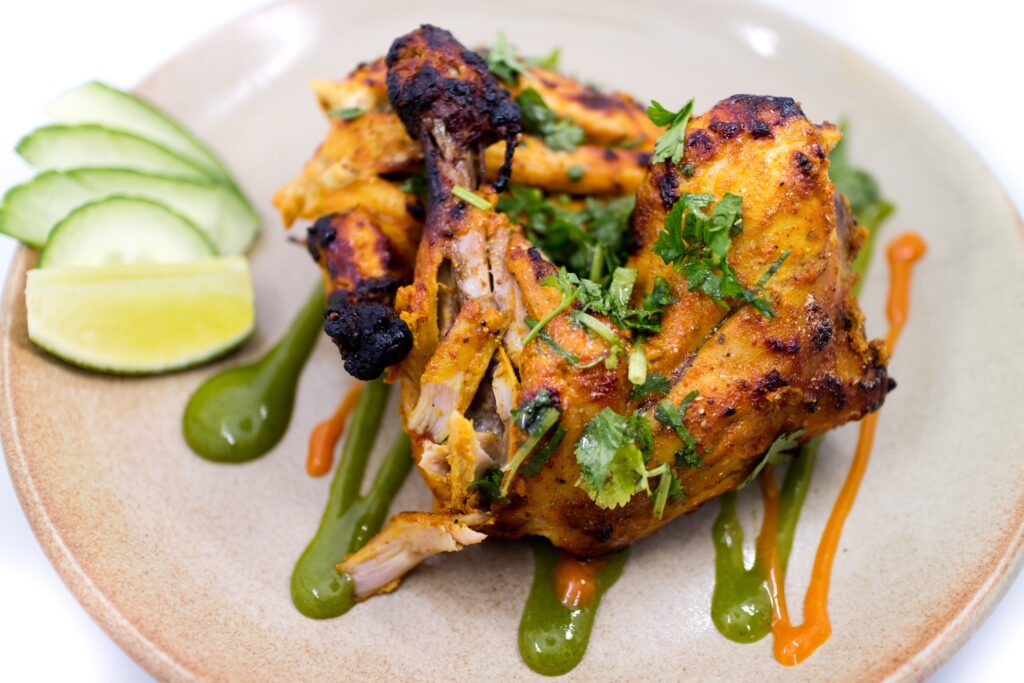
Homemade Oven-Roasted Tandoori Chicken

Juicy, flavourful and coated in a creamy hung curd marinade, this homemade tandoori chicken is perfect for a healthy, protein-rich lunch or dinner!

Ingredients

For the Marinade:

  • 250 g hung curd
  • 3 tbsp mustard oil
  • 1 tbsp red chilli powder
  • 1 tbsp ginger-garlic paste
  • 1 tbsp black pepper powder
  • ½ tbsp turmeric powder
  • 1 tbsp coriander powder
  • 1 tbsp chicken masala
  • 1–2 tbsp kasuri methi, crushed
  • 1 tbsp lemon juice
  • Salt to taste

Main Ingredient:

  • Chicken, as required

Method

  1. In a large bowl, add the hung curd, mustard oil, ginger-garlic paste, and all the spices.
  2. Add crushed kasuri methi, lemon juice, and salt. Mix everything well until you get a smooth, flavourful marinade.
  3. Add the chicken and coat each piece thoroughly with the marinade.
  4. Cover and refrigerate for at least 30 minutes, preferably 2–4 hours, for better flavour.
  5. Preheat the oven to 180°C for 10 minutes.
  6. Arrange the marinated chicken on a baking tray or wire rack. Bake on the middle rack at 220–230°C for approximately 35–45 minutes, depending on the size and type of chicken pieces. Use the fan and both heating elements if your oven supports this setting.
  7. Turn the pieces halfway through cooking for even roasting. Check that the chicken is fully cooked before removing it from the oven.
  8. For a smoky, tandoor-style finish, grill or broil for another 3–5 minutes, keeping a close eye on it to prevent burning.

Extra Tips for Perfect Tandoori Chicken

  • For deeper flavour: Make a few cuts in the chicken before marinating so the masala penetrates better.
  • For a thicker marinade: Use well-strained hung curd to prevent excess moisture.
  • For better colour: Kashmiri red chilli powder can be used for a vibrant red colour without adding too much heat.
  • For juicy chicken: Avoid overcooking, especially if using boneless pieces. The thickest part should reach 74°C internally.
  • For a healthier version: Reduce the mustard oil to 1–2 tbsp if you want to lower the overall calories.
  • For extra char: Brush lightly with oil before the final grilling step.

Serve hot with mint-yogurt chutney, onion rings, lemon wedges, and a fresh salad for a delicious, protein-rich meal.

Homemade Oven-Roasted Tandoori Chicken Read More »

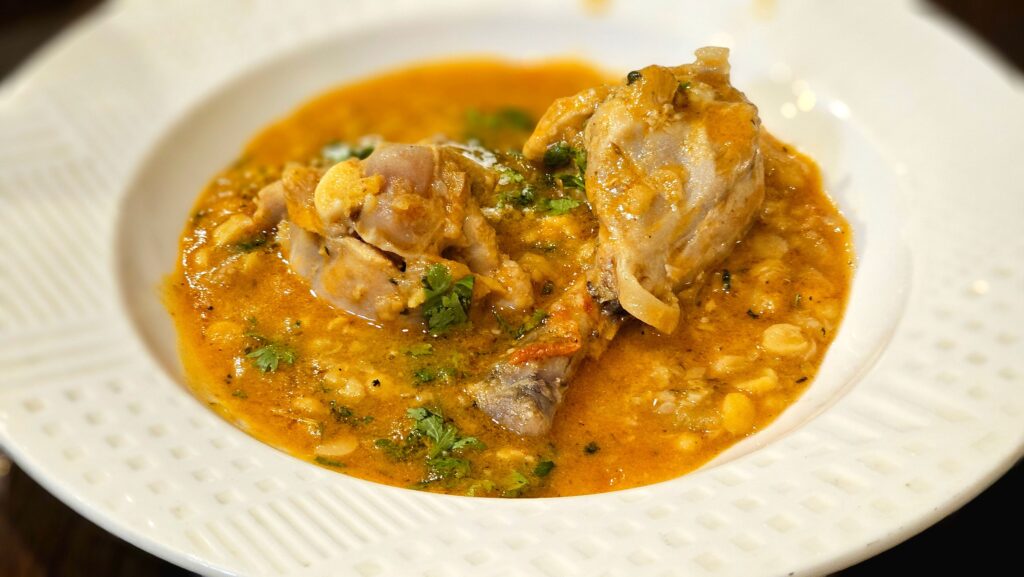
How to Make Kashmiri Chicken Resha Wali Dal at Home

Kashmiri Chicken Resha Wali Dal 🍗🥣

A comforting, protein-rich dal loaded with shredded chicken, three types of lentils, and a flavourful garlic tadka. Creamy, spicy, and perfect to enjoy with rice!

📝 Ingredients

For Dal & Chicken

  • 1 cup chana dal
  • 1 cup red masoor dal
  • 1 cup moong dal
  • 1–2 chicken breasts
  • 1 onion, finely chopped
  • 1 tbsp ginger-garlic paste
  • 2–3 tomatoes
  • 4–5 green chillies
  • 1 tsp cumin seeds
  • 1 tsp red chilli powder
  • ½ tsp turmeric powder
  • 1 tsp coriander powder
  • 1 tsp Kashmiri red chilli powder
  • Salt to taste
  • Oil as required
  • Water as required

For the Garlic Tadka

  • 2–3 tbsp oil
  • 4 garlic cloves, finely chopped
  • 1 tsp cumin seeds
  • A pinch of hing
  • 3–4 dry red chillies
  • 1 tsp Kashmiri red chilli powder

For Serving

  • Fresh coriander, chopped
  • Steamed rice
  • Sliced onion
  • Green chillies
  • Fresh salad

👩‍🍳 Method

  1. Soak the dals: Wash chana dal, red masoor dal, and moong dal thoroughly. Soak them for 1–1½ hours.
  2. Prepare the masala: Heat oil in a pressure cooker. Add chopped onion and sauté until golden brown. Add ginger-garlic paste and cook until its raw smell disappears.
  3. Cook the chicken: Add the chicken breasts and sauté for a few minutes.
  4. Add tomato-chilli puree: Blend the tomatoes and green chillies into a smooth puree. Add it to the cooker and mix well.
  5. Add the spices: Add cumin, red chilli powder, turmeric, coriander powder, Kashmiri red chilli powder, and salt. Cook until the masala is well roasted and the oil starts separating.
  6. Add the dals: Drain the soaked dals and add them to the cooker. Mix everything well and add enough water, approximately twice the volume of the soaked dals, adjusting as needed for the desired consistency.
  7. Pressure cook: Close the cooker and cook for 4–5 whistles, or until the dals and chicken are completely cooked. Allow the pressure to release naturally.
  8. Make the chicken resha: Take out the cooked chicken breasts and shred them finely using two forks.
  9. Mash the dal: Mash the cooked dals thoroughly until smooth, thick, and creamy. Add a little hot water if needed.
  10. Combine: Add the shredded chicken back to the dal and mix well. Let it simmer for a few minutes so the flavours come together.
  11. Prepare the tadka: Heat oil in a separate pan. Add chopped garlic, cumin seeds, hing, and dry red chillies. Sauté until the garlic turns lightly golden.
  12. Add Kashmiri chilli powder: Switch off the flame or keep it very low, add Kashmiri red chilli powder, and immediately pour the tadka over the hot dal.
  13. Garnish and serve: Finish with fresh coriander and serve hot with steamed rice, sliced onion, green chillies, and salad.

Tip: Mash the dal really well and shred the chicken into fine, thin strands for that perfect creamy, resha-style texture. Adjust the water according to how thick you like your dal.

Add servings and nutrition informationSpecify exact oil quantities

How to Make Kashmiri Chicken Resha Wali Dal at Home Read More »

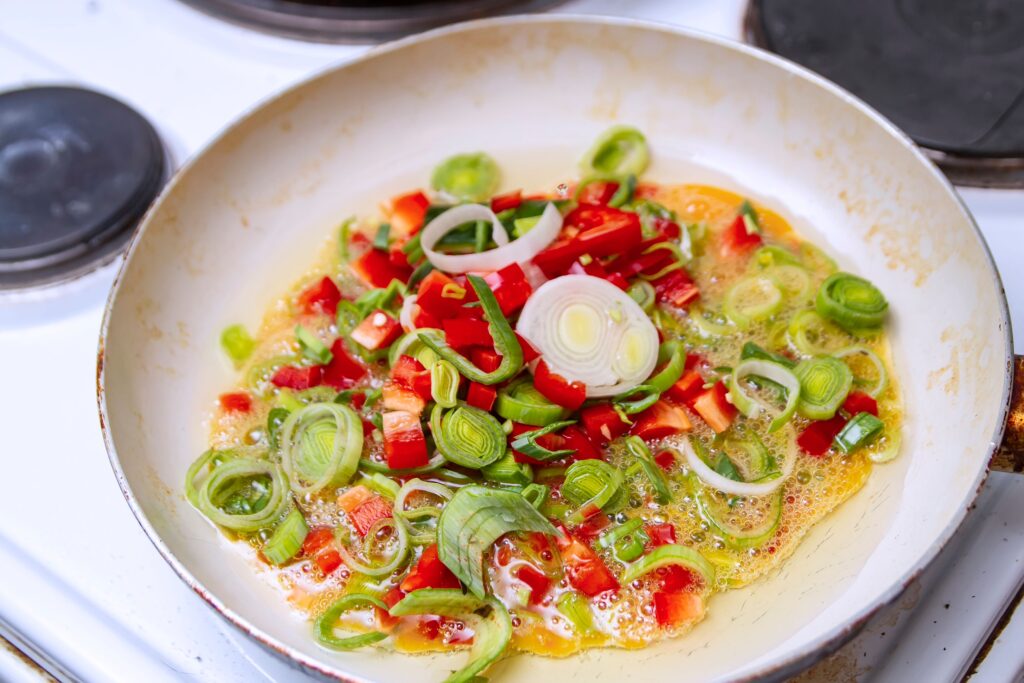
How to make Healthy Lemon Pepper Egg Stir-Fry

🍋 Healthy Lemon Pepper Egg Stir-Fry

This Healthy Lemon Pepper Egg Stir-Fry is a quick and delicious way to enjoy eggs with a tangy, peppery sauce. Instead of deep-frying the eggs, a simple omelette is prepared, cut into bite-sized pieces, and tossed in a light garlic-chilli sauce. It makes a great high-protein breakfast, snack, or quick dinner.

Ingredients

  • 2 eggs
  • Salt, to taste
  • ½ tsp black pepper
  • 1 tsp oil
  • 2 garlic cloves, finely chopped
  • ½ tsp finely chopped ginger
  • ½–1 green chilli, chopped
  • 1 tsp soy sauce
  • 1 tsp tomato or chilli sauce
  • ½ tsp corn flour
  • ¼ cup water
  • 1–2 tsp fresh lemon juice
  • ½ tsp lemon zest, optional
  • Spring onion or coriander for garnish

Method

Whisk the eggs with a little salt and black pepper. Heat a non-stick pan with a few drops of oil and prepare a thin omelette. Once cooked, remove it from the pan, cut it into small bite-sized pieces, and keep aside.

In the same pan, add the remaining oil and sauté garlic, ginger, and green chilli for a few seconds until fragrant. Add soy sauce and chilli or tomato sauce and mix well.

In a small bowl, mix corn flour with water to make a smooth slurry. Pour it into the pan while stirring continuously. Cook for a minute until the sauce becomes lightly thick.

Season with salt and plenty of freshly ground black pepper. Add lemon juice and lemon zest for a fresh, tangy flavour. Finally, add the omelette pieces and gently toss until they are well coated with the sauce.

Garnish with spring onion or coriander and serve hot.

💡 Healthy Tip

Use minimal oil, choose low-sodium sauces, and increase the garlic, ginger, pepper, and lemon for maximum flavour without needing extra sauce or oil.

How to make Healthy Lemon Pepper Egg Stir-Fry Read More »

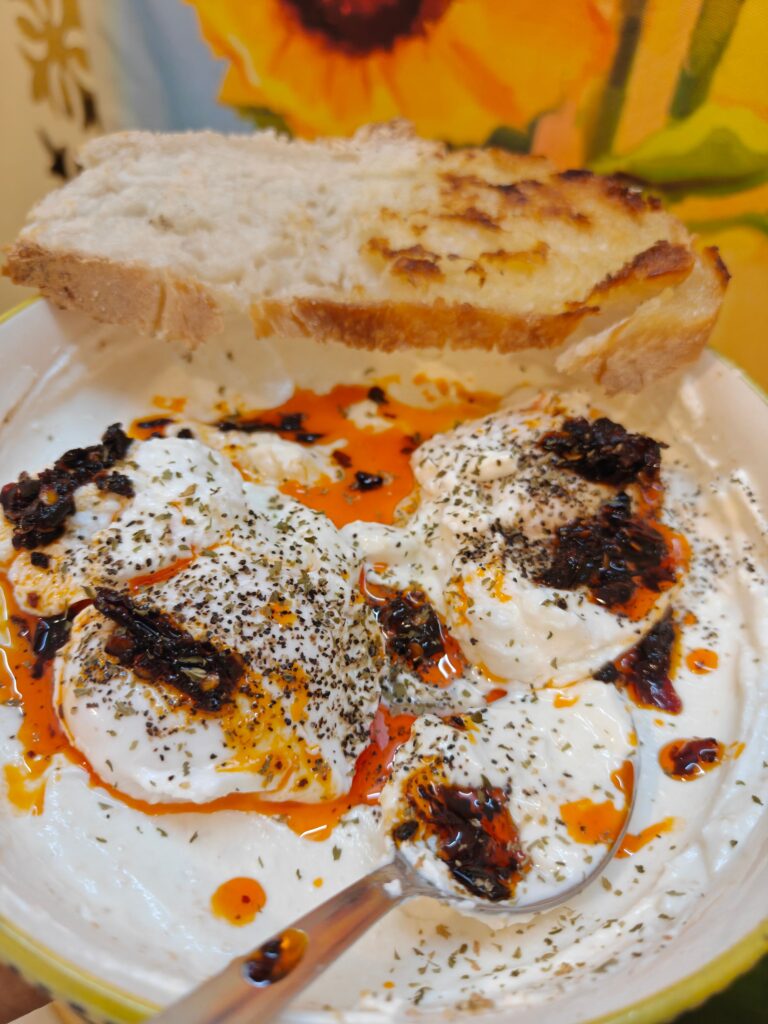
How to Make Chilli Oil Eggs at Home

A spicy, flavour-packed egg recipe that comes together in just 10 minutes!

🥚 Ingredients of Chilli Oil Eggs

  • 2 eggs
  • 1 tsp chilli oil
  • ½ tsp sesame seeds
  • ½ tsp chilli flakes
  • 1 small garlic clove, finely chopped
  • 1 tsp spring onion, chopped
  • ½ tsp soy sauce
  • Black pepper, to taste
  • Salt, as needed
  • Fresh coriander, for garnish

👩‍🍳 Method

  1. Heat a non-stick pan and add ½ tsp chilli oil.
  2. Crack in the eggs and cook on low-medium heat until the whites are set and the yolks are still slightly runny.
  3. In a small bowl, mix the remaining chilli oil with garlic, chilli flakes and sesame seeds.
  4. Pour the chilli mixture over the eggs and let it sizzle for a few seconds.
  5. Drizzle with soy sauce and sprinkle with black pepper.
  6. Garnish with spring onion and coriander and enjoy your Chilli Oil Eggs

💡 Healthy Tip

Use 1 tsp chilli oil for flavour instead of pouring extra oil. Serve with whole-grain toast, roti, or a bowl of sautéed vegetables for a balanced meal.

⏱️ Prep + Cooking Time: 10 minutes
🍳 Servings: 1

How to Make Chilli Oil Eggs at Home Read More »

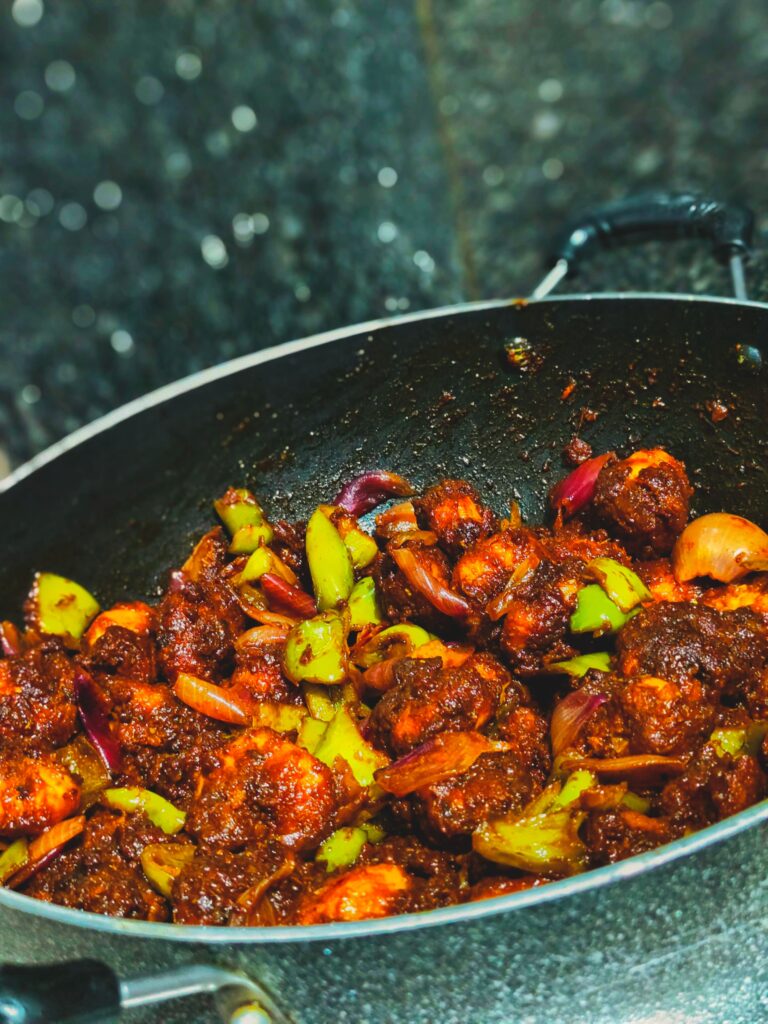
Chilli Garlic Prawns

Perfect for: quick dinner, meal prep, or pairing with rice/roti & salad.

Ingredients of Chilli Garlic Praw

  • Prawns – as required
  • Garlic – 5–6 cloves, finely chopped
  • Green chilli – 1–2, finely chopped
  • Onion – 1 small, sliced
  • Capsicum – ½ cup, sliced
  • Soy sauce – 1 tsp
  • Red chilli flakes – ½ tsp
  • Black pepper – ½ tsp
  • Oregano – ½ tsp
  • Lemon juice – 1 tsp
  • Oil – 1 tsp
  • Salt – as required
  • Coriander/spring onion – for garnish

👩‍🍳 Quick Preparation of Chilli Garlic Praw

  1. Prep ahead: Clean the prawns and marinate with lemon juice, black pepper, chilli flakes and a little salt. Refrigerate.
  2. Heat oil in a pan and sauté garlic + green chilli for 30–40 seconds.
  3. Add onion and capsicum. Stir-fry on high heat for 2–3 minutes.
  4. Add the marinated prawns and cook for 3–5 minutes, until just cooked.
  5. Add soy sauce and oregano. Toss everything together.
  6. Finish with spring onion/coriander and a squeeze of lemon.

💡 Meal-Prep Tip

You can chop the vegetables and prepare the prawn marinade in advance. Keep them separately refrigerated and cook fresh—it takes only about 7–10 minutes.

For a complete meal, pair with a small portion of rice + cucumber salad or stir-fried vegetables.

Chilli Garlic Prawns Read More »

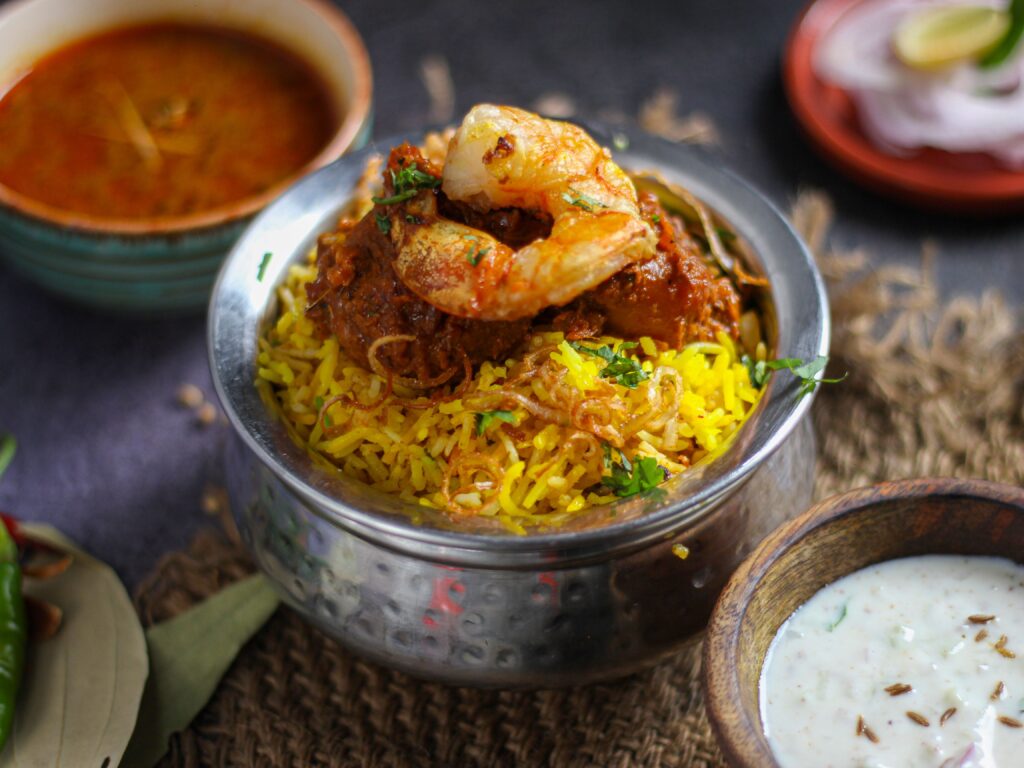
Healthy Prawn Biryani — Easy & Meal-Prep Friendly

A lighter biryani with less oil, plenty of flavour and a good protein base.

Ingredients — 2 servings

  • Prawns – as required
  • Basmati rice – as required
  • Thick dahi – ½ cup
  • Onion – 1 medium, thinly sliced
  • Tomato – 1 small, chopped
  • Ginger-garlic paste – 1 tsp
  • Green chilli – 1, optional
  • Turmeric – ½ tsp
  • Red chilli powder – ½ tsp
  • Coriander powder – 1 tsp
  • Biryani masala – 1 tsp
  • Garam masala – ½ tsp
  • Cumin – ½ tsp
  • Mint + coriander – handful
  • Lemon juice – 1 tsp
  • Oil – 1–2 tsp
  • Salt – as required
  • Water – as required

👩‍🍳 Advanced Prep

1. Marinate the prawns
Mix prawns with dahi, turmeric, chilli powder, ginger-garlic paste, lemon juice and salt. Refrigerate for 20–30 minutes.

2. Prepare the rice
Cook basmati rice until about 80% done. Drain and keep aside.

3. Make the masala
Heat oil, add cumin and onion. Cook until lightly golden. Add tomato, green chilli, coriander powder and biryani masala. Cook until the tomato softens.

4. Add prawns
Add marinated prawns and cook for just 3–5 minutes. Don’t overcook them or they can become rubbery.

5. Layer
Add a layer of rice over the prawn masala. Top with mint, coriander and a pinch of garam masala.

6. Dum cook
Cover tightly and cook on low heat for 5–7 minutes. Rest for another 5 minutes before serving.

🥗 Make it more weight-loss friendly

Serve with cucumber-onion raita + a large vegetable salad rather than adding extra fried onions or ghee.

Meal-prep tip: Keep the rice and prawn masala separately if preparing in advance, then combine and reheat gently. This keeps the prawns much softer.

Healthy Prawn Biryani — Easy & Meal-Prep Friendly Read More »

Crispy Protein Pizza Chilla

A high-protein, crispy savory pancake that tastes like a cross between a pizza and a moong dal chilla


Ingredients

For the Chilla Base

  • 1 cup yellow moong dal (split yellow lentils)
  • 2–3 tbsp water (for blending)
  • 1 green chili
  • 1-inch ginger
  • Salt to taste
  • ½ tsp oregano
  • ½ tsp chili flakes
  • ¼ tsp turmeric (optional)
  • 1 tsp eno/fruit salt or ¼ tsp baking soda (optional, for extra crispness)

Pizza Toppings

Choose one protein:

  • 100 g low-fat paneer (crumbled or cubes)
    or
  • 120 g cooked shredded chicken

Vegetables:

  • ¼ onion, thinly sliced
  • ¼ capsicum, thinly sliced
  • 1 small tomato, deseeded and chopped (optional)

Other toppings:

  • 2 tbsp pizza sauce or thick tomato chutney
  • 30–40 g low-fat mozzarella cheese
  • Oregano + chili flakes for garnish

For Cooking

  • 1–2 tsp olive oil or ghee spray

Step 1: Prepare the Moong Dal Batter

Wash the moong dal 3–4 times.

Soak it in water for:

  • 3–4 hours minimum
  • Overnight works even better.

Drain completely.

Blend with:

  • Green chili
  • Ginger
  • Salt
  • Very little water

You want a thick but pourable batter.

Consistency should be similar to dosa batter but slightly thicker.

Rest for 10–15 minutes.

Add:

  • Oregano
  • Chili flakes
  • Eno/baking soda (optional, just before cooking)

Step 2: Prep the Toppings

Paneer Version

  • Crumble or cube low-fat paneer.
  • Toss with:
    • pinch of salt
    • chili flakes
    • black pepper

Chicken Version

Use cooked shredded chicken.

Quick seasoning:

  • Salt
  • Pepper
  • Garlic powder
  • Chili flakes

Vegetables

Slice onions and capsicum thinly so they cook quickly.


Step 3: Cook the Crispy Chilla Base

Heat a non-stick pan or cast-iron tawa on medium heat.

Lightly grease with oil.

Pour a ladle of batter in the center and spread gently into:

  • medium-thin circle
  • slightly thicker than a dosa

Cook on medium flame for 3–4 minutes.

Drizzle a few drops of oil around the edges.

Once the bottom becomes:

  • golden
  • crisp
  • easy to lift

flip it carefully.

Cook the second side for 1–2 minutes.


Step 4: Turn It Into Pizza

Lower the flame.

Spread:

  • 2 tbsp pizza sauce

Add:

  • Paneer/chicken
  • Onion
  • Capsicum
  • Cheese

Sprinkle:

  • Oregano
  • Chili flakes

Cover with a lid.

Cook on low flame for 3–5 minutes until:

  • cheese melts
  • bottom becomes extra crispy

Step 5: Final Crisping Trick

For restaurant-style crispness:

After cheese melts:

  • uncover
  • cook 1 extra minute on medium flame

This removes moisture and crisps the base.


Serving Suggestions

Serve with:

  • Mint yogurt dip
  • Garlic curd dip
  • Hot sauce
  • Green chutney

Meal Prep Tips

Batter Storage

Moong batter stays good in fridge for:

  • 2 days

Prepped Toppings

Store chopped veggies and cooked chicken separately.

Reheating

Reheat on a pan instead of microwave to keep crisp.


Common Mistakes

Batter too thin

Chilla becomes soft and breaks.

High flame

Outside burns before inside cooks.

Too many toppings

Makes the base soggy.

Covering too long

Steam softens the crispness.


Quick Timing Guide

StepTime
Soaking dal4 hrs
Batter prep10 mins
Cooking base5 mins
Pizza finish5 mins
Total active cooking~20 mins

Crispy Protein Pizza Chilla Read More »

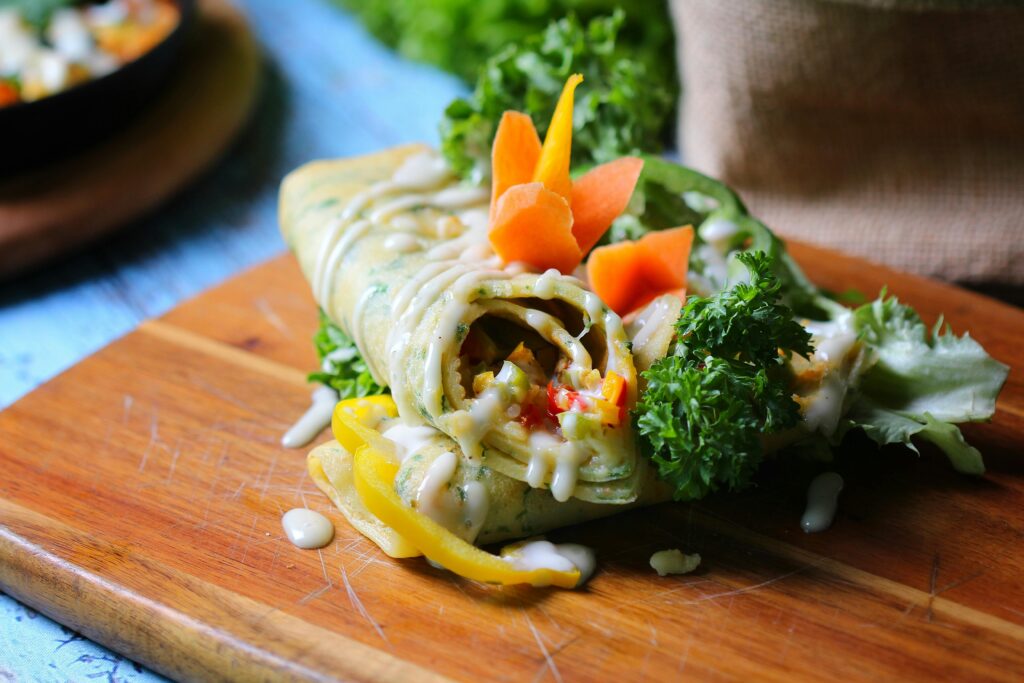
Egg Omelette Wrap Recipe


🌯 Egg Omelette Wrap Recipe

Ingredients:

  • 2 eggs
  • 1 roti / tortilla / chapati
  • 2 tbsp chopped onion
  • 2 tbsp chopped tomato
  • 1 green chili (optional)
  • Salt & black pepper (to taste)
  • 1–2 tsp oil or butter
  • Optional: grated cheese, coriander, ketchup or mayo

👩‍🍳 Steps:

  1. Prepare the egg mix
    Crack eggs into a bowl. Add onion, tomato, chili, salt, and pepper. Beat well.
  2. Heat the pan
    Add a little oil or butter on medium heat.
  3. Cook the omelette
    Pour the egg mixture into the pan and spread slightly.
  4. Place the roti on top
    While the egg is still wet, place the roti directly over it and press gently so it sticks.
  5. Flip it
    Once the egg is cooked on one side, flip the whole thing so the roti is now at the bottom.
  6. Add fillings
    Add cheese, sauces, or extra veggies on top of the omelette side.
  7. Wrap it up
    Fold or roll into a wrap and cook for another minute until slightly crispy.
  8. Serve hot
    Cut in half and enjoy!

💡 Tips:

  • Use leftover roti to save time.
  • Add shredded chicken or paneer for extra protein.
  • A little butter at the end gives great flavor.

Egg Omelette Wrap Recipe Read More »

Almond Flour Pizza


Almond Flour Pizza (Microwave + Oven Method)

Ingredients

For the base:

  • 2 tbsp almond flour (small pizza) / 3 tbsp (medium pizza)
  • 1 whole egg (small pizza) / 2 eggs (medium pizza)
  • A pinch of salt
  • ¼ tbsp baking powder
  • ¼ tbsp apple cider vinegar (optional)

For the toppings:

  • 1 tbsp pizza sauce
  • Onion (chopped)
  • Capsicum (chopped)
  • Bell peppers (chopped)
  • Olives
  • Mozzarella cheese

Non-veg options:

  • Grilled or boiled chicken (sautéed with salt & black pepper)
  • Pepperoni
  • Salami

Method

Step 1: Prepare the base

  1. In a mug or bowl, mix almond flour, egg(s), salt, baking powder, and apple cider vinegar.
  2. Whisk well to get a thick batter-like consistency.

Step 2: Microwave the base

  1. Take a flat, microwave-safe flat plate and lightly grease it with oil.
  2. Spread the batter evenly to form a pizza base.
  3. Microwave for 120 seconds (2 minutes).
  4. Your almond flour pizza base is ready.

Step 3: Preheat

  • Preheat your microwave in convection mode at 180°C or use an oven.

Step 4: Assemble the pizza

  1. Place the base on a baking tray.
  2. Spread pizza sauce evenly.
  3. Add all veggies: onion, capsicum, bell peppers, and olives.
  4. Add mozzarella cheese on top.
  5. For non-veg version, add grilled/boiled chicken, pepperoni, or salami.

Step 5: Bake

  • Bake for 10 minutes at 180°C until cheese melts and slightly browns.

Healthy, high-protein almond flour pizza is ready! 🍕

Almond Flour Pizza Read More »