
Healthy Breakfast Recipes

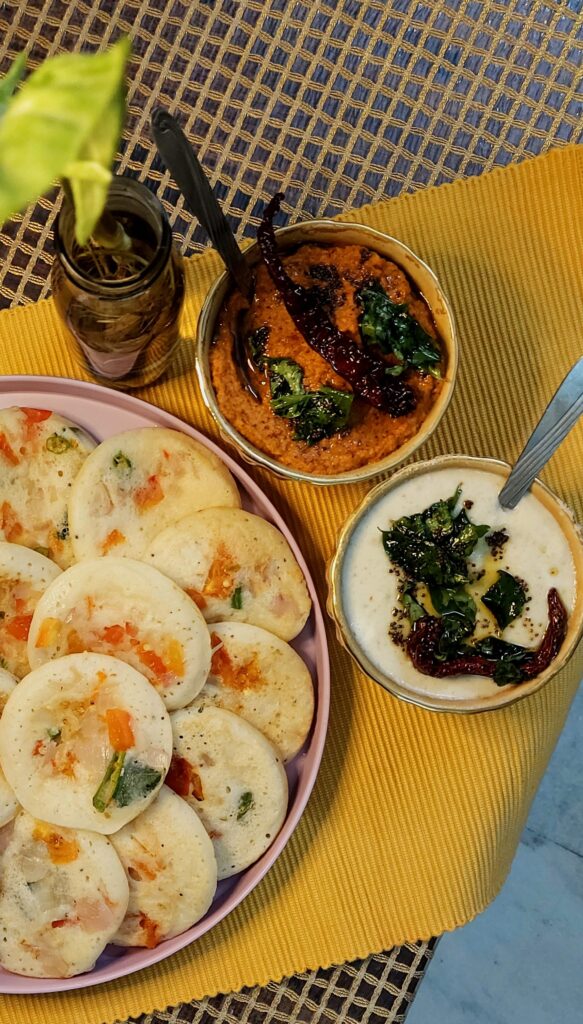
How to Make One-Pot Sambar Idli at Home

One-Pot Sambar Idli

Ingredients of One-Pot Sambar Idli

For the Suji Idli Batter:

  • 1 cup suji (rava)
  • ½ cup curd
  • ½–¾ cup water (as required)
  • ½ tsp eno fruit salt
  • Salt to taste
  • 1 tbsp chopped coriander
  • 1 tbsp grated carrot (optional)

For the Sambar Gravy:

  • 1 small onion, chopped
  • 1 tomato, chopped
  • ½ cup mixed vegetables (carrot, beans, pumpkin)
  • 2 tbsp cooked toor dal
  • 1–1½ tbsp sambar masala
  • ½ tsp turmeric powder
  • ½ tsp red chilli powder
  • Small piece of tamarind soaked in water
  • Salt to taste
  • 1 tsp oil

For Tempering:

  • ½ tsp mustard seeds
  • ½ tsp cumin seeds
  • Few curry leaves
  • 2 dried red chillies
  • A pinch of hing

Method

1. Prepare the Suji Batter

  1. In a bowl, combine suji, curd, salt and water.
  2. Mix well and rest for 15–20 minutes.
  3. Add a little more water if required to get a thick, pourable idli batter consistency.
  4. Just before cooking, add Eno and gently mix.

2. Prepare the Sambar Gravy

  1. Heat oil in a deep pan. Add mustard seeds, cumin seeds, dried red chillies, curry leaves and hing.
  2. Add chopped onion and sauté until translucent.
  3. Add tomatoes, mixed vegetables, turmeric, red chilli powder and sambar masala.
  4. Add cooked dal, tamarind water and around 2 cups of water.
  5. Cover and cook until the vegetables are tender and the gravy is flavourful.

3. Cook the Idlis in Sambar

  1. Once the sambar starts simmering, reduce the flame to low.
  2. Drop small spoonfuls of the prepared suji batter directly into the simmering sambar, leaving some space between each portion.
  3. Cover with a lid and cook on low flame for 10–12 minutes.
  4. Avoid stirring while the idlis are cooking, as they need time to set.
  5. Check with a toothpick; once the idlis are cooked through, gently mix or spoon the gravy around them.

4. Serve Garnish with fresh coriander and a squeeze of lemon juice. Serve hot.

Tip: Keep the sambar slightly thinner before adding the batter, as the suji idlis will absorb some gravy while cooking. Add Eno only just before dropping the batter into the sambar for soft and fluffy idlis.

How to Make Chhattisgarhi Bafori

Chhattisgarhi Bafori 🌿

Traditional Chhattisgarhi | Steamed | Protein-Rich | Healthy Snack

Ingredients

  • 1 cup chana dal, soaked for 3–4 hours
  • ½ cup finely chopped onion
  • ½ cup finely chopped coriander
  • 1–2 green chillies, finely chopped
  • 1 tsp grated ginger
  • ½ tsp cumin seeds
  • ½ tsp ajwain
  • ½ tsp turmeric powder
  • ½ tsp red chilli powder
  • ½ tsp coriander powder
  • ½ tsp garam masala
  • Salt to taste
  • 1 tbsp lemon juice
  • 1–2 tbsp water, if required
  • Oil, for greasing

Method

  1. Soak the dal: Wash and soak chana dal for 3–4 hours. Drain completely.
  2. Grind: Add the soaked dal to a mixer and grind into a slightly coarse, thick paste. Avoid making it completely smooth.
  3. Prepare the mixture: Transfer to a bowl and add onion, coriander, green chilli, ginger, cumin, ajwain, turmeric, red chilli powder, coriander powder, garam masala and salt.
  4. Add lemon juice and mix everything well. The mixture should be thick enough to hold its shape. Add only a little water if needed.
  5. Steam: Grease a steamer plate lightly with oil. Take small portions of the mixture and shape them into small round or slightly flattened baforis.
  6. Place them in the steamer, leaving some space between each piece. Cover and steam for 15–20 minutes, or until firm and cooked through.
  7. Allow them to cool for a few minutes. Serve hot with green chutney, coriander chutney or tomato chutney.

Quick Tips 💡

  • Keep the dal mixture coarse for the best traditional texture.
  • Drain the soaked dal very well before grinding; excess water can make the bafori soft.
  • Don’t overcrowd the steamer.
  • For extra flavour, add a little finely chopped fresh coriander and garlic.
  • You can lightly pan-sear the steamed bafori after cooking for a slightly crisp exterior.

Advance Prep 🥣

  • Soak the chana dal overnight and refrigerate after draining if you’re preparing it later.
  • The dal can be ground and stored in the refrigerator for up to 24 hours.
  • Chop the vegetables and herbs in advance and refrigerate separately.
  • Steamed bafori can be prepared ahead and refrigerated. Re-steam or lightly pan-heat before serving.

Serving idea: Pair 3–4 baforis with green chutney and a fresh onion-coriander salad for a filling, protein-rich snack. 🌿

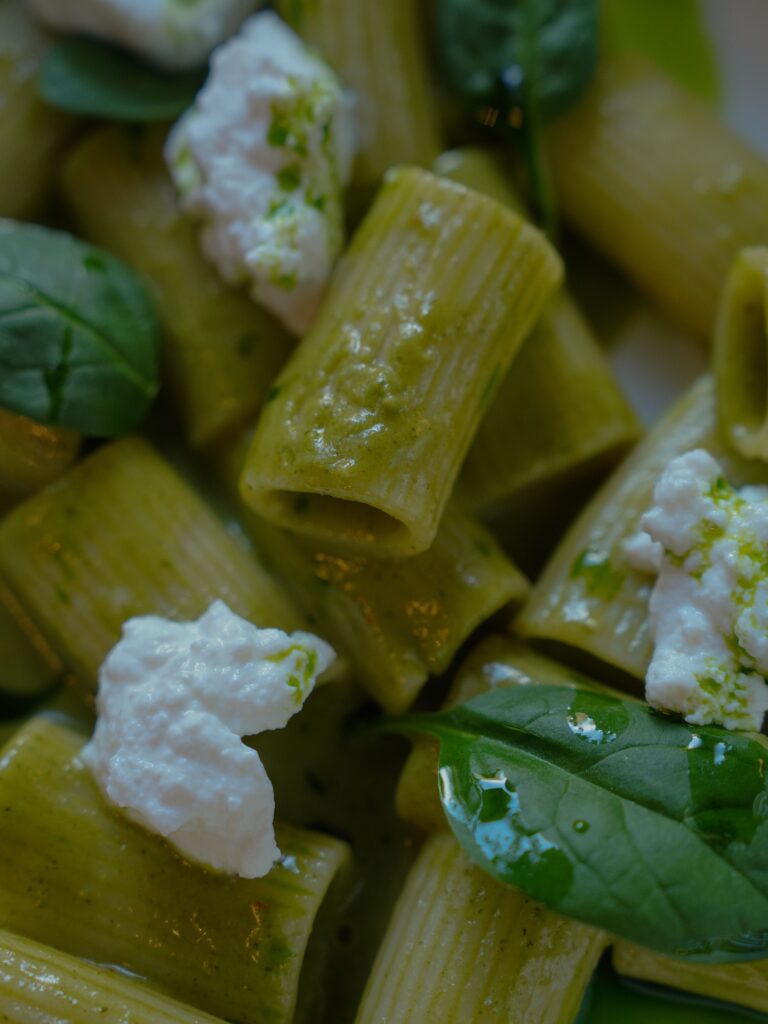
Avocado Spinach Pasta

🥑 Avocado Spinach Pasta

Ingredients:

  • 1 ripe avocado
  • 1 cup fresh spinach
  • 2–3 garlic cloves
  • 1–2 tsp lemon juice
  • Salt, to taste
  • Black pepper, to taste
  • 2–3 tbsp pasta water
  • 1 cup boiled pasta

Method:

  1. Boil the pasta until cooked. Reserve a little pasta water before draining.
  2. In a blender, add avocado, spinach, garlic, lemon juice, salt, black pepper, and pasta water.
  3. Blend until you get a smooth and creamy green sauce.
  4. Add the boiled pasta to a pan and pour the avocado-spinach sauce over it.
  5. Mix gently on low heat for 1–2 minutes until the pasta is well coated. Avoid cooking the avocado sauce for too long.
  6. Finish with a little extra black pepper and lemon juice if desired.

Quick Tip: Add pasta water gradually while blending to get the perfect creamy consistency without adding cream or cheese.

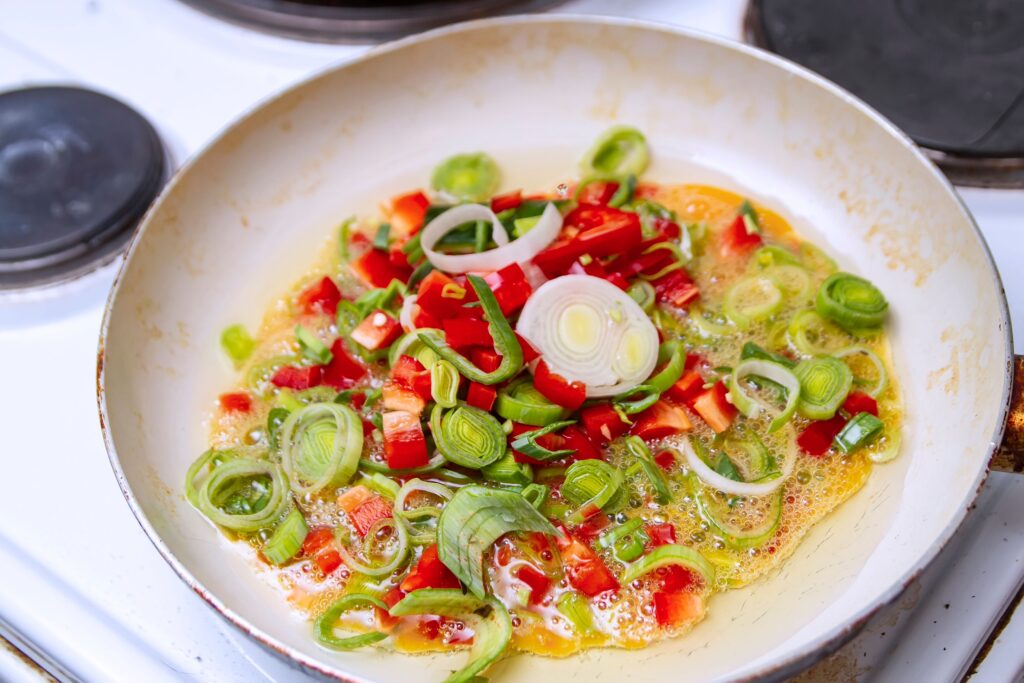
Scrambled Eggs with Sautéed Beans

Scrambled Eggs with Sautéed Beans

Looking for a quick, healthy and protein-rich breakfast? These Scrambled Eggs with Sautéed Beans are packed with protein, vegetables and fresh flavours. Ginger, garlic, spring onion and green chilli add a delicious spicy kick while keeping the recipe simple.

Ingredients:

  • 2 eggs
  • 1 cup finely chopped French beans
  • 2 cloves garlic, finely chopped
  • ½ tsp ginger, finely chopped
  • 2 tbsp spring onion, chopped
  • 1 green chilli, finely chopped
  • 1 tsp oil
  • Salt, to taste
  • Black pepper, to taste

Method:
Heat oil in a pan and add ginger, garlic and green chilli. Sauté for 30–40 seconds until fragrant. Add the chopped French beans and cook on medium-high heat for 3–4 minutes, keeping them slightly crunchy.

Add the spring onion and sauté for another minute. Meanwhile, whisk the eggs with salt and black pepper. Push the sautéed vegetables to one side of the pan and pour the beaten eggs into the empty space.

Allow the eggs to set slightly, then gently scramble them. Mix the eggs with the sautéed beans and cook for another 1–2 minutes until the eggs are cooked but still soft.

Garnish with fresh spring onion and serve hot.

How to make Healthy Lemon Pepper Egg Stir-Fry

🍋 Healthy Lemon Pepper Egg Stir-Fry

This Healthy Lemon Pepper Egg Stir-Fry is a quick and delicious way to enjoy eggs with a tangy, peppery sauce. Instead of deep-frying the eggs, a simple omelette is prepared, cut into bite-sized pieces, and tossed in a light garlic-chilli sauce. It makes a great high-protein breakfast, snack, or quick dinner.

Ingredients

  • 2 eggs
  • Salt, to taste
  • ½ tsp black pepper
  • 1 tsp oil
  • 2 garlic cloves, finely chopped
  • ½ tsp finely chopped ginger
  • ½–1 green chilli, chopped
  • 1 tsp soy sauce
  • 1 tsp tomato or chilli sauce
  • ½ tsp corn flour
  • ¼ cup water
  • 1–2 tsp fresh lemon juice
  • ½ tsp lemon zest, optional
  • Spring onion or coriander for garnish

Method

Whisk the eggs with a little salt and black pepper. Heat a non-stick pan with a few drops of oil and prepare a thin omelette. Once cooked, remove it from the pan, cut it into small bite-sized pieces, and keep aside.

In the same pan, add the remaining oil and sauté garlic, ginger, and green chilli for a few seconds until fragrant. Add soy sauce and chilli or tomato sauce and mix well.

In a small bowl, mix corn flour with water to make a smooth slurry. Pour it into the pan while stirring continuously. Cook for a minute until the sauce becomes lightly thick.

Season with salt and plenty of freshly ground black pepper. Add lemon juice and lemon zest for a fresh, tangy flavour. Finally, add the omelette pieces and gently toss until they are well coated with the sauce.

Garnish with spring onion or coriander and serve hot.

💡 Healthy Tip

Use minimal oil, choose low-sodium sauces, and increase the garlic, ginger, pepper, and lemon for maximum flavour without needing extra sauce or oil.

How to Make Chilli Oil Eggs at Home

A spicy, flavour-packed egg recipe that comes together in just 10 minutes!

🥚 Ingredients of Chilli Oil Eggs

  • 2 eggs
  • 1 tsp chilli oil
  • ½ tsp sesame seeds
  • ½ tsp chilli flakes
  • 1 small garlic clove, finely chopped
  • 1 tsp spring onion, chopped
  • ½ tsp soy sauce
  • Black pepper, to taste
  • Salt, as needed
  • Fresh coriander, for garnish

👩‍🍳 Method

  1. Heat a non-stick pan and add ½ tsp chilli oil.
  2. Crack in the eggs and cook on low-medium heat until the whites are set and the yolks are still slightly runny.
  3. In a small bowl, mix the remaining chilli oil with garlic, chilli flakes and sesame seeds.
  4. Pour the chilli mixture over the eggs and let it sizzle for a few seconds.
  5. Drizzle with soy sauce and sprinkle with black pepper.
  6. Garnish with spring onion and coriander and enjoy your Chilli Oil Eggs

💡 Healthy Tip

Use 1 tsp chilli oil for flavour instead of pouring extra oil. Serve with whole-grain toast, roti, or a bowl of sautéed vegetables for a balanced meal.

⏱️ Prep + Cooking Time: 10 minutes
🍳 Servings: 1

How to make Soft & Spongy Suji Bun Dosa at Home

Soft & Spongy Suji Bun Dosa

A soft, fluffy and wholesome breakfast made with suji, curd and vegetables. You can make it either instantly or use natural fermentation for an even softer texture.

Version 1: Quick & Easy No-Eno Bun Dosa

Ingredients

  • 1 cup suji/rava
  • ½ cup thick curd
  • ¼–½ cup water, as required
  • 1 tbsp rice flour
  • 1 tbsp grated carrot
  • 1 tbsp finely chopped capsicum
  • 1 tbsp finely chopped onion
  • 1 tbsp coriander
  • 1 green chilli, finely chopped
  • ½ tsp grated ginger
  • ½ tsp cumin seeds
  • Salt to taste
  • 1 tsp oil for cooking

Method

  1. Add suji, rice flour, curd and salt to a bowl.
  2. Gradually add water and make a thick, smooth batter.
  3. Cover and rest for 30–40 minutes.
  4. Add the vegetables, ginger, chilli, coriander and cumin.
  5. Add a little water if needed. The batter should be thick like pancake batter.
  6. Heat a non-stick pan and lightly grease it.
  7. Pour a ladleful of batter and spread it slightly thicker than a regular dosa.
  8. Cover and cook on low-medium heat until the top is cooked and the bottom is golden.
  9. Flip gently and cook for another 1–2 minutes.

Result: Soft and fluffy inside with a lightly golden outside — without Eno or baking soda.


Version 2: Naturally Fermented Bun Dosa

This version takes a little more planning but gives a softer and naturally fermented texture.

Ingredients

Use the same ingredients as Version 1.

Method

  1. Mix suji, rice flour, curd and water into a thick batter.
  2. Cover and keep it in a warm place for 4–6 hours.
  3. Once slightly fermented, gently mix the batter.
  4. Add the vegetables, spices, coriander and salt.
  5. Adjust the consistency with a little water.
  6. Cook thickly on a lightly greased pan, covered, over low-medium heat.
  7. Flip once the base is golden and the top is cooked.

Tip: If your kitchen is cool, fermentation may take longer. Slightly sour curd works particularly well.


⚡ Quick Advance-Prep Tips

Night-before prep:
Mix suji + curd + water + salt and refrigerate overnight. In the morning, add vegetables and adjust the consistency before cooking.

Vegetable prep:
Chop carrot, capsicum, onion, coriander and chilli together and store in an airtight container for 2–3 days.

Batch batter:
Prepare the basic suji-curd batter in advance and refrigerate. Add fresh vegetables just before cooking.

For an extra-soft texture:
Don’t make the batter watery and don’t spread the dosa too thin. A thick dosa + covered cooking + low-medium heat gives the best bun-dosa texture.

Healthy Serving Options

Serve with:

  • Mint-coriander chutney
  • Vegetable sambar
  • Fresh curd
  • Coconut chutney in a controlled portion

Best for busy mornings: Keep the basic batter ready overnight and simply add vegetables and cook fresh in the morning.

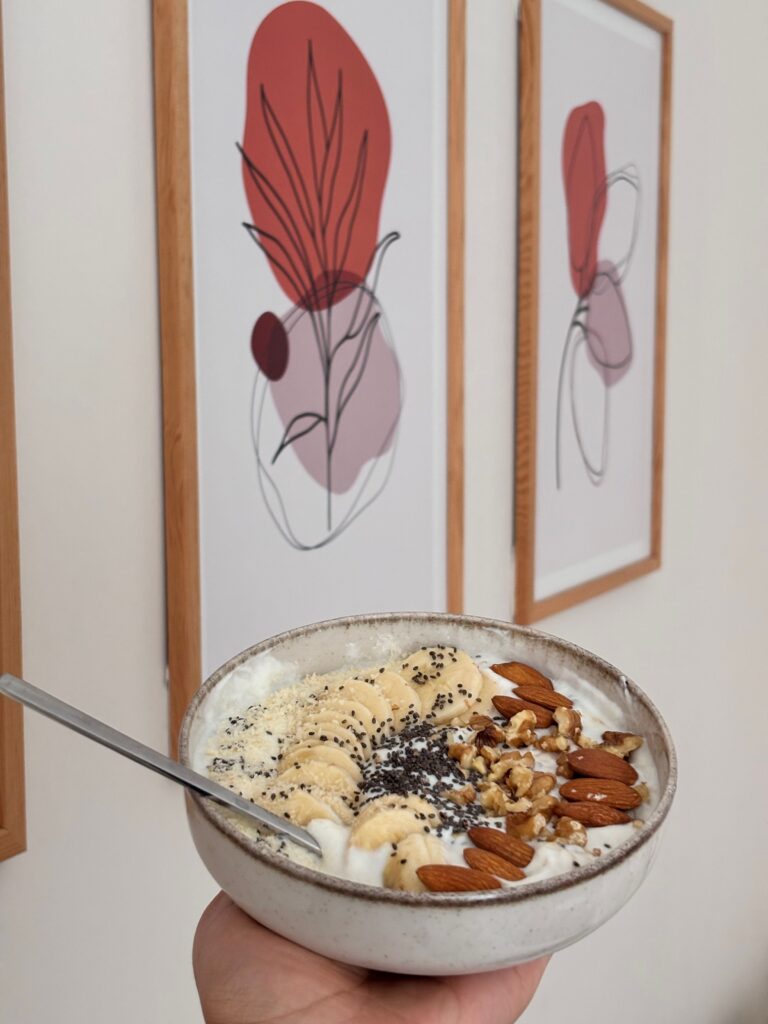
How to Make Banana Caramelised Protein Bowl

🍌 Caramelised Banana Protein Bowl | Easy High-Protein Breakfast

Looking for an easy, healthy and protein-rich breakfast for weight loss? Try this delicious Caramelised Banana Protein Bowl made with Greek yogurt, soaked chia seeds, fresh blueberries, nuts and seeds.

It is creamy, naturally sweet, crunchy and super easy to prepare

🥣 Ingredients

  • 150 g Greek yogurt
  • 10 g chia seeds, soaked
  • 50 g red banana, sliced
  • ½ tbsp cinnamon powder
  • ½ tbsp honey
  • 20 g blueberries
  • 5 g sunflower seeds
  • 5 g pumpkin seeds
  • 4 almonds, chopped

👩‍🍳 How to Make Caramelised Banana Protein Bowl

1. Soak the Chia Seeds

Soak 10 g chia seeds in a little water for 15–20 minutes, or until they become soft and gel-like.

2. Make the Caramelised Banana 🍌

Heat a pan on low flame. Add sliced banana, honey and cinnamon powder.

Cook for 2–3 minutes, gently mixing until the banana becomes soft and lightly caramelised.

3. Prepare the Protein Base 🥣

Add Greek yogurt to a bowl and mix in the soaked chia seeds.

4. Build Your Bowl ✨

Add the warm caramelised banana and fresh blueberries over the Greek yogurt.

5. Add the Crunch 🌻

Top with chopped almonds, sunflower seeds and pumpkin seeds.

💚 Why You’ll Love This Healthy Breakfast

  • High in protein
  • Contains healthy fats and seeds
  • Chia seeds provide fibre
  • Naturally sweet and satisfying
  • Quick and easy to prepare
  • Great option for a weight-loss breakfast
  • No complicated cooking required

🌟 Easy Tip

For a lower-calorie version, reduce the honey or skip it if your banana is naturally sweet enough.

Creamy Greek yogurt + caramelised banana + soaked chia seeds + crunchy nuts and seeds = a delicious high-protein breakfast bowl!

Your creamy, crunchy and protein-rich bowl is ready to enjoy! 💛

Perfect for busy mornings when you want a quick, filling and nutritious breakfast without spending much time in the kitchen.

https://www.instagram.com/reel/Dc3EhB4T4-Y/?stkn=N2hnajdseGZrOHN2

How to Make High-Protein Mutter Paneer Cheela Wrap

Mutter Paneer Chilla Wrap A healthy and filling roll made with a peas & paneer wrap, crunchy vegetables, and your choice of sauce.

Ingredients of Mutter Paneer Chilla Wrap

For the Mutter Paneer Chilla Wrap

  • Green peas – boiled
  • Paneer
  • Besan – for binding
  • Ginger
  • Green chilli
  • Cumin powder
  • Red chilli powder
  • Black pepper
  • Chaat masala
  • Salt
  • Water, as required

For the Vegetable Filling

  • Cabbage – finely shredded
  • Carrot – grated
  • Capsicum – thinly sliced
  • Onion – thinly sliced
  • Black pepper
  • Chaat masala
  • Lemon juice
  • Salt

For the Sauce – Choose Any One

Option 1: Homemade Yogurt Sauce

  • Thick hung curd/Greek yogurt
  • Grated garlic
  • Coriander or mint
  • Chilli flakes
  • Black pepper
  • Lemon juice
  • Salt

Option 2: Ready-Made Sauce

  • Mint chutney
  • Green chutney
  • Chilli-garlic sauce
  • Sandwich sauce

Option 3: Mayonnaise

  • Regular mayonnaise
  • Light mayonnaise
  • Eggless mayonnaise

Method to Make Mutter Paneer Chilla Wrap at Home

1. Make the wrap batter
Blend boiled peas, paneer, ginger and green chilli into a smooth paste. Add besan, cumin powder, red chilli powder, black pepper, chaat masala and salt. Mix into a thick, spreadable batter.

2. Cook the wrap
Heat a non-stick tawa and lightly grease it. Spread the batter thinly like a cheela. Cook until golden and easy to release. Flip and cook the other side.

3. Prepare the vegetables
Mix cabbage, carrot, capsicum and onion with black pepper, chaat masala, lemon juice and salt. Keep them crunchy.

4. Assemble
Place the Mutter Paneer wrap on a plate. Spread your chosen sauce over it. Add the crunchy vegetables and roll tightly.

5. Make it crisp
Toast the roll on a tawa from both sides until lightly golden and crisp.

💡 Advanced Prep

The Mutter Paneer batter and homemade sauce can be prepared in advance and refrigerated. Keep the vegetables separately and assemble the roll fresh.

https://www.instagram.com/reel/DcskxPsCM9j/?igsi=a25rdWFhN2U4cWZk

Suji–Rice Idli Sandwich

Crispy Layered Suji–Rice Idli Sandwich

A healthy twist on classic idli, layered with spicy vegetable potato masala and finished on the tawa for a delicious crispy texture.

Ingredients

For the Suji–Rice Idli Batter

  • 1 cup suji/rava
  • ½ cup cooked rice
  • ½ cup yogurt
  • Water as required
  • Salt to taste
  • ½ tsp Eno

For the Potato Masala

  • 2 boiled potatoes, mashed
  • 1 onion, finely chopped
  • 1 carrot, grated
  • ½ capsicum, finely chopped
  • 1 green chilli, finely chopped
  • Fresh coriander, chopped
  • ½ tsp mustard seeds
  • ½ tsp cumin seeds
  • Curry leaves
  • ¼ tsp turmeric
  • ½ tsp red chilli powder
  • ½ tsp coriander powder
  • ½ tsp garam masala
  • Salt to taste
  • 1 tsp oil

Method

  1. Prepare the batter: Blend cooked rice, yogurt and a little water until smooth. Mix with suji and salt. Add water as required to make a thick but pourable batter. Rest for 15–20 minutes.
  2. Prepare the potato masala: Heat 1 tsp oil. Add mustard seeds, cumin seeds and curry leaves. Once they crackle, add onion, green chilli, carrot and capsicum. Sauté until slightly soft.
  3. Add turmeric, red chilli powder, coriander powder, garam masala and salt. Add mashed potatoes and mix well. Finish with fresh coriander.
  4. Add Eno: Just before steaming, add ½ tsp Eno to the prepared batter. Sprinkle 1–2 tsp water over it and gently mix in one direction. Do not overmix.
  5. First layer: Grease a round steel plate/thali that fits inside your steamer. Pour half of the batter onto the plate and spread evenly.
  6. Steam for 5–7 minutes, just until the first layer is set.
  7. Add the filling: Carefully spread the potato masala evenly over the steamed first layer.
  8. Second layer: Pour the remaining batter over the potato masala and gently spread it to completely cover the filling.
  9. Steam again for 10–12 minutes, or until the top layer is fully cooked.
  10. Allow it to rest for 5 minutes, then carefully remove it from the plate and cut into squares or wedges.

Make It Crispy

  1. Heat a non-stick tawa and lightly brush it with oil.
  2. Place the idli sandwich pieces on the tawa.
  3. Cook on medium-low heat for 2–3 minutes until golden and crisp underneath.
  4. Flip carefully and crisp the other side.
  5. For extra crunch, sprinkle a few sesame seeds on the tawa before placing the idli pieces.

Serve hot with mint-coriander chutney, tomato chutney or a yogurt dip.

Tip: If you are making two layers, add Eno to the batter immediately before starting the steaming process so the batter stays light and fluffy.

https://www.instagram.com/reel/DZ2tbAojMV5/?igsi=MTV2N2hkd24zZjF3ZQ==