Healthy Recipes

All healthy recipes are under this category. Try at your convenience.

Healthy eating means eating a variety of foods that give you the nutrients you need to maintain your health, feel good, and have energy.


These nutrients include protein, carbohydrates, fat, water, vitamins, and minerals. A healthy diet is essential for good health and nutrition.

It protects you against many chronic non-communicable diseases, such as heart disease, diabetes, and cancer. It can also boost a person’s mood and provide them with more energy.


A doctor or dietitian can provide tips on eating a more healthful diet.  If you take care of yourself, you can keep your cholesterol and blood pressure within a safe range.

This keeps your blood flowing smoothly, decreasing your risk of cardiovascular diseases.


Eating a variety of foods and consuming less salt, sugars, and saturated and industrially-produced trans-fats, are essential for a healthy diet

Healthy  Recipes foods nourish us with vitamins, minerals, protein, fiber, and healthy fat.


So, healthy recipes are made up of vegetables, fruits, whole grains, lean meats, legumes, low-fat or fat-free dairy, and healthy fats.

It’s a combination of these foods that give us the most nutritional bang for our caloric buck. Nutrition is important for everyone.


When combined with being physically active and maintaining a healthy weight, eating well is an excellent way to help your body stay strong and healthy.


Having foods & drink that are high in fat, sugar & salt have these often & in small amounts.

Nutritious recipes can include butter and sugar, just like healthy meals can include an indulgent dessert—

it’s all about moderation and the big picture.


makki ki roti

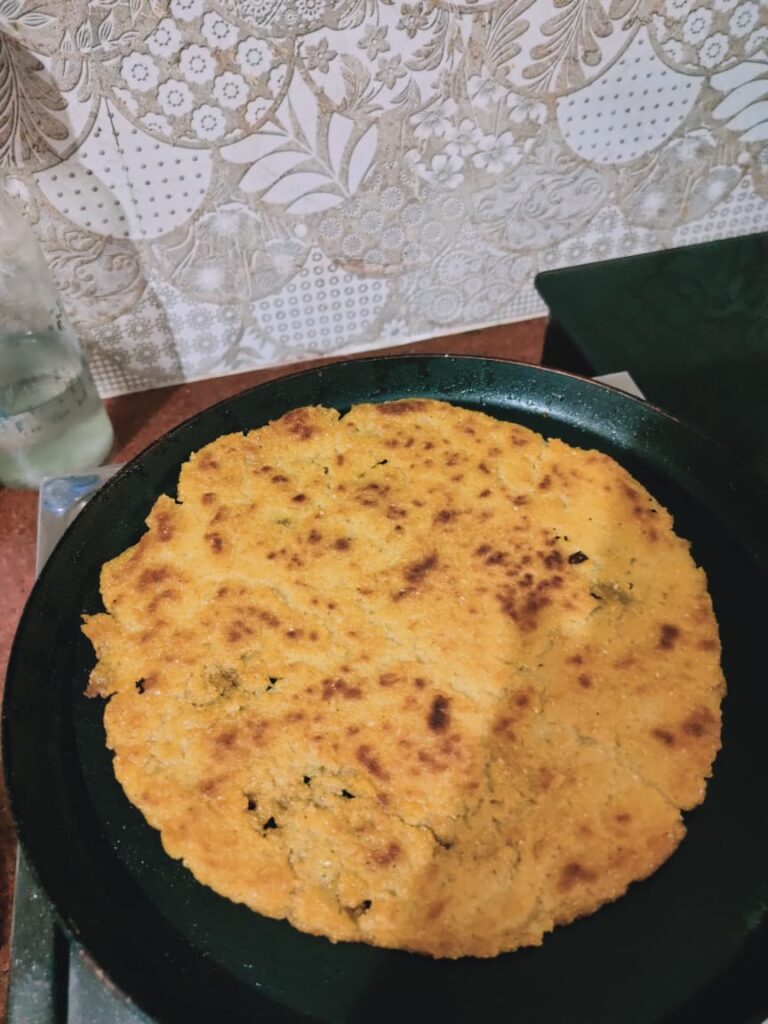
Makki Di Roti Recipe

Makki di roti or chapati or flatbread is one of the most comforting food items of winters. Makki roti goes best with sarso ka saag. As you might have heard the common phrase “sarson da saag te makki ki roti”. Many people are fond of this combination. And many even like to eat this combination with a piece of jaggery. Well just the thought of this combination makes us craves for it.

Makki or maize flour is one of the millets and it is highly nutritious. It is a good source of complex carbohydrates and fiber. It also contains good amount of vitamin C. Makki flour is rich is proteins and low in fats. It also is a source of B vitamins.

Makki can be easily incorporated in diets and the easiest way to do that is to make rotis or chapatis out of it. You can add methi or bathua or spinach (palak) to the flour and make a higly nutritious chapati. Many people also like to add potatoes to the flour and making a thick chapati or a parantha. You can also have makki ki roti along with your morning cup of tea for a wholesome breakfast.

You can make dhokla of maize flour and even can make nachos at home using maize flour. Do you know you can also make healthy con sev puris by using maize flour? Well, it really tastes amazing.

For this recipe, we will be using fenugreek leaves along with makki to make chapatis. You can use bathua leaves or spinach leaves as per your taste or availability.

Let’s dig into the recipe:

Preparation time: 5 minutes

Cooking time: 10 minutes

Total time: 15 minutes

Serving: 8-10 chapatis

Makki di roti without sarson ka saag is a miss! Try out this amazing recipe of Sarson ka saag to club with makki di roti!

Ingredients to make Makki ki roti:

Makki flour: 2 cups

Fenugreek leaves: ½ cup

Salt: as needed

Makki flour for rolling

Method of preparation:

makki di roti1
  • Firstly, to make makki di roti, combine makki flour and methi (fenugreek) leaves and salt. Add warm water and knead a firm dough. Then, cover the dough with a cloth or plate and leave for about 30 minutes.
  • Secondly, divide the dough into equal portions and roll them by using a roller into a circle. If the dough sticks, apply little makki flour for rolling.
  • Thirdly, heat a non-stick pan on medium flame and place the chapati. Cook it from both the sides and then on open flame till it puffs and becomes brown.

Finally your makki di roti is ready. Serve hot with sarson ka saag or chutney!

If you are struggling shedding weight. You can talk to us by taking this assessment: Click here

For more information click here

Makki Di Roti Recipe Read More »

Low Carb/Low Fat Gajar ka halwa

Low Carb/Low Fat Gajar ka halwa

Do you know why winters are our favorite season? Well, you guessed it right. It is all because of gajar ka halwa. How about we present to you a Low Carb/Low Fat Gajar ka halwa version. Winters and gajar ka halwa go hand in hand. It surely takes some time to make but the flavor, the aroma, the taste is surely worth the wait.

The best part about gajar ka halwa is that it is not only tasty but it is highly nutritious as well. The main component of the halwa are carrots and milk. And all of us know, how nutritious these two ingredients are.

Carrots:

Carrots be it of any color (orange or red) are loaded with nutrients. You must have heard that carrots are a rich source of vitamin A. They are not only rich in vitamin A but also a good source of fiber. Carrots also contain potassium, vitamin C and manganese.

Grated Carrots

During winters, we get really fresh carrots that can be easily incorporated in diet. For instance, you can make carrot stuffed paranthe, carrot cake, carrot kheer, carrot and methi sabzi and above all, you can have gajar ka halwa. You can also have carrots in salads. They have a rich red color which makes them more appealing.

On the other hand, we all know that milk is an amazing source of protein. No only protein, it is also rich in calcium. Do you know that 1 glass of milk, i.e., 250 ml gives you around 8g of proteins? Isn’t it great!

So now, when you mix these two amazing sources of nutrients together, you get the most ever tasty combination of all times. And that is, “gajar ka halwa”. Well, by now, you must have guessed that I really love gajar ka halwa.

The best thing about this halwa is that you don’t need sugar. You can make this without sugar and the sweetness will come from carrots and milk. So yes, it is also diabetic friendly. If you want, you can add stevia or erythritol to it.

There are 2 ways to make this halwa. You can make it in a pressure cooker to make it quick. Or you can use a pot to slow cook it. In this recipe, we will be making a quick gajar ka halwa.

Let’s dig into the recipe

Preparation time: 10 minutes

Cooking time: 10 minutes

Total time: 20 minutes

Serving: 2

Ingredients to make Gajar ka halwa:

Carrot: 2 cups grated

Milk: 1.5 cups

Ghee: 1 tablespoon

Sweetener (optional): Stevia/Erythritol/Monk fruit extract/Xylitol

Elaichi (cardamom) powder: ¼ tsp

Almonds and cashew-nuts: for garnishing (can also add raisins)

Also learn how to make peanut chikki this winter!

Method of preparation:

  • Firstly, to make gajar ka halwa in a pressure cooker, heat the ghee and add grated carrots to it. Sauté for a minute on medium flame. Make sure to stir continuously.
  • Secondly, add milk to the cooker and cover it with the lid. Let it cook for 1 whistle.
  • Thirdly, open the lid after the steam passes. Add ealichi powder and the sweetener (optional). Now, mix all the ingredients well. And cook for about 4 minutes on high flame. Make sure to stir continuously otherwise it might get burnt.

And your quick low carb/low fat gajar ka halwa is ready. Serve it hot with garnished almonds and cashew-nuts!

If you are struggling shedding weight. You can talk to us by taking this assessment: Click here

For more information click here

Low Carb/Low Fat Gajar ka halwa Read More »

Roti wrap

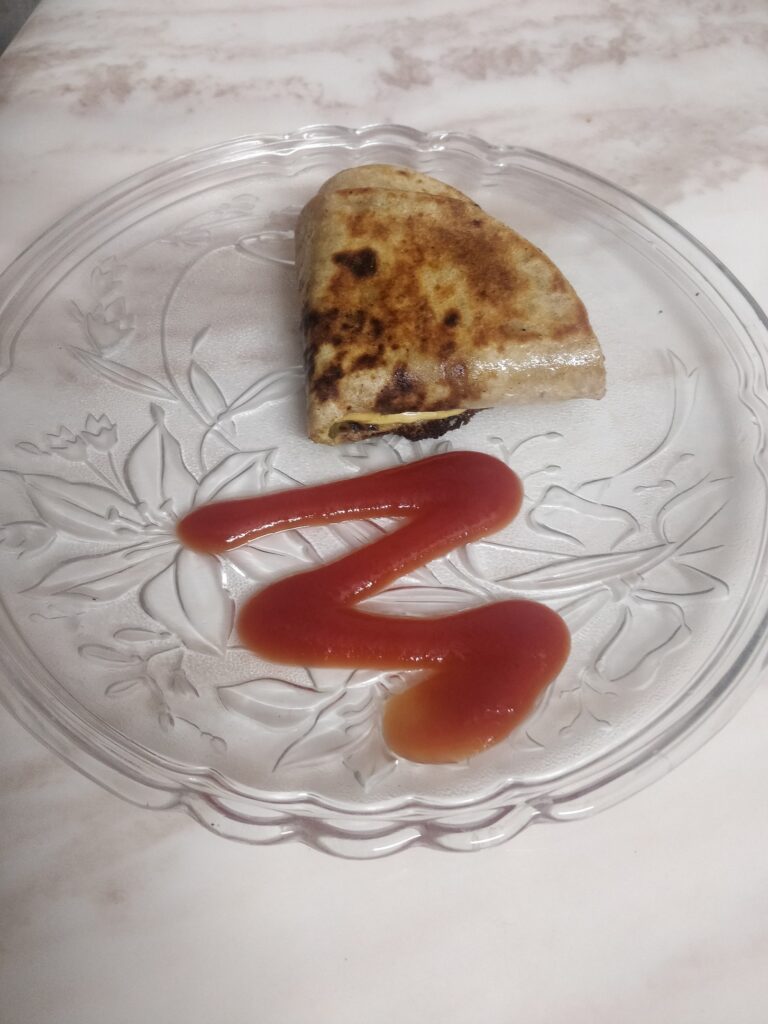
How to make viral four ways roti/tortilla wrap?

Everyone loves wraps and rolls. Especially kids, they are their favorites. You can make this viral four ways roti/tortilla wrap for their breakfast or packed lunch which they will surely enjoy. They all are easy to make and really delicious at the same time. 

This four way wrap is versatile, delicious and also nutritious. This wrap became viral through social media across the whole world during the lockdown. It involves making a roti/tortilla wrap by using a quartering and folding technique to divide the roti into four, placing a different filling of your choice in each section. 

For fillings, you can use your own imagination and choose from any number of fillings such as paneer, vegetables, dips, cheese, and sauces. 

You can also try this viral dish with Paranthas instead of a simple roti or tortilla wrap.

For this recipe, we used paneer, cucumber, onion, lettuce leaves along with tomato sauce and some sprinkles of cheese on the top of veggies.

This mesmerizing tortilla/roti wrap works with all the things, and the wide variety of filling options. With this wrap hack, you can create anything of your taste just in a matter of minutes. 

Let’s dig into the recipe!

Preparation time: 10 minutes

Cooking time: 8-10 minutes

Total time: 18-20 minutes

Serving: 1

Ingredients for Four-way roti/tortilla wrap:

Roti/tortilla/paratha-1

Paneer slices- 5-6

Cucumber slices- 3-4

Onion slices- 3-4

Lettuce leaves- 2-3

Cheese- 1 slice

Oil/butter- 1 tsp

Tomato sauce/ketchup-1 tsp

Mint chutney-1 tsp

Method to prepare viral four ways roti/tortilla:

If you are struggling shedding weight. You can talk to us by taking this assessment: Click here

  1. Firstly, prepare all the ingredients you will use in the wrap. 
  2. Secondly, cut the roti/tortilla/paratha from the middle of the tortilla to the bottom edge down using a knife or pizza cutter.
  1. Now, starting at the bottom left quadrant, place paneer slices to the left quadrant.
  2. To the top left quadrant, add lettuce and chopped onions slices.
  3. On the top right quadrant, spread some tomato ketchup and add cucumber slices in it.
  1. Then, on the last quadrant, spread some mint chutney and then top it with a cheese slice.
  2. Next, fold the wrap, starting from the bottom left quarter to up, to right, to bottom right; just keep folding until you get a triangle.

  1. Lastly, heat a pan/grill over medium heat, and add some butter and spread it. Now, grill the tortilla from both sides, until they are crispy and the cheese melts for 2-3 minutes per side.
  2. Finally, serve this wrap filled with the goodness with chutney of your choice.

For more information click here

How to make viral four ways roti/tortilla wrap? Read More »

Pizza paratha

How to make Pizza paratha?

Pizza is one of everyone’s favorite dishes. A hot, cheesy pizza loaded with your favorite veggies is one of the most fun to eat with your loved ones. Pizza paratha is one that is going to be everyone’s favorite.

But who would have thought that pizza can be made into delicious and nutritious paratha. Yes, you heard it right. These parathas are innovative dishes which can easily replace your monotonous plain or simple stuffed paratha or chapati. The plus point of pizza parathas does not only satisfy your paratha cravings, but also fully satisfies your pizza cravings.

The aroma and taste of this pizza paratha is amazingly good. For the stuffing of this pizza paratha, I used capsicum, onion, cabbage, carrot and corn. You can also customize the vegetables for your paratha as per your choice or whatever you have in your fridge at that time. Also, you can easily make this paratha for your kids. They are loved equally by kids, adults and elderly.

This paratha is stuffed with varieties of vegetables and also topped with cheese and served hot to enjoy its sizzling taste. This is a healthy twist to the usual pizza.

So, let’s look into its recipe!

Preparation time: 10 minutes

Cooking time: 10 minutes

Total time: 20 minutes 

Serving: 3-4

Ingredients for Pizza paratha: 

  • 2 cups wheat flour
  • 1 tsp oil
  • salt to taste
  • Onion, chopped-1/4 cup 
  • Capsicum, chopped-1/4 cup
  • Steamed corn-1/4 cup
  • Carrot-1/4 cup
  • Cabbage-1/4 cup
  • Oregano- 1 tsp
  • Chilli flakes-1 tsp
  • Salt to taste
  • Pizza sauce/ Tomato-garlic chutney-2 tbsp
  • Grated cheese-1/2 cup
  • Oil – 4 tsp

Method of preparation: 

  1. Firstly, in a mixing bowl, add wheat flour, salt and mix it. Then, start adding water little by little, and knead the dough slowly with your hands. Once it becomes soft, then add 1 tsp oil and knead it again.
  2. Next, make the dough not be too tight or too loose and it should be non sticky.
  3. To another mixing bowl, add all the vegetables, oregano, chilli flakes and salt to it and set aside for a few minutes. 
  4. Now, make 2 balls of the dough and roll them both dough thin.
  5. Next, spread pizza sauce or tomato-garlic chutney on one paratha and sprinkle some cheese on it. Then, add the veggies filling on the paratha and again sprinkle some cheese to cover the filling and place another paratha on it and seal the edges by pressing the edges. 
  6. Heat your tawa and carefully place the paratha on the tawa. Put some oil on the paratha and cook on both the sides until golden brown. 
  7. Finally, cut your paratha into wedges and serve it hot.

If you are struggling shedding weight. You can talk to us by taking this assessment: Click here

For more information click here       

How to make Pizza paratha? Read More »

bajra khichdi

How to make bajra khichdi at home

Bajra is one of the most commonly available millet in India. It is also one of the staples of Rajasthan and Haryana. You might have heard about bajra khichdi when you visit these states. Hence, Bajra Khichdi can be easy at home recipe for you.

In winters, bajra khichdi provides not only warmth but also nutrition. Do you know that bajra is a millet that is rich in many nutrients? It is really healthy and is loaded with nutrients as well.

Bajra is a good source of magnesium and potassium. It is said to be heart healthy. Furthermore, it is suggested by studies that bajra may have a cholesterol lowering effect. That is, it might be helpful in reducing LDL and increasing HDL. Moreover, it might help in reducing the overall cholesterol and help in managing lipid profile.

With such great benefits of bajra, it is really wise to include it in your daily diet. And the best news is, that it can be easily incorporated in you diet. You must have heard about bajra chapatis, soups and more.

This recipe is easy to make and really very comforting during cold weather. You can serve it with some curry or as I prefer to have it with kadhi. Also, can add your favorite vegetables to it.

Let’s start with the recipe.

Soaking time: 7-8 hours

Preparation time: 5 minutes

Cooking time: 20 minutes

Total time: 8 hours 5 minutes

Serving: 3-4

Learn how to make easy bajra soup at home!

Ingredients to make Bajra Khichdi:

Bajra: ½ cup (Soaked for 7-8 hours)

Moong dal (yellow): ½ cup (wash and drained)

Salt: as required

Ghee: 1 tbsp

Cumin seeds: 1 tsp

Hing (asafetida): ½ tsp

Turmeric powder: ½ tsp

Method of preparation:

  • Firstly, take a pressure cooker and place it on medium flame. To it add soaked bajra and drained moong dal. Add salt and around 1.5-2 cups of water.
  • Secondly, mix all the ingredients well, and cover the lid of the cooker and cook it till 4 whistles.
  • Now, to make tadka, in a pan add ghee, cumin seeds and hing. Let the seeds crackle and change their color to dark brown. (You can add tomato and onions too in this tadka).
  • Then, add this tadka to the bajra-moong khichdi. Stir continuously and cook for another 2-3 minutes.

Your bajra khichdi is ready to serve.

If you are struggling shedding weight. You can talk to us by taking this assessment: Click here

For more information click here       

How to make bajra khichdi at home Read More »

Broccoli soup

How to make Broccoli soup at home?

Soups are the best comfort foods in winter days. They give us warmth in cold winters. These soups can be prepared in less than thirty minutes and ready for us to enjoy their warmth and deliciousness. So here is Broccoli soup for you today.

Broccoli soup is green colored soup along with the sauteed onions and carrot. Broccoli is a great way to add iron in your diet and this soup is the perfect way to do that. It has a smooth and creamy texture, mouth-watering taste and fills your stomach.

Moreover, broccoli has anti-inflammatory properties and helps in protecting blood vessels from damaging as well.  It is a good carb and is high in fiber, which aids in digestion, prevents constipation, maintains low blood sugar, and curbs overeating. 

Along with all these benefits, broccoli is also great for weight loss because it is rich in fiber. So, what are you waiting for, let’s start with the recipe.

Preparation time: 10 minutes

Cooking time: 20 minutes 

Total time: 30 minutes

Serving: 3-4

Ingredients for broccoli soup:

Broccoli- 1 floret

Onion, chopped- 1

Carrot, chopped-1

Salt, as per taste

Oregano- 1/4 tsp

Black pepper, as per taste

Milk- 1/2 cup

All purpose flour-2 tbsp

Olive oil-1 tbsp

Method of preparation:

  1. Firstly, fill a pan with 3 to 3½ cups of water and add in 1/4 tsp of salt in it.
  2. Next, boil the water and after boiling, turn off the heat and add in chopped broccoli florets. Stir the water so the broccoli florets are immersed in water.
  3. Now, blanch the broccoli for 15 to 20 seconds and then drain all the water and set aside the broccoli florets.
  4.  Now, heat1 tbsp of olive oil in the same pan or pot you blanched your broccoli in and add chopped onions and carrot. And saute them until they soften.
  5. Next, add 2 tbsp of all-purpose flour to the mixture and continue to saute for 2 to 3 minutes on low heat.
  6. Now, it’s time to add the blanched broccoli to the soup mixture and mix everything well.
  7. Next, add 1 ½ cups of water or vegetable stock, and stir to mix it well and after stirring, cover the pan with a lid and let it cook about 6 to 7 minutes on low heat.

Tip: Don’t forget to check occasionally. When the broccoli becomes tender, turn the heat off and let it cool down for 1-2 minutes.

  1. When the soup mixture is still slightly hot or warm, use a hand blender to blend the soup until the texture is smooth.
  2. After blending is done, add slightly hot milk to the pureed soup and mix it thoroughly. 
  3. Now, keep your pan on the stovetop and simmer the soup on a low heat.
  4. Next, add oregano or your choice of dried or fresh herbs and gently heat soup (do not boil) and stir it sometimes.
  5. Lastly, add salt and black pepper and mix it into the soup.
  6. Finally, pour the hot soup into serving bowls and garnish with broccoli florets.

If you are struggling shedding weight. You can talk to us by taking this assessment: Click here

For more information click here       

How to make Broccoli soup at home? Read More »

mushroom onion soup

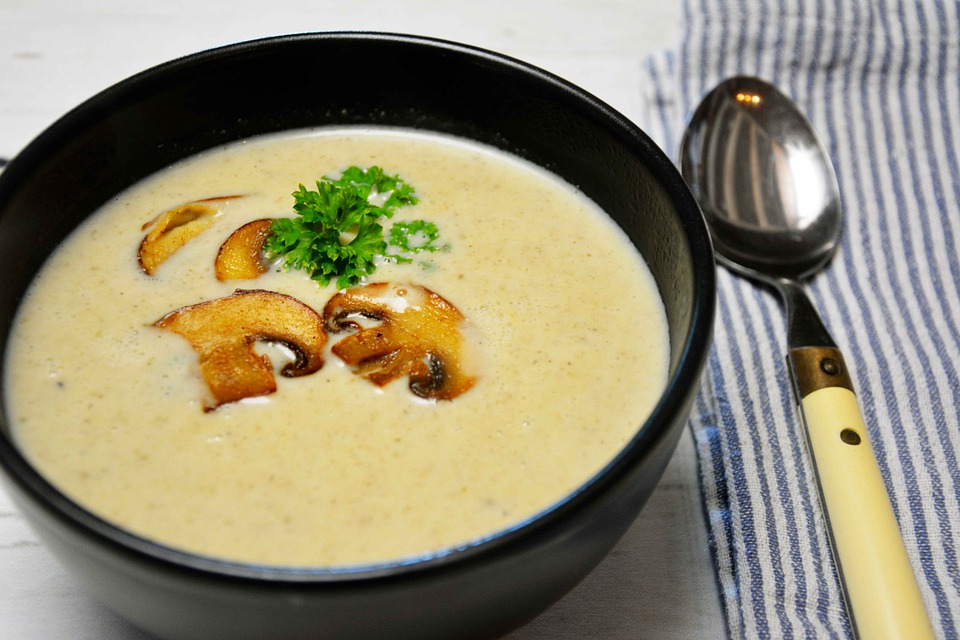
Easy to make Mushroom onion soup at home

Soups are not only comforting but also tasty. On a winter day, all you need is a perfect bowl of soup that gives you warmth. There are many varieties of soups, but one of our favorite soup is mushroom and onion soup. Mushrooms and onions go really well together. And do you know, that mushrooms are a really good source of potassium?

Well, one can really never go wrong with this combination. And this soup is not only full-filling, but also nutritious. We have used whole wheat flour here, along with milk.

For vegetable stock, you can use your choice of vegetables such as bottle gourd, pumpkin, cabbage or beans.

It is an easy to make recipe that doesn’t take a lot of time.

Let’s get started with the recipe.

Serving: 2-3

Ingredients to make mushroom onion soup:

Mushrooms: 1 cup (sliced)

Onion: 1 big (chopped)

Olive oil- 2 tablespoons

Salt: as required

Black pepper: ½ tsp

Red paprika- ¼ tsp

Vegetable stock: 1 cup

Whole wheat flour: 2 tablespoons

Milk: 2 cups

Lemon juice: 2 tablespoons (optional)

Also learn how to make Broccoli soup at home!

Method of preparation:

  • Firstly, on a stove take a pan and add olive oil to it. Now, to this, add chopped onions. Cook the onions until golden brown.
  • Secondly, Add a few tablespoons of water to it and cook the onions until they caramelize.
  • Now, add mushroom, paprika, salt and black pepper to the pan. Lower the flame and sauté all the ingredients.
  • Add the vegetable stock and cover the pan with a lid. Let the ingredients cook properly.
  • Now, in a separate pan, add 1 tablespoon of olive oil. To this add the wheat flour and mix it with oil to make a paste. Add milk to the mixture. Constantly stir the mixture and cook it until the sauce thickens.
  • Finally, Once the sauce is thick with no lumps, add it to the mushroom mixture. Stir well and let it cook for about 1 minute.

Squeeze few drops of lemon and serve the soup hot!

Tip: if you don’t have olive oil, you can also use butter.

If you are struggling shedding weight. You can talk to us by taking this assessment: Click here

For more information click here       

Easy to make Mushroom onion soup at home Read More »

chicken biryani

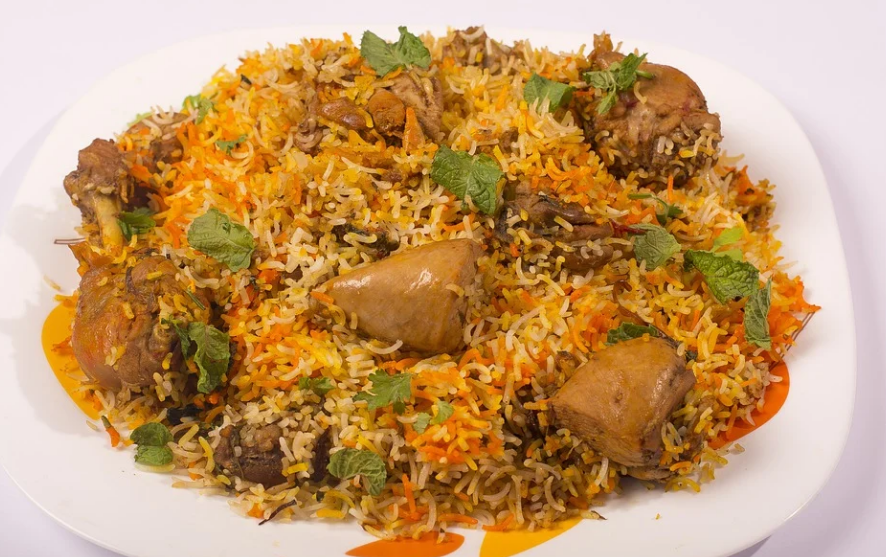
How to make Chicken Biryani at home

Chicken biryani is a dish that is loved by all. It is not only cherished by children, but also by adults. The flavor, the aroma, the texture, everything about this dish is special and amazing. I think that you can never go wrong with chicken biryani. It’s healthy, full of proteins and above all, it tastes so good.

Chicken biryani is like a comfort food. If you dine out, chicken biryani is a must, isn’t it? But do you know, that it is really easy to cook chicken biryani at home as well? And a bonus, you can also add your favorite ingredients as per your choice and your taste.

It might take some time to cook, but the result is worth the wait and preparation. And, the aroma of biryani is too good to miss. So next time, try this super easy recipe of chicken biryani at home when you crave for it!

Let’s get started with the super-delicious recipe of chicken biryani.

Serving- 5

Ingredients to make chicken biryani:

Chicken- 500 grams

Basmati rice- 1 cup

Hung curd- 1 cup

Mint leaves- ½ tsp

Coriander leaves- ½ tsp

Oil- 2 tbs

Salt- as required

Garam masala- 1 tbs

Turmeric- 1 tbs

Chili powder- 1 tbs

Bay leaf- t-2

Ginger garlic paste- 1.5 tbs

Cardamom-3 green

Cloves- 3-4

Cumin (jeera) seed- 1 tsp

Onion- 2 big (chopped)

Water- as required

Saffron- 1 tsp

Learn how to make Cuban roast chicken!

Method of preparation:

  • Firstly, marinate the chicken. To marinate the chicken, in a bowl, take chicken (500g). Make few slits.
  • Then to this add hung curd, garam masala (you can also use biryani masala), ginger garlic paste, salt, chili powder, and turmeric. If you like you can also add 1 tablespoon of lemon juice to this mixture.
  • Mix all the ingredients well and marinate the chicken. Make sure to cover all the sides of the chicken. Cover the bowl with a lid and keep it aside for 1 hour.
  • Meanwhile, rinse and drain 1 cup of basmati rice. Rinse it properly with water for about 2-3 times. Then, add fresh water to the rice and set it aside for about 30 minutes. After 30 minutes, drain the rice and keep aside.

How to cook chicken biryani:

  • Now, to cook the chicken, take a heavy-bottom pot or pressure cooker. Place it on stove and heat oil or ghee. To the ghee, add all the whole spices.
  • Then, to this add finely chopped onions. Cook them on medium flame, until golden brown.
  • Furthermore, add the marinated chicken to the cooker and sauté it for about 5 minutes.
  • When the chicken turns pale, turn the flame to low. Cover the cooker with a lid and cook the chicken until it is soft and completely cooked.
  • Check if the chicken is completely cooked with the help of a knife. Now, remove the lid from the cooker, and evaporate excess moisture.
  • Once the moisture is evaporated, add curd, garam masala, mint leaves, coriander leaves and salt. You can adjust the spices according to your taste. Mix well
  • Now, add the drained rice to the cooker and spread above the chicken. Further, add water to the cooker from the sides. (use about 3 cups of water).
  • To this, add fried onions and saffron. Do not mix everything. Let is cook slowly. Cover the lid of the cooker and cook it till 1 whistle. Check if the rice is cooked completely. If done, let it rest for about 15 minutes.

(If you’re cooking in a pot, let the biryani cook until the rice is cooked)

And your chicken biryani is ready! Serve it either with mint-coriander chutney or any other chutney that you like.

If you are struggling shedding weight. You can talk to us by taking this assessment: Click here

For more information click here       

How to make Chicken Biryani at home Read More »

Almond oats cookies

Almond oats cookies- guide to make the same at home?

Dessert is everyone’s favorite and these delicious, healthy cookies are here to prove it.  Almond oats cookies are which are full of flavors and filled with healthy goodness. They have a crispy outer layer and a very soft inside, and they just melt in your mouth.

This recipe is easy to bake and can be adjusted to everyone’s sweet tooth. These cookies are incredibly mouth-watering; and loved by everyone alike. You can enjoy the goodness of these healthy cookies in your tea time with your loved ones. 

These healthy cookies can be your comfort food instead of the instant snacks you buy from grocery shops. These cookies will not only satiate your cravings but will make you feel good about yourself. 

These buttery and crunchy cookies made with oats and almond flour are something we all love and are obsessed with. 

We are spilling the secret to our scrumptiously simple yet healthy cookies. Whether you’re on a diet or looking for a more nutritious way to indulge in some sweets, here is a recipe for you to enjoy in moderation.

Looking for more deserts made of oats. Then you are at the perfect place. Oats and orange rabri, Overnight Oats bowl

So, let’s start with the recipe.

Preparation time: 15 minutes

Cooking time: 15 minutes

Total time: 25 minutes

Ingredients for Oats-Almond cookies:

Oats flour-1 cup

Almond flour- 1/2 cup

Cream-2 tbsp

Butter-1 small cube

Sugar- 1/4 cup

Baking powder – 1 pinch

Method of preparation:

  1. Firstly, preheat the oven at 180 C or 375 F for 15 minutes.
  2. While the oven is getting ready, mix oats flour with almond flour. 
  3. Now, add 2 tablespoons of cream, butter and also sugar to the flour mix to make a smooth dough. 
  4. After mixing well, add 1 pinch of baking powder in the mix.

Tip: In addition, if you are an eggetarian, you can add 1 egg too, else use baking powder for baking. Also, you can add zero carb Choco chips too. 

  1. Now, make small balls from the cookie dough and keep them on the baking tray and place it inside the oven.
  2. Lastly, bake them in the oven for 15 minutes. 
  3. Finally, your healthy cookies are ready!

Tip: Remember not to add too much butter to the mix. Let’s keep it low carb and low fat.

If you are struggling shedding weight. You can talk to us by taking this assessment: Click here

For more information click here       

Almond oats cookies- guide to make the same at home? Read More »

vegetable paneer oats

How to make vegetable paneer oats?

Vegetable paneer oats is an easy to make recipe. It is also a healthy, tasty and a perfect dish to start your day with. 

Have you ever tried oats with paneer and vegetables? Well, you may have tried the normal packet oats with instant masala. But this is much better than that. Adding paneer with vegetables is a plus as we all know that everything with paneer is delicious and the same goes for this recipe as well. 

Oats are one of the healthiest breakfast cereal. It is packed with omega-3, magnesium, protein, potassium and dietary fibre which is really good for your digestion and provides your stomach with satiety.

In addition, paneer is everyone’s favorite. It is also a good source of calcium and protein and has a smooth milky flavor. I assure you that you will love this dish with all your heart. It is a perfect combination of paneer, oats and vegetables of your choice also. 

So, let’s start with the recipe of this deliciously good dish!

Preparation time: 5 minutes

Cooking time: 5 minutes

Total time: 10 minutes

Serving: 1

Ingredients for vegetable paneer oats:

Oats-1 cup

Paneer-8-10 small pieces

Peas- 1 tbsp

Carrot- 1/2

Coriander leaves, for garnishing

Green chilli-1

Salt as per taste

Coriander powder- 1/4 tsp

Oil-1 tsp

Method of Preparation:

  1. Firstly, in a pan, put oil and heat it. 
  2. Now, add vegetables, green chilli and paneer in the pan and also saute them for 1-2 minutes.
  3. Now, add 1 cup of water in the pan and the salt, coriander powder as well and boil for 1 minute.
  4. After boiling for 1 minute, add the oats in the pan and also mix well.
  5. Now, keep stirring the oats till the water has evaporated to avoid any lumps and the oats have cooked nicely.
  6. Finally, serve hot with coriander leaves garnishing.

If you are struggling shedding weight. You can talk to us by taking this assessment: Click here

For more information click here       

How to make vegetable paneer oats? Read More »