Sesame broccoli chickpea recipe is a great lunch or dinner meal option in case if you want to reduce weight. Chickpea is an extremely good and healthy source of vegetarian or vegan protein. And adding broccoli as well as sesame seeds will improve its nutrients and add upto its fibre content as well other trace micronutrients.
Ingredients:
Chickpeas/ kabuli chana – 1 cup
Broccoli florets – 50g
Sesame seeds – 1 tablespoon
Onion finely chopped
Tomatoes finely chopped
Coriander
Lemon Juice – 1 squeeze
salt and pepper
Green chilly ( to taste)
Steps to make the above recipe:
Boil chickpea in a pressure cooker. Make sure to soak them overnight. Once the chickpeas are boiled, we can move ahead with preparing our vegetable mix.
Lets take 1 onion, 1 medium sized tomato and 1 green chilly. Finely chop all of them and mix them in a bowl which has chickpea in it. Make sure to drain excess chickpea water from the boiled chickpeas. You can also use this water later to make chickpea soup.
Add chopped coriander along with lemon juice. Now you can add salt and pepper to taste.
Mix of of this in the bowl and serve immediately for a good wholesome meal.
Salad with asparagus and peas, delicious lemon thyme vinaigrette is blended with fresh, crisp spring veggies. You may add your preferred protein to turn it into a meal or serve it as the ideal side dish for a spring brunch or lunch.Salad made with asparagus is a nutritious vegetarian dish. This healthful recipe, which is created with lettuce and cherry tomatoes, is ideal for school lunches as well as for office workers.The main component in this recipe is fresh asparagus.
Ingredient
1.Asparagus
2.Peas
3.Greens
4.Cilantro
5.Radishes
6.Almonds
7.Goat cheese
8.Extra virgin olive oil
9.White wine vinegar
10.Lemon
11.Thyme
12.Honey
13.Garlic
14.Salt and pepper
How to make Asparagus And Pea Salad
1.Prepare your greens and chop your vegetables-If made ahead, put them in the fridge in an airtight container.
2.All the ingredients for your vinaigrette should be placed in a blender, and they should be blended on high until emulsified. Pour contents into a lidded glass bowl or Mason jar and store in the refrigerator until needed. For 3–4 days, the vinaigrette can be stored in the refrigerator. Before using it, simply shake or stir it because it could solidify a little bit in the refrigerator.
3.Several hours or even a day before serving, blanch your asparagus and peas. Keep chilled until you’re ready to use.
4.Prepare the salad and garnish with the goat cheese, nuts, and vinaigrette.
HOW TO BLANCH ASPARAGUS AND PEAS
1.Bring water in a big pot to a boil. For a further two to three minutes, or until they just begin to get soft, add the asparagus and peas.
2.A big basin should be filled with cold water and plenty of ice to create an ice bath while the asparagus and peas are cooking.
3.Asparagus and peas that have been cooked should be drained and thrown into the ice bath right away. Keep them there until they have totally cooled. By shocking the veggies, the cooking process is stopped, and the vegetables’ brilliant colour and firm texture are preserved.
4.If the ice hasn’t fully melted, remove it from the bath and drain the water before using a paper towel to gently pat the vegetables dry. Until you’re ready to use, keep in the refrigerator in an airtight container.
Peanut Butter Banana Oatmeal combines naturally sweet banana and creamy peanut butter for a filling and satisfying breakfast. This peanut butter banana is excellent because peanut butter and banana are one of the best flavor combinations. This recipe is a fantastic one to try if you’re searching for a nutritious breakfast option to include in your rotation. This breakfast bowl, which is packed with the health of oats, chia seeds, and pumpkin seeds, is the ideal way to start the day. Add tonnes of peanut butter and hazelnut spread, bananas, and crispy almond flakes to it for extra flavor!People enjoy eating a rainbow of colours, which contains a range of vitamins and minerals, so this is a fantastic way to incorporate all of your fruit into one meal. Oats are a very healthy choice for a variety of reasons. The fibre in them may help in good digestion, improve your hair and skin quality, and is an excellent energy booster and keeps your bone health in check.
Ingredients
1.3/4 cup oats
2.1 cup water
3.1/4 cup milk
4.1/2 Ripe banana sliced
5.1 tbsp Peanut butter (heaped)
6.1 tbsp Hazelnut spread (heaped)
7.1 tbsp pumpkin seeds
8.1/2 tbsp Chia seeds
9.1/2 tbsp Almonds flakes
10.Honey (as desired)
How to make Banana Peanut Butter Oat Meal
1.Toast oats in a pan until they turn light brown.
2.Oats are cooked by adding water and cooking them on a medium heat until they get sticky.
3.Cook for an additional few minutes after adding milk.
4.The heated oats porridge should be poured into a bowl, then topped with the banana, peanut butter, hazelnut spread, almonds, and seeds.
5.If desired, add honey to the bowl of oats to taste.
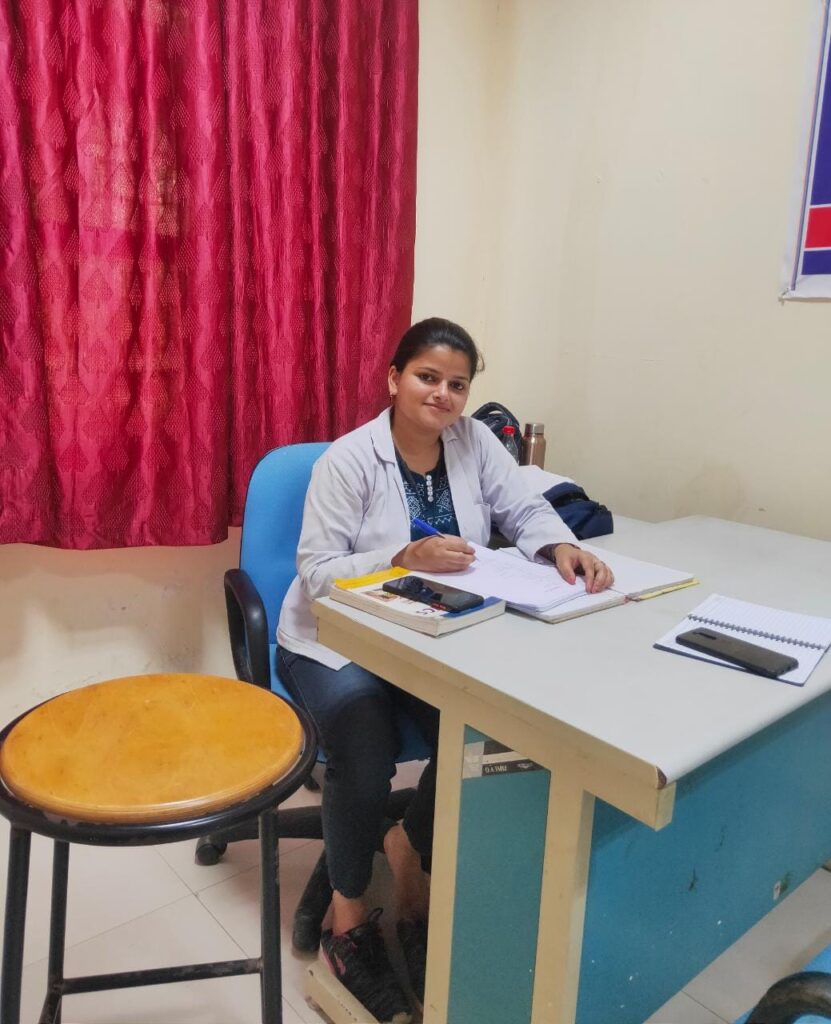
Saumya is a passionate nutrition expert. She has done Master’s in Nutrition science. She has done her internship with Nutrition quest and two months internship at L.L.R. Hospital, Kanpur. She has great passion for health and fitness industry. She wants to spread awareness about a healthy diet and lifestyle. She believes “you are what you eat”. So, she says “if we want to be healthy we have to eat healthily and mindfully”.
Vanshree is a dedicated Clinical Nutritionist who wants to help people live healthier life. She has a post-graduate diploma in Nutrition & Dietetics from symbiosis skills and Professional University, Pune.
She has done her internship at Sayali’s Health & wellness awareness solutions 4 U, Pune.
She believes that good Nutrition is essential to not only lead a healthy life but prevent 95 % of diseases. She has experience in providing Nutrition counseling & meal planning. She is knowledgeable in Nutrition Science, Fitness, and Diet plans and is eager to educate others to make healthy choices. Outside of her Nutrition practice, Vanshree enjoys cooking, reading, blogging, and traveling. She loves trying out new recipes and researching the science behind them.
She believes the right habits play the most crucial role in one’s health and wellness journey. “Losing weight is a game of patience, determination & a never give up attitude”, according to Vanshree Ghanekar. As a Dietitian, she is passionate about people understanding the importance of diet & nutrition in their lives. Also, Nutrition Science can do wonders.
Her Specialisation:
Lifestyle management including weight loss, diabetes, hypertension & obesity
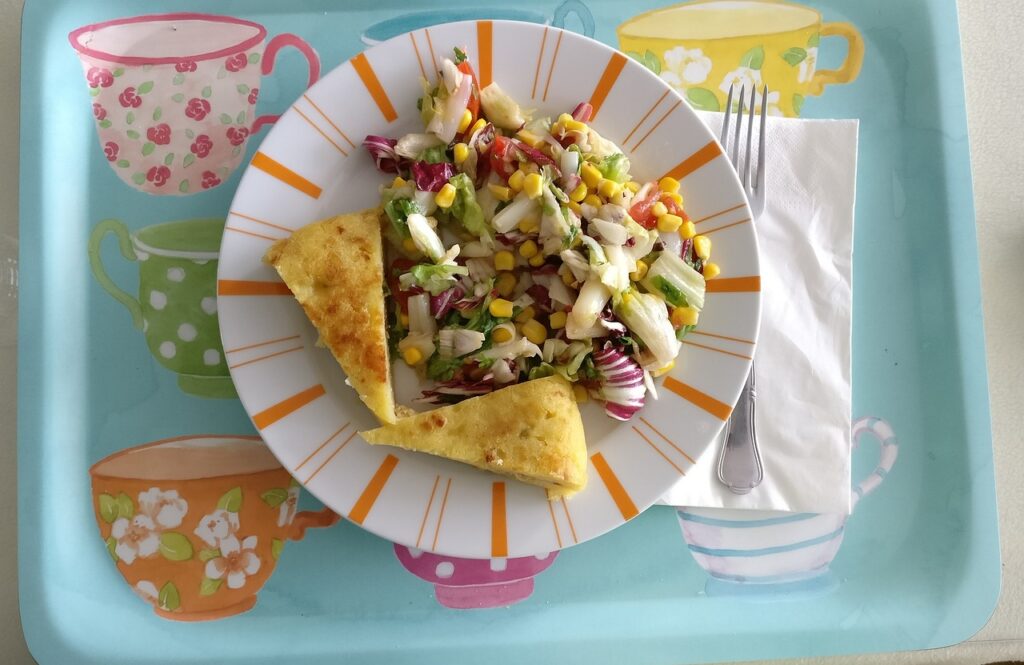
We all crave for something delicious and wholesome. Something that is not only tasty but also super easy and quick to make. Cheesy rice bowl is the answer to all your cravings. This wholesome rice bowl with richness of cheese and vegetables can be a perfect option for your lunch or dinner.
This recipe can be made with your choice of ingredients and you can modify accordingly. How much vegetables are too much? Well, worry not, you can add as much vegetables and as much variety of vegetables that you want as per your taste.
Cheesy rice bowls are not only liked by children but also cherished by adults.
Firstly, in a non-stick pan, heat 1 tbsp of oil and add all the chopped vegetables (garlic, tomato, bell peppers, onions, peas or any other vegetable of your choice). Sauté vegetables well until soft and toss them together.
Secondly, add all the dry spices of your choice and mix well.
To this, add 2 cups of boiled rice and mix all the ingredients together.
Now, for preparing the salad, take a bowl and add all the diced vegetables- onion, tomato, cucumber, lettuce, and lemon juice. Toss all the vegetables together by adding salt. Mix everything together, and your salad portion is ready.
Now, take a deep bowl, and add the side of salad to it, layer it up with hot vegetable rice. Over it, add cream cheese (1-2 tbsp). Mix everything together and your cheesy rice bowl is ready to serve!
Pro tip: If you like eggs, you can top your cheesy rice bowl with a poached egg or egg scramble!
If you are struggling shedding weight. You can talk to us by taking this assessment: Click here
Rich in fiber and nutrients, besan is gram flour or chickpea powder. Chickpea flour, also known as gram, besan, or garbanzo bean flour, has been a staple in Indian cooking for centuries. Chickpeas are versatile legumes with a mild, nutty taste, and chickpea flour is typically made from a variety called Bengal grams. Besan can be used to make recipes like kadhi, besan sabji or gatte ki sabji, pakodas, chillas, and many more.
Chickpea flour is loaded with important nutrients.
One cup (92 grams) of chickpea flour contains (1Trusted Source):
Calories: 356
Protein: 20 grams
Fat: 6 grams
Carbs: 53 grams
Fiber: 10 grams
Thiamine: 30% of the Reference Daily Intake (RDI)
Folate: 101% of the RDI
Iron: 25% of the RDI
Phosphorus: 29% of the RDI
Magnesium: 38% of the RDI
Copper: 42% of the RDI
Manganese: 74% of the RDI
About Gatte ki Sabji
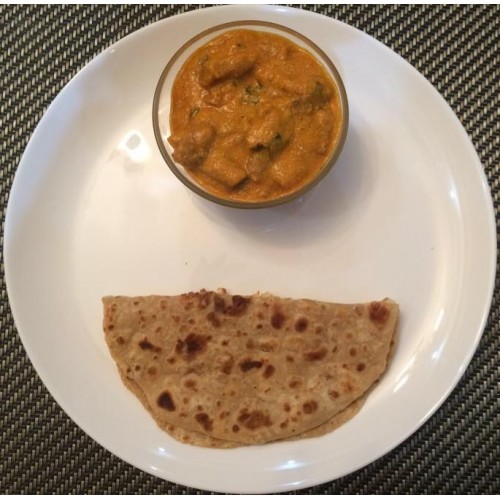
Gatte ki sabji is a delicious Rajasthani recipe, now cooked, celebrated, and eaten all over the country. Its creating besan dumplings and then cooking them in gravy. This mouthwatering delight is full of spices and flavors that you just can’t resist. Here’s the recipe of the sensational ‘Rajasthani Gatte ki Sabzi’ made with besan dipped in spicy gravy.
Ingredients of Gatte Ki Sabzi
For the Gattas:
1 cup besan, small
Half tablespoon turmeric powder
1/2 tsp dhania powder
1/2 tablespoon chilli powder
A pinch of asafoetida
3/4 tsp salt
1 tsp cumin
1/2 ginger , finely chopped
1 tsp mint leaves, chopped
1/4 tbsp baking soda
1 cup curd (whisked), large
Oil
For the base:
1 tbsp ghee
1 tbsp oil
5 Guntur chillies
1/2 tsp cumin
1 onion, finely chopped
8-10 Cloves
1 piece cassia
5-6 garlic cloves, finely chopped
1/2 tsp turmeric
3/4 tsp chilli powder
1/2 tsp dhania powder
1/4 tsp asafoetida
Salt
1 Green chilli (slit)
A few coriander leaves, finely chopped
Gatte Ki Sabzi Recipe
About Gatte Ki Sabzi Recipe: A delightful dish from the Rajasthani cuisine, Gatte are basically cooked gram flour dumplings which are added to the spicy curd gravy. It can be served for lunch or dinner on usual days and at dinner parties at home as well. This mouthwatering delight is full of spices and flavors that you just can’t resist. Here’s the recipe of the sensational ‘Rajasthani Gatte ki Sabzi’ made with besan dipped in spicy gravy.
How to Make Besan Ki Sabji
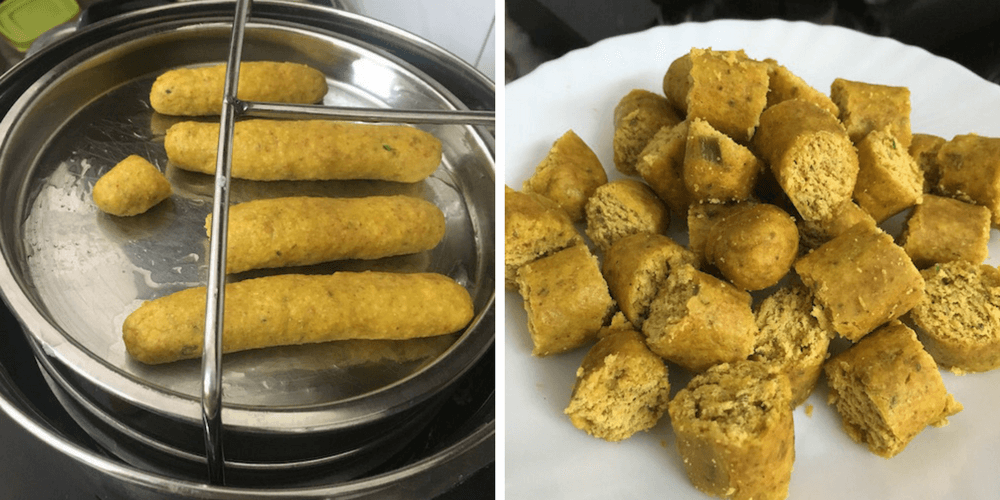
Step 1: Gattas preparation
The first step is to put water to a boil, Approx 2-3 mugs. While the water is boiling, lets make the gattas dough. To make guttas dough, take besan 3-4 tablespoons, curd and some water. Add ginger garlic paste to it and add salt, red chilly powder & dhania powder as per taste. Mix the dough to make a firm dough ball.
Now roll the dough into long dough logs like hot dogs and add the same to boiled water in a pressure cooker. Cook the same for about 10-12 mins.
Step 2: Masala curry preparation for Besan ki Sabji
While the gattas are getting cooked, lets make the gravy for sabji. Take 2 tablespoons oil in a kadhai, and sautee finely chopped onion, tomatoes with some ginger and garlic paste. Now after the mixture is cooked, add some haldi, garam masala, dhania powder, chilly powder, salt to taste and Kasuri methi for flavors. Once the mixture is ready. Take the gattas out on a plate and cut them into small pieces.
Do not throw the water in which gattas were boiled. Add the cut peices of gatte or gattas into the gravy mix and let the flavours infuse into the same. After 3-4 mins add the water used in the boiling of the gatte, and mix them all. Let the mixture cook for sometime and let the gravy have a thick consistency.
Garnish the same with fresh coriander. Best served with tandoori roti, naan or flatbreads.
If you are struggling shedding weight. You can talk to us by taking this assessment: Click here
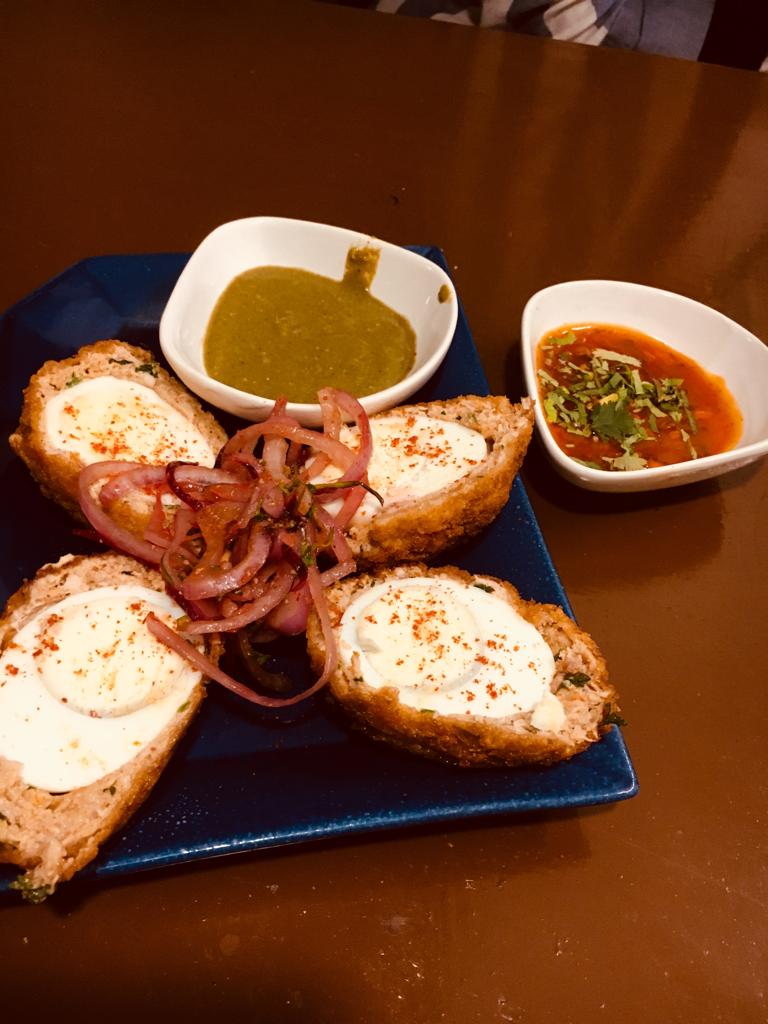
Easy to make hard fried scotch eggs recipe that is low carb, a complete meal, and can easily be made at home. As per definition, a scotch egg is a hard-boiled egg enclosed in sausage meat, rolled in breadcrumbs, and fried. Its highly nutritive and is also a low carb recipe option for you:
Typical Values
Per 100g
One scotch egg (113g)
Energy
978kJ / 235kcal
1105kJ / 265kcal
Fat
14.6g
16.5g
Saturates
4.3g
4.9g
Carbohydrate
14.9g
16.8g
Ingredients:
Original recipe yields 4 servings:
2-3 eggs
1/2 teaspoon chopped coriander leaves
1/2 teaspoon ground rosemary
4 tablespoon milk
1 tablespoon english mustard
100 gm panko breadcrumbs
black pepper as required
300 gm minced chicken
1/2 teaspoon chopped parsley
salt as required
50 gm all purpose flour/gram flour/oats flour/almond flour
1/4 teaspoon mace powder
1 cup vegetable oil or Air fyer to fry the scotch eggs
Method to Prepare scotch eggs:
Step 1: To prepare this non-vegetarian recipe, boil the eggs first. Put a large pan on high flame and add water to it, bring it to a boil. After a boil, add six eggs to the pan and boil them for about 5 minutes. Once done, place them in ice-cold water, doing this will retain a runny yolk. Keep them in the cold water for at least 10 minutes. You can choose to extend your time of boiling to 10 mins in case if you wish to have your egg yolk fully boiled.
Step 2: Now, prepare the mixture for coating the eggs. Take a large bowl and mix together the minced chicken, coriander leaves, parsley, rosemary, mace powder and English mustard. Season this with salt and pepper as per your taste. Knead it like a dough, until everything has been mixed well. Divide this mixture into 2-3 equal parts based on the number of eggs and size of your eggs nd keep them aside.
Step 3: By now, the eggs will be easy to handle, peel them and keep them aside. Next, crack the remaining two raw eggs in a bowl with the milk and season with a little salt, beat them together until everything is mixed well. In another bowl, place the flour along with a little salt and pepper powder. You can choose multiple variety of flour like besan/gram flour/almond flour/ oats flour or a mixture of wholewheat flour/ atta with oats flour to make it more nutritious and healthy.
Step 4: Take a portion of the minced chicken mixture and spread it with your fingers until it is large enough to encase a single egg. Make sure to spread the flour on your working space so that the chicken mixture doesn’t stick.
Step 5: To assemble the eggs one by one, roll one egg on the flour bowl and place it at the centre of the flattened minced chicken mixture. Gently encase the egg so that it is covered completely with the minced chicken. Then dip this covered egg in the flour, and then the egg-milk mixture, and finally with the breadcrumbs. Repeat this procedure once again to ensure that the boiled egg inside won’t burst out open. Do this with the remaining eggs.
Step 6: There are 2 ways to prepare the final egg. Either you can heat the oil in a saucepan and fry the scotch egg in medium heated oil/ghee. For keto lovers, you can fry it in ghee. For low carb/low fat lovers, you can air fry the eggs in air fryer and apply oil/ butter/ ghee in 2 sets in between while the eggs are getting air fryed. Once Fryed, cut them into 2 halves and served them either with half boiled egg yolk or fully boiled egg yolk to taste. Serve it with mint chutney or tomato chutney.
If you are struggling shedding weight. You can talk to us by taking this assessment: Click here
Before we learn the baked palak paneer recipe, let us understand more about spinach first. Is Spinach a superfood? Yes, spinach is. It is loaded with tons of nutrients and can be used for a breakfast meal or a main meal option both ways. Dark, leafy greens like spinach are important for skin, hair, and bone health. They also provide protein, iron, vitamins, and minerals.
Spinach is an extremely good source of Iron, calcium, magnesium and can be extremely effective for diabetes management, hypertension management, cancer prevention, asthma prevention . It can promote bone health, healthy hair and skin.
Baked Palak Paneer Recipe:
Ingredients:
Ingredients for Baked Palak Paneer Recipe
Blanched spinach puree 1 cup
Cottage cheese cut into cubes 1/2 cup
Oil 2 tablespoons
Cumin seeds 1 teaspoon
Garlic finely chopped 2 teaspoons
Ginger to taste
Medium onion finely chopped 1
Salt to taste
Green chillies finely chopped 2-3
Mozzarella cheese 100 grams
Garam masala powder 1 teaspoon to sprinkle
Fresh cream 2 tablespoons
Green capsicum cut into thin strips for garnishing
Method of Preparation:
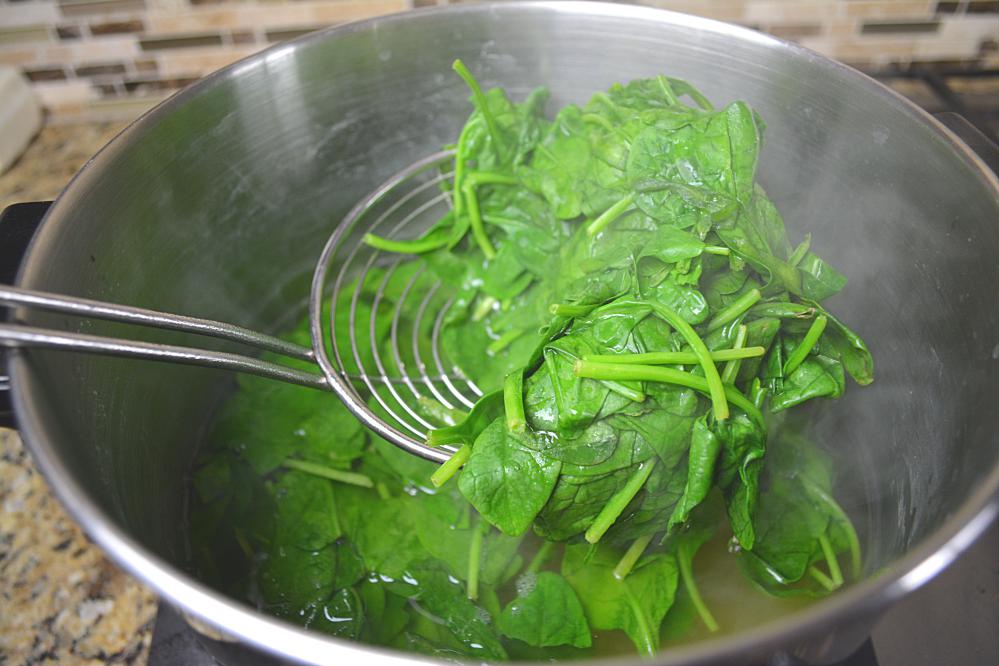
Step 1: Boil or blanch spinach in a saucepan or kadai. Make sure to not use a pressure cooker to do the same. Once the spinach is blanched, you grind the blanched spinach in a grinder. It should make a thick paste. You can also add grated ginger and chillies while grinding spinach. Keep the spinach aside.
Step 2: Take a pan and heat 1 spoon oil/ghee/butter and add 1 teaspoon cumin seeds aka jeera and let it add the flavor. Now add finely chopped onions and grated/finely chopped garlic to the mix. Sauce till the onions and garlic turn golden brown.
Step 3: Now add spinach to the same and add salt to taste. Cook for about 2-3 mins.
Step 4: Cut pieces of paneer into cubes and mix paneer cubes, some fresh thick cream, and mozzarella cheese together in a bowl.
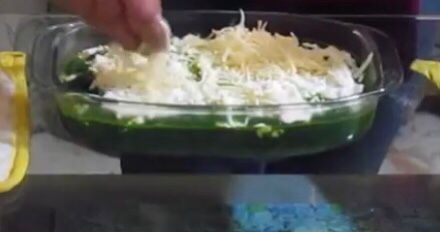
Step 5: Take a glass dish/ baking dish. Create the first layer with palak/ spinach mix first. Then add the paneer, cream, and mozzarella cheese ( you can choose to stick to only paneer and only a little cheese in case if you want to stick to your macros of making your meal a low fat too) mix on the top. Sprinkle some garam masala at the top.
Step 6: Last step to make baked palak paneer is to bake the mix in a preheated oven or microwave oven for about 15 mins.
Your baked palak paneer is ready to serve!
Cooking time: 25-30mins
Baked Palak Paneer can be served with jeera rice, roti or just plain baked palak paneer alone. It is also a keto recipe too.
If you are struggling shedding weight. You can talk to us by taking this assessment: Click here
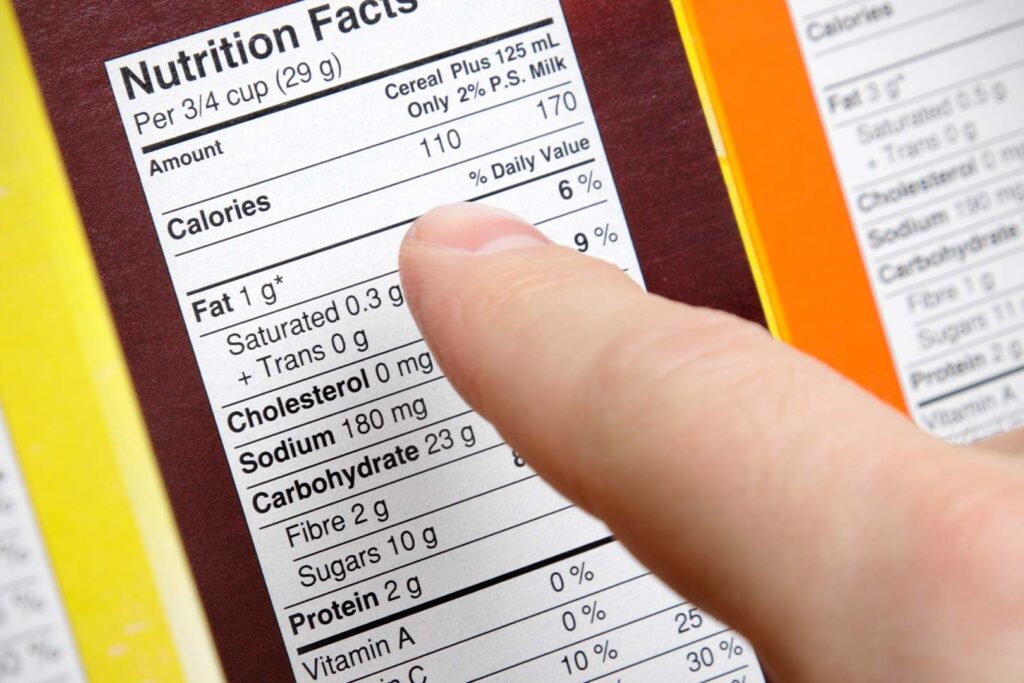
The food label tells you the nutritional content of a food to help you make wise choices about what you consume—it’s easy to read and allows you to quickly find information. In addition, standardized serving sizes make product comparison easier. Therefore reading food labels is critical to make the right choices.
Reading food labels is an important habit for a healthier lifestyle. All foods are not created equal. Two brands of the same type of food may have two completely different food labels. One may have more calories, fat, or sodium than the other.
Infact, you may also find out not just the nutritional content of the product but also the hidden values of the products that you are buying. Here are list of 15 things to check before your buy the right product for you and your family:
1. Check Net Weight/ net Quantity while reading food labels:
Its really important to check how much of the product you are buying. I see a lot of people buy products in bulk in lew to the offers they get. Sometimes it is buy one get one or sometimes it is 20/30/40 % off offers that makes you buy bigger package prices. Try to calculate your consumption and buy what is needed.
While reading food labels, net weight also helps you determine how much of the extra sugar/calories would you end up consuming buying that pack since each pack gives you nutritional fact per 100g only. For example if you are buying a juice pack. Buying a juice pack of 150 ml vs 1000 ltr. You might see calories per 100 ml only but in actual your end up buying a pack of 100 ml x 10.
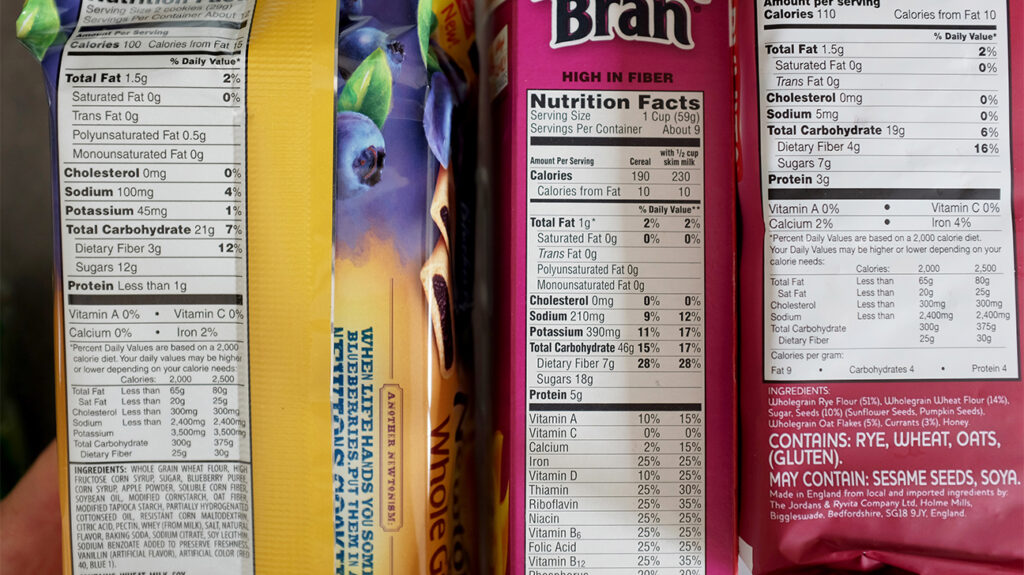
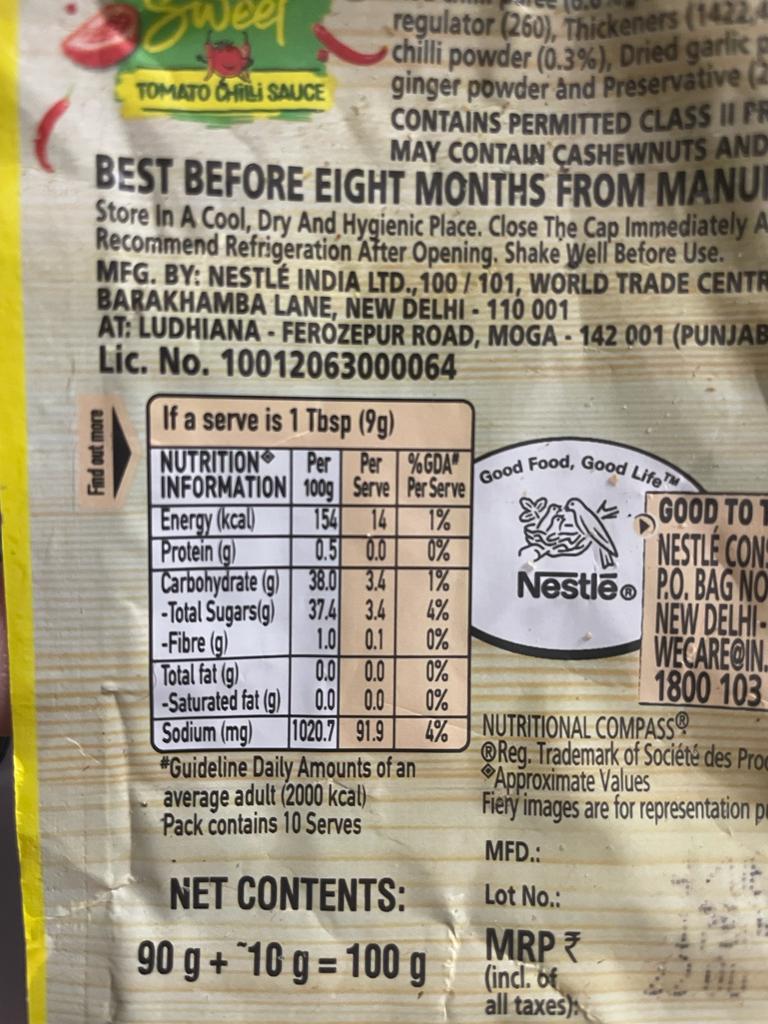
2. The Nutritional Facts / 100g
Whatever you buy, whether it is ketchup sauce, or cookies to juices, canned food to your favourite mayo. Make sure to read nutritional facts and the breakup of each of these products.
A few examples totally shocked me when I read their food labels. One of the examples were the ketchup used in our home. Here is the copy, have a look:
If you check carefully, per 100g of tomato ketchup has 37g of plain sugar. And 1 spoon that is 1 serve (approx) 9g of serving size has 3.7g of sugar alone. Well, thats alot, alot and alot of sugar in ketchup!
3. Key Ingredients (Part I):
Reading food labels, reading key ingredients is extremely important. Most of the time we read only the front and end up missing out on what is the actual ingredients of the products. Here is what we should check when it comes to reading ingredient labels:
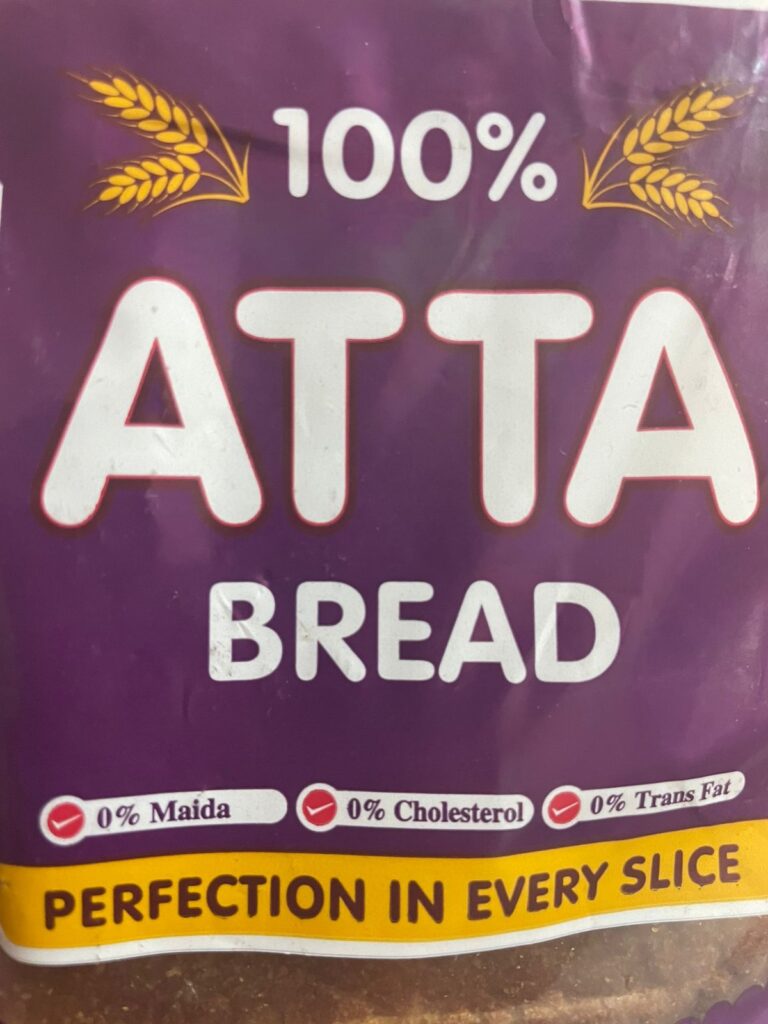
a) Read the key ingredients: For example, is the may ingredient for ketchup is tomatoes or not. Is the main ingredients for atta bread is atta or not.
Here is a food label of a famous atta bread which claims to be 100% atta on the front. I am sure when you read this, you think it is pure atta alone right? But looks at the labels here:
If you notice, in spite of claiming to be 100% atta/wholewheat. Wholewheat flour is only 54% in this bread. If you see the other ingredients include Wheat protein and Soya Flour. If not maida.
4. Key Ingredients (Part II):
Checking the INS of every number and category written in the ingredient section: INS stands for International Number system. In the categories of Emulsifiers, Thickening agents, preservatives, acidity regulators and improvers have been given a number. If you doubt any of the products, you can also find out each of these numbers and see if they are approved yet or not.
Always and always check sugar content of any particular product. I see sugar everywhere. Wheater it is bread or ketchup or even sugarfree drinks. many a time it would say no added suagr. However the product may already have added sugars in it. Sugar alone as a label can save you for opting in for hidden calories without knowing.
6. Different types of Oils used in preparation
Fats and oils can come from many sources, like animal fats, fish, seeds, plants, and nuts. Reading the ingredient lists on products will reveal the source of the fat. For oils and fats ingredient lists, fats and oils are referred to by their common names (e.g., “beef fat,” “cottonseed oil”). Like other ingredient lists, the types of fat and oils used should be listed by predominance. However, if there is a blend of fats, the ingredient list may say “___ shortening” or “blend of ___ oils” with the blank being filled by “vegetable,” “animal,” or marine,” whichever is applicable. If the ingredient is a blend, there must be a list of which specific fats or oils are used in the blend (e.g., “vegetable oil shortening (soybean and cottonseed oil)”).
Many of Indian origin products would either use Soyabean oil or palm oil. The reason why these oils are used is because these oils are cheap and are easily available. However, due to its processed nature, they are not advisable to be consumed. Therefore, avoid food pruducts using low grade oil.
7. Organic vs Non organic labels
If the product says it is organic, please do not agree to it. That may be a trap. If you are buying in the US market, always buy organic certified products certified by USDA or with a certified naturally grown.
Fssai food label vs organic fssai food label for Indian consumers. If you are buying any organic product do check for these labels on your products.
fssai organic food logo
Fssai normal food logo
Please note, Indian Organic is a mark of assurance for organically grown food and processed food made in India.
8. The critical dates of your product:
Always check for manufacturing date, expiry date and the Best before statement and match both. If both in alignment with each other that means that products shelf life is mentioned correctly. If the deviation is large then there can be an issue with the product printing.
Important dates in your food label
Please note, A date label on food should indicate the last date where the food maintains peak quality and flavor. Date labels are meant to reflect quality, not food safety.
9. Packaging
Food packaging serves many purposes, from protecting the food to creating portion sizes to offer information on the product.
However, what is not well known about food packaging is the different types of packaging available. There are nine types available: Plastics, tray, bags, cans, boxes, cartons, flexible packing, thermocol packaging & wraps.
Refrain from buying food products that are your regular food products and are packed in plastic form. Bottles, bags. covers or even wraps. Plastics not only have ill effects on health but also affect the environment.
10. Check the calories; Check Fat free or not
All too many people think the “110 calories” posted on that 20-ounce bottle of cola means they’re drinking 110 calories. Hardly. You’ve got to multiply the 110 calories by the total number of servings, 2.5, to realize that you’re actually downing a whopping 275 calories.
Also check calories from fat,
It’s on the Nutrition Facts label. Unfortunately, it doesn’t tell you “percent of calories from fat,” which is how all health guidelines direct us to limit fat. You’ve got to do a little math. Divide the number of calories from fat by the total calories. (If the serving’s 150 calories, 50 of which are fat, your product is 33% calories from fat.).
If division trips you up, go by grams. Use this easy rule. If a product has 2 grams of fat or less per 100 calories, its fat content is within Pritikin guidelines for processed foods: the fat, per serving, is 20% or less of total calories. You don’t have to be a mathematician to realize that 4 grams of fat per 100 calories is double the fat recommended by the Pritikin Eating Plan.
Don’t be fooled by claims like “99% fat-free” soup or “2% fat” milk. They’re based on the percent of weight, not percent of calories. So that can of 99% fat-free soup may actually have 77% of its calories from fat, or more. And 2% fat milk actually has about 34% of total calories from fat; 1% milk has about 23% calories from fat.
If you are struggling shedding weight. You can talk to us by taking this assessment: Click here