Healthy Recipes

All healthy recipes are under this category. Try at your convenience.

Healthy eating means eating a variety of foods that give you the nutrients you need to maintain your health, feel good, and have energy.


These nutrients include protein, carbohydrates, fat, water, vitamins, and minerals. A healthy diet is essential for good health and nutrition.

It protects you against many chronic non-communicable diseases, such as heart disease, diabetes, and cancer. It can also boost a person’s mood and provide them with more energy.


A doctor or dietitian can provide tips on eating a more healthful diet.  If you take care of yourself, you can keep your cholesterol and blood pressure within a safe range.

This keeps your blood flowing smoothly, decreasing your risk of cardiovascular diseases.


Eating a variety of foods and consuming less salt, sugars, and saturated and industrially-produced trans-fats, are essential for a healthy diet

Healthy  Recipes foods nourish us with vitamins, minerals, protein, fiber, and healthy fat.


So, healthy recipes are made up of vegetables, fruits, whole grains, lean meats, legumes, low-fat or fat-free dairy, and healthy fats.

It’s a combination of these foods that give us the most nutritional bang for our caloric buck. Nutrition is important for everyone.


When combined with being physically active and maintaining a healthy weight, eating well is an excellent way to help your body stay strong and healthy.


Having foods & drink that are high in fat, sugar & salt have these often & in small amounts.

Nutritious recipes can include butter and sugar, just like healthy meals can include an indulgent dessert—

it’s all about moderation and the big picture.


How to Prepare Kantola Vegetable

Introduction

The Kantola vegetable’s spiky green tint lends itself naturally to beauty. It is commonly referred to as a monsoon vegetable that is both nutrient-dense and low in calories. The Kantola vegetable is a great source of dietary fiber as well as vitamins and minerals like vitamin A, vitamin C, calcium, iron, and potassium. These nutrients are essential for boosting the immune system, fostering bone health, and supporting general wellbeing. commonly known as the spiny gourd or Kantola. Indians also refer to the kantola vegetable as kakrol. The Kantola vegetable’s have a little bitter flavor but not as bitter as Karela, the bitter gourd, but still bitter. They cook up with a lovely soft texture.

The Kantola Vegetable is an anti-allergen, and the analgesic qualities of this vegetable, which are typically present during the monsoon season, aid in preventing seasonal coughs, colds, and other allergies. The kantola vegetable is rich in fiber and antioxidants, making it particularly beneficial for facilitating simple digestion and removing constipation.

Ingredient for Kantola vegetable:-

  • Kantola 100g
  • Olive oil 4 tablespoons 
  •  Cumin seeds ½ tablespoons
  •  Mustard seeds ½ tablespoons
  • Chopped onion 1 Pieces
  •  Chopped tomatoes 2-3 Pieces
  •  Chopped green chili 2-3 chili
  •  Chopped garlic 3-4 Pieces
  •  Turmeric powder  ½ tablespoons
  • Red chili powder  ½ tablespoons
  • Coriander powder  ½ tablespoons
  • Hing powder  ½ tablespoons
  • Black pepper ½ tablespoons
  • Amchur powder 1 tablespoons
  • Salt as per the taste
  • Lemon juice (Optional)

Cooking Instructions for Kantola vegetable:-

  • For Kantola Vegetable -Take some kantola, wash them thoroughly with enough water, take off and throw away the upper, thin stem, and chop them vertically.
  • If the seeds are tough, then remove them. If the seeds are soft or tender, there is no need to remove them.
  • Collect the sliced spine gourds in a mixing bowl and add 1/2 teaspoon each of black pepper, turmeric powder, red chili powder,dhania powder . Marinate the food in the covered bowl for 10 to 12 minutes.
  • Once the oil is hot, add the mustard seeds, cumin seeds and hing when they start to crackle. Add the chopped onion,garlic and green chili after that, cook until golden brown.
  • After that, on a low heat, sauté them and allow them to cook. The pan doesn’t require covering. At regular intervals, give it a quick toss, cover the pan, and let it cook for a while. Continue stirring the kantola slices to ensure equal cooking and browning.
  • Add some dried mango powder (amchur) if you prefer a taste that is a little bit sour. While serving the  kantola sabji, you can also drizzle some lemon juice over it.

Macros Breakup of Kantola vegetable (30g)

  • Protein :– 5g
  • Carbohydrate :- 12g
  • Fat :– 7g
  • Calories :– 134 kcal

For more recipes: Click here

If you are facing issues in dropping your weight, please take this free-body type assessment: Click here

How to Prepare Kantola Vegetable Read More »
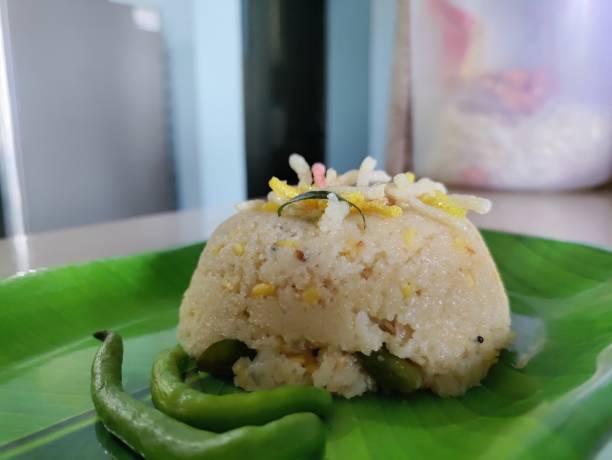
How to make varai upma

Varai Upma, a flavorful and nutritious dish, perfectly embodies the versatility and health advantages of this millet.

Varai Upma isn’t just a meal; it’s a testament to the joys of healthy eating. By incorporating this unassuming grain into your diet, you can reap its myriad health benefits while relishing a delectable and comforting dish. Whether you’re expanding your culinary horizons or seeking a nutritious alternative to conventional grains, Varai Upma is a choice that will tantalize your taste buds and nurture your body.

So, why wait? Dive into the world of Varai Upma and embark on a journey toward a healthier, more flavorful diet.
You can also try: https://fitpiq.com/nutritious-recipe-tamarind-ragi-semiya-upma/

Ingredients to make varai upma

  • 1/2 cup Varai (Barnyard Millet)
  • 2 tablespoons of oil
  • 1 teaspoon of cumin seeds
  • 1-2 finely chopped green chilies (adjust to your spice preference)
  • 8-10 curry leaves
  • 1/4 cup roasted peanuts
  • 1 teaspoon of coriander powder
  • Salt to taste
  • 200-250 ml of hot water

Instructions

  1. Rinse and Toast the Varai:
    • Start by thoroughly rinsing the varai (barnyard millet) under running water and then draining it.
    • Heat a pan over medium heat with 1 tablespoon of oil.
    • After that, add the drained varai to the pan and sauté it for approximately 2 minutes until it emits a pleasant aroma. Remember to stir occasionally.
    • Once this step is completed, remove the toasted varai from the pan and set it aside.
  2. Prepare the Upma:
    • In the same pan, add another tablespoon of oil.
    • Begin by adding the cumin seeds, allowing them to splutter.
    • Next, toss in the finely chopped green chilies and curry leaves, sautéing for a minute to release their aromatic flavors.
  3. Cook the Varai:
    • Reintroduce the toasted varai into the pan and combine it with the spices.
    • Season the mixture with salt according to your taste.
    • Pour in the hot water (200-250 ml) and thoroughly stir.
    • Cover the pan with a lid and let it simmer on low heat for 10-20 minutes, or until the varai is tender and has absorbed the water. Stir occasionally to prevent sticking.
  4. Add Peanuts and Coriander:
    • Once the varai is cooked and has absorbed the water, add 1/4 cup of roasted peanuts and incorporate the coriander powder.
    • Ensure everything is well-mixed and continue cooking for an additional 2-3 minutes until the peanuts are heated through and the flavors meld together.
  5. Serve:
    • Your Varai Upma is now ready to be served.
    • If desired, garnish with fresh coriander leaves.

Enjoy your homemade Varai Upma, a delicious and healthy millet-based dish!

For more recipes: Click here

If you are facing issues in dropping your weight, please take this free-body type assessment: Click here

How to make varai upma Read More »

PAneer mushroom stir fry

How to make paneer mushroom stir fry

Paneer Mushroom Stir Fry, a delectable concoction that unites cottage cheese, earthy mushrooms, and an assortment of aromatic spices. Beyond its exquisite taste, this dish shines with a remarkable array of nutritional advantages, making it a prized addition to a balanced diet.

Now, let’s embark on a culinary journey to explore the health benefits of the Paneer Mushroom Stir Fry. From the high-quality protein found in paneer to the digestive wonders of ginger, and from the antioxidant-rich spices to the fiber-packed vegetables, each ingredient plays an active role in enhancing both flavor and well-being. So, join us as we uncover how this vibrant stir fry not only delights the palate but also nurtures the body, ensuring a harmonious fusion of gastronomic pleasure and nutritional wisdom.

Ingredients

  • 50g paneer (cottage cheese), cubed
  • 200g mushrooms, sliced
  • 1 small onion, finely chopped-40gm
  • 1-inch piece of ginger, finely chopped-20gm
  • 1 green chili (adjust to your spice preference), finely chopped
  • 1 tablespoons butter
  • Salt to taste
  • 1/2 teaspoon oregano
  • 1/4 teaspoon turmeric powder (haldi)
  • 1/2 cup diced bell peppers (Shimla Mirch), any color you prefer-20gm

Instruction to make paneer mushroom stir fry

  • Melt 2 tablespoons of butter in a pan over medium heat.
  • Add 200g of sliced mushrooms and sauté them until they release their moisture and become tender. This should take about 5-7 minutes.
  • While the mushrooms are cooking, finely chop 1 small onion, 1-inch piece of ginger, and 1 green chili. Once the mushrooms are tender, add these finely chopped ingredients to the pan.
  • Sauté the onion, ginger, and green chili until the onions turn translucent and begin to take on a golden brown color.
  • Now, introduce 200g of cubed paneer to the pan. Gently stir everything together to blend the flavors.
  • Season the stir fry with salt, 1/2 teaspoon of oregano, and 1/4 teaspoon of turmeric powder. Adjust the seasoning to your taste.
  • Incorporate 1/2 cup of diced bell peppers (Shimla Mirch) into the stir fry. This will add both color and crunch to the dish.
  • Continue sautéing everything for an additional 3-5 minutes until the paneer is heated through, and the bell peppers are slightly softened but still have a pleasant crunch.
  • Taste the stir fry and make any necessary adjustments to the seasoning.
  • Once the ingredients are well combined and cooked to your liking, remove the pan from the heat.
  • Transfer the Paneer Mushroom Stir Fry to a serving dish.
  • Serve the stir fry hot as a side dish or as a main course with roti, naan, or rice.

Enjoy your delicious Paneer Mushroom Stir Fry with the rich flavors of butter, mushrooms, and spices!

Nutrients value

Energy-263 kcal

Carbohydrate-16.5gm

Protein-18gm

Fat-13 gm

Fibre-8.16gm.

For more recipes: Click here

If you are facing issues in dropping your weight, please take this free-body type assessment: Click here

How to make paneer mushroom stir fry Read More »

How to make Overnight Savory Oats

Overnight Savory Oats represent a holistic meal that seamlessly combines nutrition and flavor. This dish delivers essential nutrients while fostering digestive health, supporting heart well-being, bolstering the immune system, and contributing to overall dietary satisfaction.

Rolled oats, a primary component of this dish, provide a generous dose of dietary fiber. This essential nutrient promotes healthy digestion, aids in maintaining optimal cholesterol levels, and imparts a lasting feeling of fullness, which can facilitate effective weight management.

Overnight Savory Oats offer immune support through the infusion of vitamin C from cucumbers and other vital nutrients. A fortified immune system aids the body in warding off infections and illnesses.

You can also try: https://fitpiq.com/how-to-make-overnight-soaked-oats-with-nut-and-fruits/

Ingredients

For Overnight Soaking:

  • 1/3 cup rolled oats
  • 1/2 cup curd (yogurt)
  • 1/4 cup water
  • Salt to taste
  • 1/4 teaspoon freshly ground black pepper

For Adding Veggies:

  • 1/2 carrot, grated
  • 1/2 cucumber, grated
  • 2 tablespoons fresh coriander, chopped
  • 1/2 onion, finely chopped
  • 2 tablespoons capsicum (bell pepper), finely chopped

Tadka (Tempering):

  • 1 tablespoon cooking oil
  • A pinch of hing (asafoetida)
  • 1/2 teaspoon mustard seeds
  • 1/2 teaspoon urad dal (split black gram)
  • 1 tablespoon peanuts
  • 1 green chili, finely chopped
  • 1/2-inch piece of ginger, finely chopped
  • A few curry leaves
  • 1 teaspoon sesame seeds

Instructions for oats making

Preparing the Overnight Soaked Oats:

To begin, take a mixing bowl and combine 1/3 cup of rolled oats, 1/2 cup of curd (yogurt), 1/4 cup of water, and season with salt to taste and 1/4 teaspoon of freshly ground black pepper. Now, s

tir thoroughly until a smooth and creamy consistency is achieved.

Next, cover the bowl and place it in the refrigerator overnight. This allows the oats to absorb the liquid and become soft.

Adding Veggies:

The next day, when you’re ready to enjoy your meal, prepare the veggies. Grate 1/2 a carrot, 1/2 a cucumber, finely chop 1/2 an onion, and chop 2 tablespoons of fresh coriander and 2 tablespoons of capsicum (bell pepper).

In the same bowl containing the overnight soaked oats, add the grated carrot, grated cucumber, chopped onion, fresh coriander, and chopped capsicum.

Gently mix the veggies with the overnight soaked oats until they are thoroughly combined.

Tadka (Tempering):

For an extra burst of flavor, heat 1 tablespoon of cooking oil in a separate pan. Add a pinch of hing (asafoetida), 1/2 teaspoon of mustard seeds, and 1/2 teaspoon of urad dal. Allow these ingredients to sizzle and release their aroma.

Next, introduce 1 tablespoon of peanuts and sauté them until they turn a golden brown color.

Now, add 1 finely chopped green chili, 1/2-inch piece of finely chopped ginger, and a few curry leaves to the pan. Sauté for another minute to enhance the flavors.

To complete the tadka, sprinkle 1 teaspoon of sesame seeds and sauté them briefly until they become fragrant.

Finally, pour this aromatic tadka (tempering) over the oats and veggie mixture.

Thoroughly combine all the elements to ensure an even distribution of flavors.

Taste the dish and, if needed, adjust the seasoning by adding more salt or pepper to suit your preference.

Your delicious and nutritious Overnight Savory Oats are now ready to be enjoyed. This quick and satisfying meal can be savored at any time of the day, offering a delightful blend of textures and flavors.

For more recipes: Click here

If you are facing issues in dropping your weight, please take this free-body type assessment: Click here

How to make Overnight Savory Oats Read More »

Chicken proso soup

How to make chicken proso soup

Chicken proso Soup isn’t just food, it’s a gastronomic masterpiece. It’s a testament to the art of mindful cooking, where flavors, textures, and nutrition converge in a blissful union. Whether you’re seeking solace on a chilly evening or a soul-warming dish that tantalizes your taste buds, our Chicken proso Soup is your invitation to embark on a memorable journey of culinary pleasure and well-being.

Chicken Proso Soup is rich in protein due to the inclusion of chicken mince. Protein is essential for the repair and growth of tissues, muscle maintenance, and overall body function.Proso Millet, a key ingredient in this soup, provides a good amount of dietary fiber. Fiber aids in digestion, promotes a feeling of fullness, and helps regulate blood sugar levels.

The soup contains various vitamins, including vitamin A from tomatoes, which is vital for eye health and immune function. It also provides vitamin C from vegetables, known for its immune-boosting properties.ngredients like broccoli contribute essential minerals such as potassium, which helps regulate blood pressure, and selenium, which has antioxidant properties.

The combination of protein and fiber in the soup can aid in weight management by promoting satiety and reducing the likelihood of overeating.

You can also try: https://fitpiq.com/bajra-vegetable-soup/,

Ingredients to make soup

  • 1 cup Prossow (Proso Millet)
  • 1 cup water
  • 1 tablespoon olive oil
  • 1 tablespoon minced garlic
  • 2 tablespoons leeks, finely chopped
  • 2-3 baby corns, sliced
  • 1/4 cup button mushrooms, sliced
  • 1/4 cup broccoli florets
  • 150 grams chicken mince
  • Salt to taste
  • Crushed black peppercorn, to taste
  • 1/4 tomato, diced
  • 1/4 cup tomato puree
  • 3-4 cups water (adjust for desired consistency)
  • 2 tablespoons spring onions, chopped (for garnish)

Method to prepare porso chicken soup

Soak the Prossow: Begin by placing 1 cup of Prossow in 1 cup of water. Allow it to soak for 2-3 hours until the millet softens. Afterward, drain any excess water.

Prepare the Soup Base: Heat a large pan or pot over medium heat, and add 1 tablespoon of olive oil. Next, sauté 1 tablespoon of minced garlic for about 1 minute until it becomes fragrant. Following this, stir in the finely chopped leeks and cook for an additional 1-2 minutes until they start to soften.

Add Vegetables: Introduce the sliced baby corns, button mushrooms, and broccoli florets to the pan. Cook for 2-3 minutes, occasionally stirring, until the vegetables begin to soften.

Cook the Chicken: Incorporate 150 grams of chicken mince into the pan. Season it with salt and crushed black peppercorn to your taste. Cook the chicken for 2-3 minutes until it’s browned and no longer pink.

Tomato and Prossow: Add 1/4 diced tomato and 1/4 cup of tomato puree to the pan. Stir well to combine them with the chicken and vegetables. Now, add the soaked Prossow to the mixture.

Add Water and Simmer: Pour in 3-4 cups of water (adjust for your desired consistency). Allow the soup to come to a simmer. Cover the pan and let it cook for 8-10 minutes until the Prossow is tender and the flavors have melded together.

Garnish and Serve: Just before serving, garnish the Prossow Soup with 2 tablespoons of chopped spring onions.

Now, you can enjoy your homemade Prossow Soup, a delicious and nutritious dish with a unique twist using Proso Millet!

If you are struggling shedding weight. You can talk to us by taking this assessment: Click here

For more information click here    

How to make chicken proso soup Read More »

How to Make delicious Besan chilla in dosa style

Besan chilla is one of the healthy Indian Breakfast.This is Protein rich, low calories and Gluten free.

This filling Dish can be served in Breakfast, snacks, lunch and dinner.This is Delicious healthy and easy to make recipe.

Besan chilla is also known for its versatility and customizable dish. This can be easily customized with various ingredients, vegetables .herbs, and spice mixes.

Besan chilla is a good source of Protein,vitamins and minerals like iron, Folic acid,zinc and manganese, which can help maintain a healthy weight.

Ingredients-

  1. 1.5 Cup Besan or chickpea flour
  2. ¼ cup rava / suji
  3. ¼ cup curd
  4. 1/2 tsp Turmeric powder/Haldi
  5. 1 Cup water
  6. 1 cup chopped carrort
  7. 1 cup Grated Paneer
  8. 1 tomato chopped
  9. 1/2 capsicum chopped
  10. 2 tpsp coriander leaves
  11. 2 tbsp sweet corn
  12. Peri peri Masala 1/2 tsp
  13. Grated cheese 2 tbsp
  14. Salt as per taste
  15. Oil 1tbsp
  16. Green chutney 1 tsp
  17. Garlic chutney 1 tsp

Serving size-1-2

Procedure:-

1. Firstly, in a mixer jar take 1½ cup besan, ¼ cup rava, ¼ cup curd.

2. Add turmeric and ¾ tsp salt add 1 cup water and blend to smooth batter.

3. pour the batter into a large bowl and rest for 10 minutes.

4. Heat the dosa pan and pour the chilla batter

5. Spread as thin as possible

6. Once the chilla is cooked from the top, spread 1 tsp oil.

7. Spread 1 tsp Green chutney and garlic chutney over the chilla

8. Add Paneer, carrot ,tomatoes,capsicium sweet corns,coriander

9.Add Grated cheese ,salt and peri peri masala over the dressing

10.Now spread the stuffing Uniformly and cook for sometime.

11.Roll the chilla tight keeping the stuffing intact.

12.Enjoy Crispy Besan chilla dosa.

Nutritional Value Of Besan Chilla in dosa style

Calories -180Kcal
Protein-9 gm
Carbs-20 gm
Fats-10 gm

If you are facing issues in dropping your weight, Please take this free-body type assessment: Click here

How to Make delicious Besan chilla in dosa style Read More »

How to make stewed apple with jaggery.

Introduction

Making steamed apples with jaggery is a great way to introduce people to fruit. Numerous health advantages exist, and gently cleansing the digestive tract on a daily basis encourages consistency. Strengthens the digestive process and reduces indigestion and overeating. The vitamins and nutrients found in steamed apples with jaggery aid in a baby’s growth and development. This stewed apple with jaggery dish only calls for three to four ingredients, making it a quick, easy, and nutritious breakfast or dessert.

The stewed apple with jaggery is a delectably healthy dessert or brunch that the whole family will love. They are enjoyable in a variety of ways. You can eat them warm as a treat on their own, you can stir them into yogurt or oatmeal for breakfast, or top pancakes and ice cream with them.

Together, they are enjoyable in a variety of ways. You can eat them warm as a treat on their own, stir them into yogurt or oatmeal for breakfast, or top pancakes and ice cream with them.

Ingredient for stewed apple with jaggery

1.Apple  –  2 Small size

2.Powdered jaggery  –  4 tablespoon

3.Milk  –  2.5 Cup  

4.Cinnamon powder  – 1 tablespoon

Method

1.Take two tiny apples and give them a thorough wash.

2. After peeling, apple quarters should be cut into slices.

3. After removing the core, slice or dice the apple quarters as desired.

4. After the butter has melted over medium heat, apples are added to the pan.

5.Cover the saucepan and simmer the mixture for an additional few minutes to soften the apples.

Macros Breakup of Stewed Apple

How to make stewed apple with jaggery. Read More »

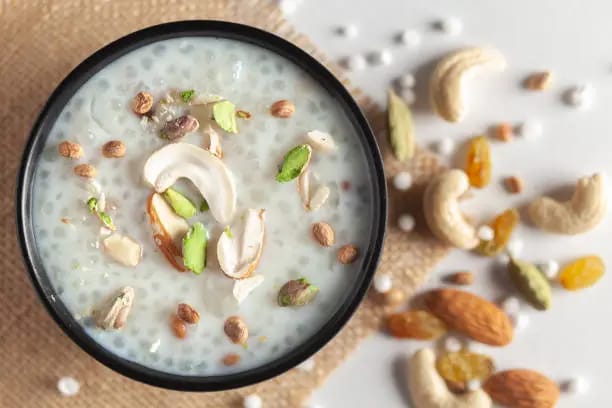
Sabudana kheer

How to make carrot sabudana kheer

Carrot sabudana kheer is a popular Indian dish that combines the unique texture of sabudana (tapioca pearls) with the sweetness of carrots. It’s often enjoyed during fasting periods and as a snack.

Carrot sabudana strikes a balance between the nutty, chewy texture of sabudana and the natural sweetness and crunch of grated or finely chopped carrots.Carrot sabudana is not only flavorful but also nutritious. Carrots are rich in vitamins and antioxidants, while sabudana provides carbohydrates for energy.

This dish can be enjoyed during fasting periods, as it adheres to fasting food rules in some Indian cuisines. It’s also a satisfying snack or light meal for any occasion. Overall, carrot sabudana is a delightful and nutritious recipe that showcases the culinary creativity of Indian cuisine. Its combination of flavors and textures makes it a popular choice for various dietary preferences and occasions.

The result is a delicious and satisfying dish that’s both comforting and nutritious. The carrots add a burst of color and natural sweetness to the sabudana, making it a flavorful choice for those observing fasting rituals or simply looking for a tasty snack or meal.

Ingredients

  • 2 tablespoons ghee (clarified butter)
  • 1 cup grated carrots
  • 1/2 cup mashed dates (remove seeds)
  • 2 cups milk
  • 1/4 cup sweetened condensed milk (Milkmaid)
  • 1/2 cup sabudana (tapioca pearls), soaked for 2 hours
  • 1/4 teaspoon ground cardamom (optional)
  • 2 tablespoons chopped almonds
  • 2 tablespoons chopped pistachios
  • 2 tablespoons raisins

Instruction to make carrot sabudana kheer

Begin by Heating Ghee:

In a large pan, heat 2 tablespoons of ghee over medium heat.

Saute the Grated Carrots

Add the grated carrots and sauté them for a few minutes until they start to soften.

Incorporate Mashed Dates

Stir in the mashed dates, ensuring they mix thoroughly with the carrots. Continue to cook for a few more minutes until the dates are well combined.

Pour in the Milk

Add 2 cups of milk and bring the mixture to a boil. Continuously stir to prevent scorching. Reduce the heat to low and allow it to simmer for about 15-20 minutes until the mixture thickens.

Introduce Sweetened Condensed Milk: (Optional)

Mix in 1/4 cup of sweetened condensed milk (Milkmaid) and the soaked sabudana. Cook for an additional 10-15 minutes until the sabudana pearls become transparent and soft. Optionally, add ground cardamom for extra flavor.

Incorporate Ghee- Roasted Nuts and Raisins

Pour the ghee-roasted nuts, pistachios, almonds, and raisins along with the ghee into the prepared Carrot and Dates Sabudana Kheer. Stir well to infuse the flavors.

Serving the Delightful Dessert:

Your Carrot and Dates Sabudana Kheer with Ghee-Roasted Nuts and Raisins is now ready to serve. Enjoy it either warm or chilled for a delightful dessert.

For more recipes: Click here

If you are facing issues in dropping your weight, please take this free-body type assessment: Click here.

How to make carrot sabudana kheer Read More »

How to make Flaxseeds chutney at home

Flaxseeds chutney is high in dietary fiber which helps you feel full for longer. It is also called Alsi in Hindi and Ali Vidai in Tamil. Flaxseeds are emerging as a “superfood” .

Flaxseeds chutney contain phytoestrogens called lignans, which are similar to the hormone estrogen. The fiber in flaxseed is found in the seed coat. Flaxseed is used for preventing constipation, diabetes, high cholesterol, obesity, and swelling of the kidneys in people with lupus. It is also used for many other conditions.

Flaxseed chutney is a rich source of omega-3 essential fatty acids and helps in fighting inflammation. It has high in nutrients such as vitamin B complex, manganese, and magnesium.

This also helps in lowering cholesterol. Flaxseed helps in insulin resistance and regulates blood sugar. Therefore Flaxseeds chutney is a healthy addition into your meals.

Ingredients

  • Flaxseeds -1cup
  • curry leaves -1 cup
  • Red chilli powder- 1tbsp
  • salt- according to taste

Instructions to Prepare Flaxseeds Chutney

  • First wash the curry leaves well and put them on a kitchen towel to dry , Then later heat a pan and put in the flax seeds and curry leaves then dry roast it on low to medium flame till you hear crackling sounds
  • Keep stirring it with a spatula.
  • Then turn off the gas and let it cool down
  • Then put the roasted flax seeds , curry leaves salt and red chilly powder in a mixer and powder them fine.
  • Flaxseed chutney can be stored in airtight container.
  • Serve chutney with hot rice and Dal, sprinkle over salads, sabji , etc
  • If you are facing issues in dropping your weight, Please take this free-body type assessment: Click here
  • For more recipes: Click here

How to make Flaxseeds chutney at home Read More »

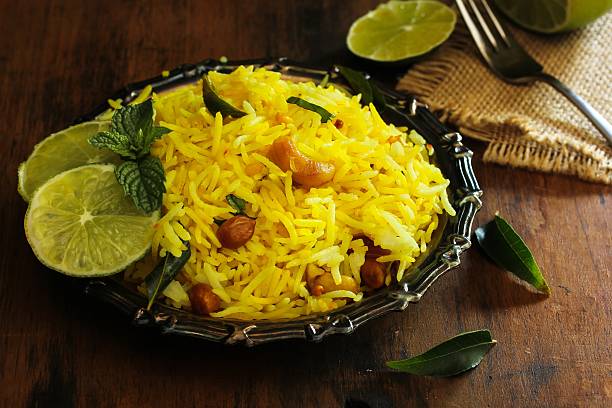
How To Make Delicious Tangy Lemon Rice At Home

Lemon Rice – South Indian turmeric rice garnished with nuts curry leaves and lemon juice, selective focus

Lemon rice is most popular delicious,flavorful, tangy and refreshing dish that is easy to make and tastes so good.This is also known as Chitranna or Nimmakaya Pulihora in South Indian languages.

An extremely simple and easy rice-based recipe prepared in just 10-15 minutes with basic and simple ingredients.

Lemon rice is appetizing and healthy too as its aids the digestion,Rich in Vitamins,antioxidant and minerals like copper,zinc.

This is Vegan and gluten free dish.

Ingredients

  1. Urad dal-1tsp
  2. Lemon juice- 3-4 tbsp
  3. Boiled steam rice or left over rice-1 cup
  4. Oil-3 tbsp
  5. Mustard seeds- 1 tsp
  6. Turmeric powder-a pinch
  7. Green chillies-1
  8. Curry leaves-6-7leaves
  9. Chana dal-1 tsp
  10. Hing-1/2tsp
  11. Peanuts- 2 tbsp
  12. salt-as per taste
  13. Chopped Coriander leaves

Serving size-1

Procedure:

1. Heat the pan with 1tsp  of oil on a medium heat,add peanuts and fry until golden crunchy.Remove them to the plate.

2. Now next pour 2 tbsp add mustard seeds, urad dal and chana dal,Fry on a medium flame until the dal turns golden.

3. Add chopped green chillies and curry leaves.

4. Then add hing, turmeric, salt as per your taste

5. Immediately pour 2-3 tbsp of water and stir well and boil for 1 minute.

6. Transfer this mixture to the cooked rice.

7. Let the rice is cooled completely, than add 3-4 tbsp of lemon juice, and mix well.

8. Garnish with roasted peanuts ,coriander leaves and serve.

Nutritional Value Of Lemon Rice

Calories -244Kc
Protein-6 gm
Carbs-44 gm
Fats-5 gm

If you are facing issues in dropping your weight, Please take this free-body type assessment: Click here

How To Make Delicious Tangy Lemon Rice At Home Read More »