Weight Loss Recipes

Weight Loss Recipes are very much required for us. These Recipes would help you lose weight and burn fat in the most effective manner.


Use them in your current meal options and start seeing the difference. A healthy weight is an important element of good health.


How much you eat and what you eat play central roles in maintaining a healthy weight or losing weight.


Exercise is the other key actor. For years, low-fat diets were thought to be the best way to lose weight.


A growing body of evidence shows that low-fat diets often don’t work,

In partly because these diets often replace fat with easily digested carbohydrates.


Hundreds of diets have been created, many promising fast and permanent weight loss.


The truth is, almost any diet will work if it helps you take in fewer calories. Diets do this in two main ways:

  1. getting you to eat certain, Weight Loss Recipes and “good” foods and/or avoid “bad” ones
  2. changing how you behave & the ways you think or feel about food


The best diet for losing weight is one that is good for all parts of your body, from your brain to your toes, and not just for your waistline.


It is also one you can live with for a long time. In other words, a diet that offers plenty of good tasting and healthy choices banishes few foods

And doesn’t require an extensive and expensive list of groceries or supplements.


One diet that fills the bill is a Mediterranean type diet. Such a diet and there are many variations usually includes:

step1:

Several servings of fruits & vegetables a day

step2:

Whole-grain bread & cereals

step3:

Healthy fats from nuts, seeds, olive oil\

Lean protein from fish, poultry & bean

Limited red meat

Moderate wine consumption with meals, not more than 2 glasses a day for men & not more than 1 a day for women


A Mediterranean-style diet is a flexible eating pattern. as well, People who follow such diets tend to have lower rates of heart disease, diabetes, dementia, and other chronic conditions.


Easy steps to make instant Oats Mug Bread

Oats Mug Bread – Warm, Soft and fluffy mug cake with oats is perfect for snack, dessert or top with greek yogurt and berries for breakfast. This instant bread will satisfy ALL bread cravings, with a healthy twist! Made with no yeast, no flour , this two minute microwave Bread is naturally gluten free, sugar free.

I have really enjoyed creating this quick and easy bread recently. What I love about this bread is that it is easy and healthy. It only takes about 5 minutes to prepare and then it’s ready to go in the oven. And true to its name, it’s as easy as any mug cake or bread! Although, for the best results I do recommend mixing wet ingredients in one mug and dry ingredients in a separate mug, just to make sure there are no clumps and that everything is well distributed.

But after that, just pop this baby in the microwave, press a few buttons, and watch it rise!

Benefits of eating Oats

  • Lowers blood sugar levels.
  • Provides antioxidants.
  • Promotes healthy bacteria in your gut.
  • Helps you to feel full to manage your weight.
  • Eases constipation.
  • Relieves skin itching and irritation.
  • Lowers your chance of colon cancer.

so after knowing all these benefits lets start with recipe…

Ingredients for oats mug bread

  • 1/3 cup rolled oats
  • 1/2 tsp baking powder
  • Dash of black pepper
  • 1/2 tsp dried basil leaves
  • 1/4 tsp black sesame seeds
  • 1/4 cup milk of choice like almond/soya/cow’s
  • 1 egg white
  • One tsp Extra Virgin Olive Oil
  • 1 teaspoon soaked chia seeds (optional)

Step wise method of cooking

1 STEP: In a container, mix oats, baking powder, herbs, and sesame seeds. Set aside.

2 STEP: In a large mouth microwaveable mug, vigorously whisk together milk, egg white, olive oil, salt, and pepper.

3 STEP: Add in the oats mixture and mix thoroughly.

4 STEP: Microwave on high for 1:30 sec to 2 min. Slice and serve warm with your favorite heart healthy breakfast options.

Hope you enjoyed this healthy 2 min Healthy Recipe as much as we do because its light and fluffy, made with just few simple ingredients, comforting and spiced like your favorite fall and winter treats, gluten-free, ready in minutes and healthy enough for breakfast!!

For more information click here

If you are struggling shedding weight. You can talk to us by taking this assessment: Click here
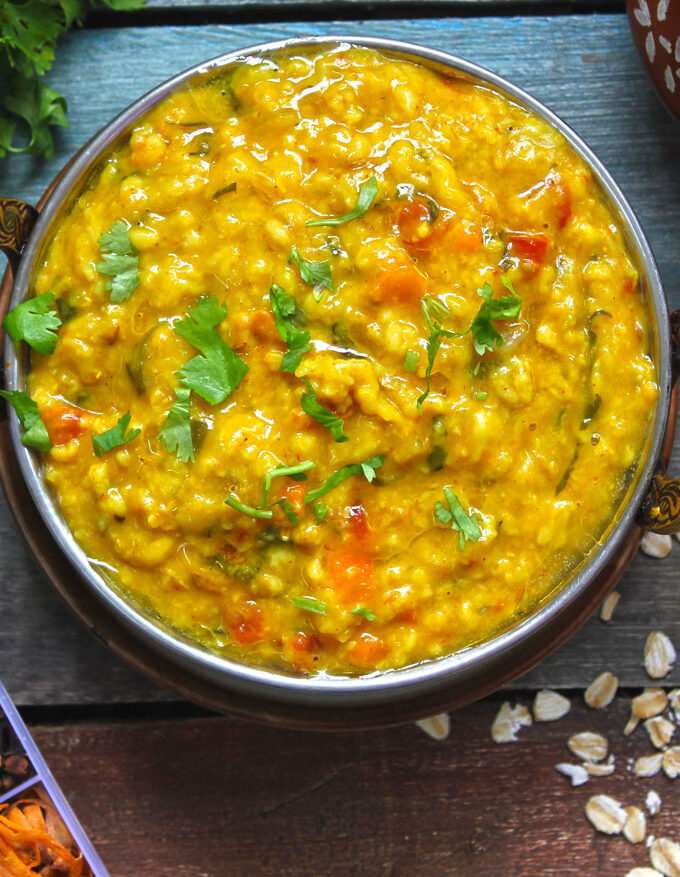
Lentil and steel-cut oats one pot dish

Simple, quick, and healthy Lentils and steel-cut oats one pot dish

Lentils and steel-cut oats one-pot dish is a simple, nutritious, and filling recipe. We can also call this dish oats khichdi. This dish is very healthy and delicious. You can have this lentil and steel-cut oats dish for breakfast, lunch, or dinner and give them to your kids or toddlers as well. You can add a variety of vegetables to it to make it more nutritious. This dish is also good when you are on your weight loss journey. This dish is rich in dietary fibers. So, keep you full for a longer time.

You can try our other oats recipe: Oats Bisibelebath, Oats vegetable soup

For a detailed video of this recipe click on this link: https://youtu.be/sMaBm32uXXQ

Why steel-cut oats?

There are many types of oats available in the market like instant oats, rolled oats, whole oat groats, and steel-cut oats. All the varieties are rich in nutrients but steel-cut oats and whole oat groats contain the double amount of fiber as instant oats and rolled oats. Because they are the least processed, they have extra fibers which keep you full for a longer time and help in weight loss.

Ingredients for Lentils and steel-cut oats dish:

  • Steel-cut oats – ½ cup
  • Moong dal – ½ cup
  • Ghee – 1 tbsp
  • Cumin – t tsp
  • Bay leaf – ½ piece
  • Ginger grated – 1 tsp
  • Turmeric – 1.5 tsp
  • Salt as per taste
  • Red chili powder – ½ tsp
  • Onions chopped – 1 large
  • Tomato chopped – 1 medium
  • Carrot chopped – 1
  • Beans chopped – 1 cup
  • Asafoetida – ½ tsp
  • Coriander leaves chopped – 1-2 tbsp

Method:

  • Firstly, wash moong dal and oats with water 2-3 times. Soak them for 10-15 minutes.
  • Now, heat ghee into the pressure cooker, add cumin and bay leaf and allow it to flutter.
  • Then, add asafoetida, onions, carrots, and beans and sauté them.
  • After this, add ginger, tomato, turmeric, and salt and fry them until the tomato turns mushy.
  • Now, mix red chili powder and stir for one minute.
  • After this, drain the moong dal and oats and put them into the pressure cooker.
  • Pour water into it and mix well.
  • After this, cover the lid and cook for 2- 3 whistles on medium heat.
  • Now, wait until the pressure goes down. Then open the lip, add coriander leaves into it and mix well.
  • Serve your lentils and steel-cut oats dish in a bowl. You can add some ghee on the top.

For more recipes: Click here

If you are facing issues in dropping your weight, please take this free-body type assessment: Click here

Gut Friendly recipe of Curd Oats

Curd oats!!! Have you heard it before ? It sounds little different but Do you want to try out a new and delicious recipe this weekend? Then, here comes a dish that you might not have heard of ever! Curd Oatmeal recipe is cooked using oats, yoghurt, ginger, onion and ground spices. You can enjoy this oats recipe in breakfast along with a Bread or Eggs . This vegetarian recipe is low in fat and can be tried by those who are constantly worried about their Gut health. Oats and curd, both the ingredients are loaded with nutrition and are counted as super foods. If you are bored with the your same curd rice options, then you must try this easy and different recipe at home!

This Fusion recipe will be ready in under 15 minutes and can be enjoyed any time of the day.

you can also try our few other easy recipes like HOW TO MAKE APPLE OATS SMOOTHIE? and Easy Apple-Banana Oats Pudding in 10 minutes- Healthy breakfast and Overnight Oats bowl

Come on lets start with our recipe……

Ingredients

  • 1 cup Oats Instant
  • 250 ml Beaten Curd
  • 2 teaspoons  oil
  • Pinch Asafoetida of
  • 1 teaspoon lentil Urad Daal Split /1 teaspoon Bengal Gram Chana Dal
  • 1/4 teaspoon Ginger Grated
  • 1 green chilli or red Chilli
  • 1/4 Mustard
  • 4 – 5 Curry Leaves
  • water as required
  • 1 teaspoon cumin seeds
  • 1 teaspoon finely chopped coriander leaves
  • salt as required

Preparation of Curd Rice

  1. Pour boiling water over the oats. Cover the pan and keep it aside for 2 minutes. After 2 minutes drain the water .
  2. Whip curd and add oats, salt and mix.
  3. In a small pan heat oil.
  4. Add Asafoetida, and then the dals.
  5. Once the dals are pink in colour add the grated ginger. When the ginger has changed colour, add mustard and cumin seeds. When the seeds start crackling add green or red chilly and then curry leaves. Pour the tempering over the curd and Oats mixture.
  6. Add salt as per taste
  7. Garnish it with fresh coriander leaves.
  8. Your hot Curd oats is ready to serve !!!! Enjoy……..

HOPE YOU LIKED THIS RECIPE...For further likewise recipes do visit our page

If you are struggling shedding weight. You can talk to us by taking this assessment: Click here

For more information click here

poharecipe

How to make a unique and nutritious poha breakfast recipe?

The nutritious poha breakfast recipe is very unique, exciting, healthy, and tasty. If you like to experiment with your food and want to try a different kind of recipe then this is for you. You are going to like it surely. Poha is eaten by almost everyone for breakfast. So, if you get bored by eating the same type of poha recipe every time then, here we bring you a unique breakfast recipe made from poha.

BENEFITS OF EATING POHA:

If you have iron deficiency, poha can help you as it is rich in iron and improves hemoglobin levels. Pregnant women and kids must eat it.

Make your body energetic by providing carbohydrates in sufficient quantity and helps in weight loss.

Poha is easily digestible, prevents constipation, and provides nutrition as well to your body.

INGREDIENTS OF POHA BREAKFAST RECIPE:

  • Poha – 1 cup
  • Tomato – 3
  • Green chili whole – 2
  • Red chili whole- 2
  • Peanuts – ¼ cup
  • Onion finely chopped – ¼ cup
  • Ginger – ½ inch
  • Curry leaves – 7-8
  • Turmeric – ¼ tsp
  • Red chili powder – ½ tsp
  • Coriander powder – ½ tsp
  • Garam masala – ¼ tsp
  • Gram flour – ½ cup
  • Rice flour – 1/3 cup
  • Oil – 1 tbsp
  • Water – 2 cup
  • Salt as per taste

METHOD:

Firstly, take a kadhai and pour water into it, and give it a boil.

Then add peanuts, green chilies, red chili, and tomato (put a cut on tomatoes from all sides) and boil it for 4-5 minutes.

After that, add poha and boil it for 4-5 minutes.

Then put off the flame and allow it to cool.

After that, strain the mixture and transfer it to a grinder.

And add salt and grind it until it turns into a smooth paste.

Now put the mixture in a bowl and add onion, curry leaves, ginger, turmeric, red chili powder, coriander powder, gram flour, and rice flour, and mix it well to make a dough.

Then take out some dough and give it a round shape and with the help of your hands, put it on the Tawa and give it a circular shape(like a small thick roti).

Pour a few drops of oil around them and cook them for 3-4 minutes from each side until golden brown. Your nutritious poha recipe is ready. Enjoy it with your favorite chutney.

For more recipes: Click here

If you are facing issues in dropping your weight, please take this free-body type assessment: Click here

Low Carb Recipe : Tandoori Fish Tikka

INTRODUCTION –

A low-carb diet limits carbohydrates — such as those found in grains, starchy vegetables and fruit and emphasizes foods high in protein and fat. Many types of low-carb diets exist. Each diet has varying restrictions on the types and amounts of carbohydrates you can eat. A low-carb diet is generally used for weight loss. Some low-carb diets may have health benefits beyond weight loss, such as reducing your risk of type 2 diabetes and metabolic syndrome.

Why you might follow a low-carb diet

You might choose to follow a low-carb diet because you:

  • Want a diet that restricts certain carbs to help you lose weight
  • Want to change your overall eating habits
  • Enjoy the types and amounts of foods featured in low-carb diets

Check with your doctor and dietitian before starting any weight-loss diet, especially if you have any health conditions, such as diabetes or heart disease.

Carbohydrate –

Refined carbohydrates such as sugar or white flour are often added to processed foods. Examples of foods with refined carbohydrates are white breads and pasta, cookies, cake, candy, and sugar-sweetened sodas and drinks.

Your body uses carbohydrates as its main energy source. During digestion complex carbs are broken down into simple sugars (glucose) and release into your blood (blood glucose).

Insulin is released to help glucose enter the body’s cells, where it can be used for energy. Extra glucose is stored in the liver and muscles, and some is converted to body fat.

A low-carb diet is intended to cause the body to burn stored fat for energy, which leads to weight loss.

NOW COME OVER TO OUR VERY EASY LOW CARB RECIPE AND ENJOY IT WITH ANY DIP OF YOUR CHOICE !!!!!!

INGREDIENTS –

  • Fish: Cut fish fillets into roughly 1.5 inch chunks. You can use any of these fish for this recipe- Katla, Rohu, Cod, Tilapia, Salmon etc (any of your choice). If using frozen fish, read instructions in ‘Tips’ section.
  • Onions and Peppers: Cut bell peppers or rainbow peppers into 1-1.5 inch chunks, about the same size as the fish. Cut onion into large chunks and separate the layers. You can switch the onions and peppers for squash, zucchini, cherry tomatoes or mushrooms if you like.
  • Tandoori Marinade: Yogurt, oil, crushed ginger and garlic (or grated), lime, salt, turmeric, garam masala, ground coriander, cumin, kashmiri red chili powder (or paprika), black pepper powder and Kasoori methi (dried fenugreek leaves).

METHOD –

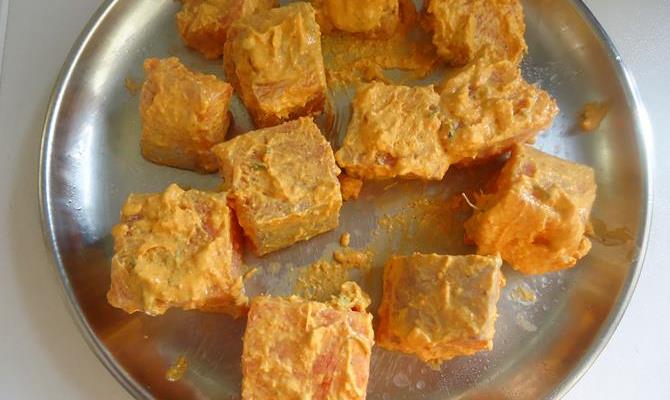
Step 1: Marinate Fish

  1. In a mixing bowl combine oil, crushed ginger and garlic, spices, lime juice to make a quick marinade.
  2. Mix well.
  3. Toss fish pieces, onions and pepper chunks in the marinade till everything gets coated well.
  4. The best part about this recipe is that the fish absorbs the flavors of the marinade quickly so you can cook it right-away.

Step 2: Cook Fish in an AirFryer or Oven Broiler

You can cook Fish Tikka using an Airfryer, Oven broiler. Checkout the step by step directions for all three methods below:

Options 1: How to Cook Fish in an Airfryer

  1. Line the drip pan with aluminum foil for easy clean-up. This is optional though. Place the fry basket in the drip pan.
  2. Arrange the fish, onions and peppers in the basket in a single layer. Don’t overcrowd them otherwise they won’t crisp up while cooking.
  3. Insert the basket back. Using the temperature button set 360°F. Set the timer for for 8-10 mins, depending on thickness of fish. (1 inch= 8 mins; 1.5 inch=10mins)

As an optional step, half-way through cooking after 4 minutes, you can baste the tikka pieces with oil, or spray lightly with cooking oil . This makes the exterior texture extra-crisp. Push the basket back in and cook for another 4 minutes.

Option 2: Oven Recipe

  1. Turn on the oven broiler. Place the marinated fish, onions and peppers on an aluminum or parchment lined baking sheet.
  2. Place the baking sheet on the top rack and cook for 7-8 minutes, or until the fish cooks through and turns opaque.

Serve hot with chutney’s or any dip of your choice. The chutney’s fresh and zesty flavors provide a delicious contrast to the earthy and spicy flavors in the fish, onions and peppers. 

Tips for the Tastiest Tandoori Fish

  • Before marinating, always pat dry the fish. This absorbs the extra moisture which leads to a crisper texture.
  • When making this recipe with frozen fish, allow it to gradually defrost in the refrigerator overnight. This results in a better texture of fish after cooking.
  • Tikka recipes traditionally call for onions and peppers, but you can switch these for squash, zucchini, cherry tomatoes, mushrooms etc.
  • As an optional step, half-way through the cooking process, you can baste the tikka pieces with oil. This makes the exterior texture extra-crisp. 
  • Sprinkle fish tikka with fresh lime juice and chaat masala (Indian spice blend) before serving, this extra step really elevates the tikka flavors.
  • Getting the cooking time right for fish is very important.

If you are struggling shedding weight. You can talk to us by taking this assessment: Click here

For more information click here       

Easy and Healthy Breakfast Toast with Walnut and Carrot Hummus

Hummus Toast is a quick and healthy breakfast recipe, snack recipe or appetiser recipe. The great thing about this recipe is that you can add your favourite toppings along with hummus on the toast. Some of the toppings which you can use are avocados, cucumbers, tomatoes, cheese, herbs, spinach, sesame seeds, salmon, chicken and eggs. Hummus is also healthy food that can aid weight loss because of its protein, fats and carbohydrate components. The ingredients used to prepare hummus are rich in vitamin A and E, iron, fibre and antioxidants. Do try this recipe and let us know how it turned out to be. Here in this recipe we will go through a different and more healthier version of Hummus.

Health benefits –

  1. Avocado toast provides vitamins, minerals, and antioxidants . It’s also a good source of magnesium, potassium, and vitamin C. It contains a variety of phytonutrients, including tocopherols, carotenoids, phenolics, and phytosterols. These antioxidants are linked to heart health, eye health, and skin health
  2. Also avocados are high in healthy fats and fiber, an average portion size of avocado toast delivers the right number of calories to leave you full, but not too full. Fiber is known to aid in digestion and can aid in weight loss.
  3. Women who consumed avocado as part of their daily meal had a reduction in deeper visceral abdominal fat. An avocado a day could help redistribute belly fat in women toward a healthier profile, according to a new study from the University of Illinois Urbana-Champaign and collaborators

INGREDIENTS –

WALNUT AND CARROT HUMMUS:

  1. 500gm of carrot
  2. 400gm fresh chickpeas (can also use processed chickpeas)
  3. 50gm of toasted walnuts
  4. 3 garlic cloves
  5. 2 tablespoons tahini sauce
  6. 1 teaspoon of cumin powder
  7. 3 tablespoons of lemon juice
  8. 2 tablespoons of extra virgin olive oil

Easy Tips for the preparation –

Tip 1: Toast the 1 cup sesame seeds. If you plan to toast the seeds, we recommend doing so on the stovetop and not in the oven. Sesame seeds are tiny and so they burn very easily. Over medium-low heat then stir constantly with a spoon until the seeds darken ever so slightly in color and become fragrant. When the sesame seeds have cooled, Put them into the bowl of our food processor, shut the lid then process until a crumbly paste begins to form. Add 3 – 4 tsp of neutral flavored oil and process into a smooth cream. To reach a similar consistency as store-bought, we’ve found 3 to 4 tablespoons of oil should do it. After more processing, a few stops to scrape the bottom and sides of the bowl and a little more processing after that, the tahini is done. Extra smooth and ready to use in whatever recipe you like.

Tip 2: To make it more convenient you can blend Chickpeas, Carrot, Walnut and Sesame seeds and other ingredients altogether. So you don’t need to add Tahini in it.

Tip 3: You can use ready made Tahini Sauce available in market in making this carrot hummus.

BREAD TOAST

  1. 4 whole wheat bread slices
  2. 2 Avocados
  3. Tomatoes slices
  4. Sprouts (optional)
  5. Toasted sesame
  6. Extra virgin olive oil

OR

You can also use Cucumbers, Onion, Peppers on topping of the Toast. One can use any Veggies of choice depending upon the availability. And trust me taste will remain the same.

PREPARATIONS –

  1. Peel the carrots and cut into pieces about two centimeters thick. Put them into boil in a saucepan until cooked, around 15 minutes.
  2. In a food processor, mix the carrot with the chickpeas, tahini sauce, cumin, lemon juice, garlic, toasted walnuts and extra virgin olive oil. If the hummus gets thick, you can add some lemon juice. Put it in bowls and reserve until the serving time.
  3. Serve the whole wheat bread slices spreading the hummus and putting on the top 2 slices of avocado, tomatoes slices, alfa alfa sprouts (optional), toasted sesame and extra virgin olive oil.

Do try this recipe and let us know how it turned out to be!!! You can also try our EASY PEASY CUCUMBER SANDWICHES FOR TIFFIN BOX

For more information click here

If you are struggling shedding weight. You can talk to us by taking this assessment: Click here

PICTURE COURTESY: SHOBHA NATRAJAN

How to make Nutty Tofu Lettuce Wrap

NUTTY TOFU LETTUCE WRAP

Nutty tofu lettuce wrap is a super delicious and healthy, low carbohydrate options for all those people who are struggling with weight loss. I know a lot of people find tofu a bit hit or miss – when it’s nice and crispy it can be absolutely delicious, but if it’s cooked poorly, it can be really bad, with a slightly spongy, squidgy texture. If you’ve had trouble cooking tofu in the past, this is the recipe for you – nutty tofu lettuce wraps, served with a creamy peanut sauce. It’s impossible to get wrong.

When you cook tofu in big slabs, it can be so easy to cook it badly. But in these lettuce wraps, the tofu is crumbled up before being cooked, so the small pieces get nice and crispy. It’s then mixed with ground peanuts and cashews, red chilli and basil, to give it a beautiful flavour and texture.

Serve it up in a big green lettuce leaf with some fluffy rice and a drizzle of creamy peanut sauce, and you’ve got yourself a delicious, and pretty healthy, lunch.

I’ve been struggling to think of healthy meal ideas lately, so I was excited to remember that lettuce wraps were a thing. In some contexts, it seems a bit depressing to substitute a tortilla wrap for a lettuce leaf, but actually, with these Asian flavours, a proper wrap wouldn’t have felt right anyway. The big lettuce leaves work perfectly as big spoons for the tofu and nuts and make you feel like you’ve had something a bit different.

Why are lettuce wraps good for you ?

One of the most prominent benefits of using lettuce wraps instead of traditional tortillas or bread is that the produce has substantially fewer calories. Whereas a Burger bun contains more than 50 grams of carbohydrates and around 200 calories. If you’re looking to go low-carb, lettuce wraps are a worthy solution. Plus, the added hydrating crunch of the lettuce makes for a refreshing summer meal.

Ingredients –

For the tofu mixture:

  • 1 tablespoon oil
  • 200 g firm tofu (cam use paneer if tofu is not available), crumbled (1 cup when crumbled)
  • 2 tablespoon cashew nuts and / or peanuts (I used half of each)
  • 1 small red chilli, seeds removed
  • Small handful fresh basil
  • 1 tablespoon lime juice
  • One tablespoon soy sauce

For the peanut sauce:

  • 1 tablespoon sweet chilli sauce
  • 1 tablespoon peanut butter
  • 2-3 tablespoon water

To assemble:

  • 8 large lettuce leaves
  • 200 gm of veggies (use any veggies of your choice)

Method –

  • Heat the oil in a frying pan, and add the crumbled tofu. Cook over a medium heat for 5-10 minutes, until slightly dry and crispy.
  • While the tofu is cooking, add the nuts, deseeded chilli, and fresh basil to a mini food processor. Blitz to form a coarse crumb. Add this mixture to the pan with the tofu, along with a squeeze of lime juice and a dash of soy sauce. Continue to cook over a medium-low heat for another 5 minutes, until the mixture is cooked to your liking.
  • To make the peanut sauce, add the sweet chilli sauce and peanut butter to the mini food processor (no need to clean it properly after using it for the nuts), along with a dash of water. Blitz to combine, and adjust the consistency with more water if needed.
  • Serve the nutty tofu mixture with the veggies, in large lettuce leaves, drizzled with the peanut sauce.

If you are struggling shedding weight. You can talk to us by taking this assessment: Click here

For more information click here       

Healthy Corn Spinach Soup

CORN SPINACH SOUP

Yummy and healthy soup

Corn spinach soup is so light and healthy for all age group people. I made this yummy soup in about 20 minutes. Sweet corn kernels and spinach are the main ingredients, with onions and mild spices rounding out the recipe. My family enjoys sipping this colorful and yummy chowder. It certainly warms them up on a cold winter evening!

Not only is this soup delicious, but it is also nutritious, too, as corn and spinach are known to have many nutrients.

Introduction for corn spinach soup –

Treasure house of vitamins and minerals, spinach must be included in the week’s menu. The usage can be varied: chopped spinach leaves cooked with potatoes is a semi-wet vegetable with rotis, a few spinach leaves thrown in with mixed vegetables and turned into a soup is lovely on a cold winter night, chopped and blanched spinach makes a different sort of raita, spinach puree can be used in cutlets or kababs, the list goes on.

Prep Time : 16-20 minutes

Cook time : 11-15 minutes

Ingredients for corn spinach soup –

  • Spinach blanched and chopped 1/2 cup
  • Corn kernels boiled 3/4 cup
  • Oil 2 teaspoons
  • Garlic finely chopped 1 tablespoon
  • Vegetable stock 3 cups
  • Salt to taste
  • White pepper powder to taste
  • Cornflour slurry 2-3 tablespoons

Method

Step 1

Heat oil in a non-stick pan. Add garlic and sauté well.

Step 2

Add corn kernels and mix well. Add stock, stir to mix and bring to a boil.

Step 3

Add salt, pepper powder and cornflour slurry, mix well and cook for 3-4 minutes. Add spinach, mix and let the mixture come to a boil.

Step 4

Serve piping hot. You can also squeeze few drops of lemon on it.

You can also try our other various soups like french onion soup , roasted cauliflower soup

Also learn how to make Broccoli soup at home!

If you are struggling shedding weight. You can talk to us by taking this assessment: Click here

For more information click here     

How to make Zucchini subzi

ZUCCHINI SUBZI

Introduction of Zucchini –

The zucchini ,courgette or baby marrow  is a summer squash, a viningherbaceous plant whose fruit are harvested when their immature seeds and epicarp (rind) are still soft and edible. It provides many health benefits. Zucchini suits many diets, such as keto, paleo, vegan, or low-carb, and a person can prepare it in many different ways based on taste preferences. Zucchini is a summer squash that is a part of the Cucurbitaceae plant family, otherwise known as gourds.

While many people refer to it as a vegetable, zucchini is a fruit. Other names include courgette and baby marrow. They range in color from dark emerald green to a yellowish shade.

Health benefits of Zucchini –

  • Can help fight inflammation: Zucchini is rich in several different types of antioxidants which can help fight free radicals and ward off inflammation. Enjoy it with the skin on for full nutrition benefits, as much of the nutrients are in the skin itself.
  • Can support a healthy immune system: Just one medium zucchini provides over half your day’s worth of vitamin C, an important antioxidant and water-soluble vitamin that plays a major role in immune function. Vitamin C also plays a role in reducing risk of several chronic diseases.
  • May support blood sugar control: Naturally low in carbohydrates, zucchini can be a great lower-carb alternative to more starchy vegetables and refined carbohydrates at any meal. Zucchini noodles make a great swap for spaghetti and lasagna in many recipes, helping to keep blood sugar levels at bay and limit blood sugar spikes from excessive refined carbohydrates. You can even try half regular linguine and half zucchini noodles which can still significantly reduce the carbohydrate load of the meal but give you the best of both worlds. It can even be made into chips or fries in the air fryer, providing a delicious and satisfying low-carb alternative.
  • Can promote good digestion: Both the fiber and water content in zucchini can help keep you regular and support healthy digestion. It is also considered a low-FODMAP vegetable, which means it may be easier to digest especially for individuals with irritable bowel syndrome.
  • May assist with weight management: It is naturally low in calories but abundant in nutrients, making it a great addition to a healthy diet. Plus, it naturally has a high water content and also contains fiber, both of which can help keep you full.
  • May support a healthy heart. One medium zucchini is a good source of potassium, a mineral and electrolyte that helps with nerve and muscle function. Potassium plays a big role in helping your heartbeat stay regular, and a potassium-rich diet can help offset some of the harmful effects of sodium on blood pressure. It also contains magnesium, another important mineral that helps keep heart rhythm steady.
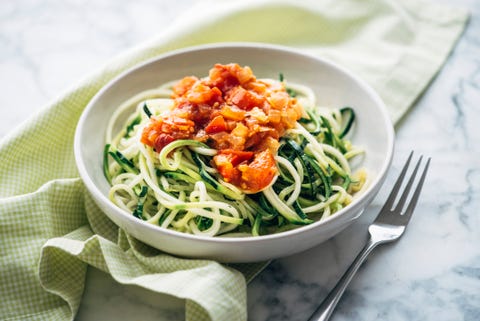
fresh zoodles with tomato sauce
IT CAN BE USED IN VARIOUS DISHES

Come on lets come over to our Zucchini subzi recipe. In this dish the spices are subtle, which make the final dish pronounced in flavor, but not overwhelmingly spicy. Lets start….

INGREDIENTS –

  • Zucchini medium sized 2 sliced (can also used unpeeled zucchini)
  • 2 small finely chopped tomatoes
  • 1 big onion finely sliced
  • Oil 1 tbsp
  • Salt as per taste
  • Ginger Garlic paste
  • 1 green chilli
  • 1/2 tsp black pepper powder
  • 1/4 tsp turmeric powder
  • Red chilli powder as per taste
  • 1/2 tsp cumin
  • a pinch of garam masala

METHOD

The method can be simplified into 4 Steps:

  • Step 1: Add cumin seeds in oil once its get hot.
  • Step 2: Now Sauté the onions until golden in this oil. Don’t brown them too much because once you add the garlic and ginger, the onions will deepen even more in color.
  • Step 3: Add the tomatoes, salt, and spices. Once the tomatoes soften, add the zucchini along with a bit of water.
  • Step 4: Cover and allow to cook for 7-10 minutes. Once the zucchini is soft and the water has dried up, use a wooden spoon to break the zucchini into pieces.
  • Step 5: Lower the heat, cover, and allow the zucchini to cook for another 15-20 minutes. Uncover and sauté out any excess moisture, using your spoon to break up any remaining bits.

How to know when it’s done:

The final dish shouldn’t have water content from the zucchini floating around. When in doubt, sauté a little extra. Once the oil separates from the curry and the zucchini is very well cooked, you’re done!

A note: I’ve had several people share pictures of their finished product with a bit more ‘curry’ and not fully reduced down. If that’s how you prefer it, that’s okay too. Make it your own!

How to serve –

This dish pairs perfectly with just about anything, but roti, naan, paratha, or any other bread go exceptionally well with it. Rice is another reader-favorite pairing.

If you are struggling shedding weight. You can talk to us by taking this assessment: Click here

For more information click here

Grilled Chicken

HOW TO MAKE AN EASY HOMEMADE GRILLED CHICKEN?

When we think about eating chicken, our mouth gets filled with water. But then we thought about its long and complex cooking process and we drop the idea of cooking it or ordering it from outside. So, here we are giving you a very simple homemade process of cooking grilled chicken. It not only fulfills your cravings but also gives you good nutrition and prevent you from eating unhealthy type of chicken recipes from the outside.

Grilled chicken is a healthy lunch or dinner option. You can eat this grilled chicken with different types of salads, sandwiches, pizzas, and more. Also, you can refrigerate them after cooking and store them for 2-3 days. So, this is a healthy and quick go-to option when preparing for lunch or dinner.

Grilled Chicken
Image Courtesy: Kanchan Singh

INGREDIENTS:

4 Boneless Skinless Chicken Breast

¼ Cup Olive Oil

3 tbsp Soy Sauce

2 tbsp Lemon Juice

1 tsp Garlic Paste

½ tsp Salt

¼ tsp Black Pepper

½ tsp Oregano

½ tsp Chilli Flakes

PREPARATION METHOD:

  1. At first, take a small bowl and whisk olive oil, soy sauce, lemon juice, garlic paste, pepper, oregano, salt, and chili flakes.
  2. Then, keep the chicken in a pan and pour marinade over the chicken.
  3. Now, keep it in the refrigerator for a minimum of 30 minutes, or up to 8 hours.
  4. After that, place the chicken on the griller and grill from each side for about 5-8 minutes. (grilling time depends upon thickness).
  5. When your grilled chicken is ready, wait for 5-10 minutes before slicing or serving

Grilled chicken:

Serving: 4

Preparation time: 20 minutes

Cooking time: 10 minutes

Total time:30 minutes( plus time of marination)

Tip: If you want to refrigerate the chicken, then keep it whole(avoid slicing).

          Wrap chicken in an airtight bag then refrigerates it to avoid contamination.

Benefits of eating grilled chicken:

  • It gives high protein content and supports muscle mass building.
  • Strengthen your bones.
  • Helps in weight management.
  • Reduce the risk of heart diseases
  • Boosts your immunity.

Hope you like the recipe.

For more recipes: Click here

If you are facing issues in dropping your weight, please take this free-body type assessment: Click here