Priyanka Yadav

grilled pomfret

How to make grilled pomfret?

Those who had grilled fish knows that grilling gives fish a different texture and flavor. What I mean is that the fish is juicy on the inside while crisp on the outside. Also, very less amount of oil is used which makes it a healthier option. Grilled pomfret recipe is mentioned below.

This delicious pomfret recipe is a must for people who love seafood recipes. The best part is that this pomfret recipe is a perfect balance of taste and health. Thus, it is a perfect dish for fish lovers. Once you try this mouth watering dish, you will definitely crave for more.

Moreover, this recipe is easy to prepare at home without putting in much efforts. The fusion of Indian spices make this Pomfret recipe truly amazing and delicious.

So, let’s quickly have a look at the recipe!

Preparation time: 1 hour

Cooking time: 10-15 minutes

Total time: 1 h 10 min-1 h 15 min

Serving: 1-2

Ingredients for grilled pomfret

  • Pomfret-1 (clean and put some deep slits on both sides)
  • Chili powder-1 tsp
  • Turmeric powder-A pinch
  • Garlic, minced/paste-1/2 tsp
  • Ginger, paste-1/2 tsp
  • Garam masala-1/2 tsp
  • Coriander powder-1/4 tsp
  • Cumin powder-1/4 tsp
  • Curry leaves-5-6
  • Lemon juice-2 tbsp
  • Salt, to taste

Method of preparation:

  • Firstly, mix all the spice powders in a bowl such as chili powder, turmeric powder, garam masala, coriander powder, cumin powder, ginger, garlic, and salt.
  • Secondly, add lemon juice to make a paste. Next, cut the curry leaves into two and add this to the paste (do not make a paste of curry leaves).
  • Now, apply this to the fish and keep it aside at least for 1 hour.
  • Lastly, heat the grill pan and grill the fish till it is cooked.
  • Finally, serve hot.

If you are struggling shedding weight. You can talk to us by taking this assessment: Click here

For more information click here

Tehri

How to make tehri at home?

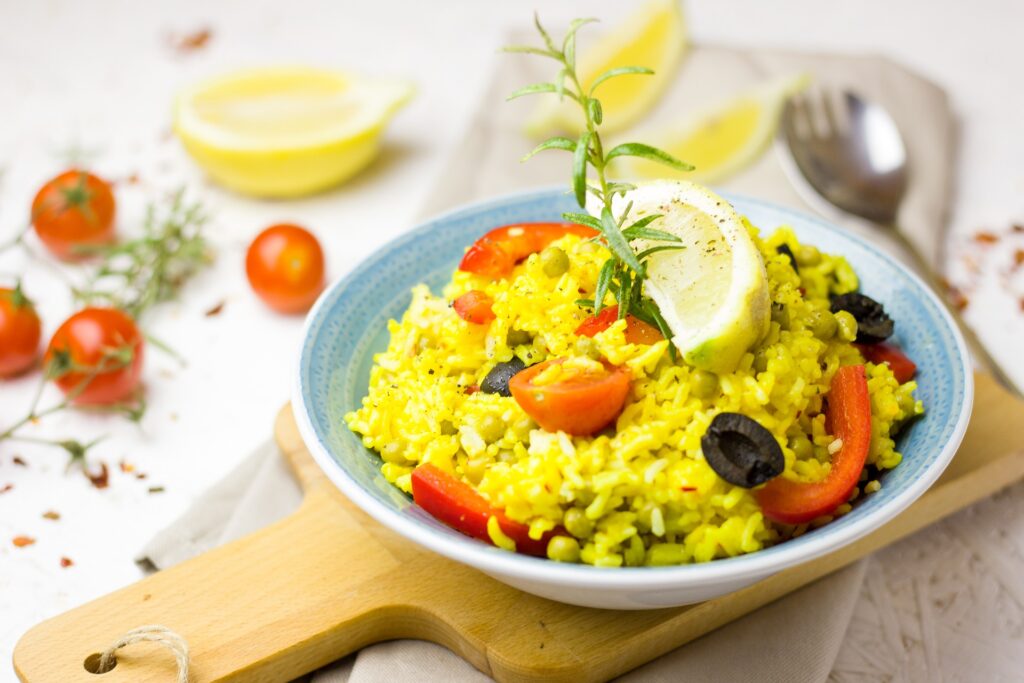
Tehri is aromatic, spiced rice along with varieties of vegetables. It is a famous dish of Uttar Pradesh. It is an easy recipe to prepare and also time-consuming. The vegetables that we usually add in tehri are cauliflower, peas, onion, tomato, and potato as well. You can also use other vegetables of your choice for tehri at home.

Tehri is a perfect blend of Indian spices and vegetables. This dish is also nutritious as it contains varieties of vegetable that provide us their goodness.

Moreover, once you have a taste of this absolutely delicious tehri, then it will become a regular part of your meals. So, without any due, let’s quickly dig into the recipe step by step!

Preparation time: 15 minutes

Cooking time: 15-20 minutes

Total time: 30-35 minutes

Serving: 4

Ingredients for making tehri at home:

  • Basmati rice-1.5 cup
  • Potatoes-2
  • Cauliflower, chopped-1/2 cup
  • French beans, chopped-1/4 cup
  • Green peas – 1/2 cup
  • Mustard oil-1.5 tbsp
  • Onion, chopped-1
  • Tomatoes, copped-1 cup
  • Ginger-garlic paste-1 tbsp
  • Coriander leaves, chopped-1/4 cup
  • Green chilies, chopped or slit – 2-3
  • Red chilli powder-1 tsp
  • Coriander powder-1 tsp
  • Turmeric powder-1/2 tsp
  • Water-3 cup or as per requirement
  • Salt, to taste
  • Tej patta-1
  • Cardamom or ilaichi-3-4

Method of preparation:

  • Firstly, rinse rice in water 2-3 times till the water runs clear of starch.
  • Secondly, heat oil in a cooker or thick bottomed deep pot or pan and add the spices such as tej patta, cardamom and saute till the spices splutter.
  • Further, add chopped onions and ginger garlic paste and saute till they become golden brown.
  • Next, add chopped tomatoes and saute them for a minute or two. Also, add chopped potatoes and saute the potatoes for 3 to 4 minutes on a low to medium flame.
  • Now, add chopped french beans, green peas and the cauliflower florets in the cooker or pan and mix them with rest of the ingredients.
  • Next, add chopped coriander leaves, green chilies, red chilli powder, coriander powder, salt and turmeric powder and also mix very well. 
  • Further, add rice and mix the rice with the masala and pour water.
  • Lastly, cover the pan with a tight lid and cook the tehri on medium flame till all the water is absorbed and the rice grains are fluffy and soft. 
  • Once done, remove the cooker or pan from the stove and also let it rest for 5 minutes.
  • Finally, serve this tehri with a raita or plain curd and enjoy it with your loved ones!

If you are struggling shedding weight. You can talk to us by taking this assessment: Click here

For more information click here

Water

Water fasting: A new trend

Water fasting is a type of fast in which there is an absolute cessation of food consumption while consuming water only throughout the day. It can last for 24-72 hours at maximum and water fasting beyond this should require medical supervision. 

This type of fasting is believed to improve health and can help motivate a healthy diet and lifestyle changes. It has been shown through ancient to modern researches that this type of intervention can stimulate physiological effects that are potentially favorable to health. These include enhanced ketogenesis, modulated hormone activity, reduced inflammation and oxidative stress symptoms. Also includes lipolysis, autophagy, and improved physical and emotional well-being. 

Looking for detox drinks to loose weight then check this out. 14 most famous and effective Detox drinks

History of water fasting:

The origin of water fasting for health dates back the development of the present forms of animal life. The first records of human fasting for the remedy of disease go back to the ancient civilizations of Greece and the Middle East. ​The ancient Greeks were great believers in fasting.  

In the past, Socrates (philosophers) fasted for 10 days at a time to attain mental and physical efficiency. Many ancient people used water fasting as a source of treating many types of diseases.

For instance, the ancient Egyptians treated syphilis with fasting cures. And, the great Greek physician, Hippocrates, prescribed fasting during critical periods of disease. Asclepiades and Thessalus employed fasting; Celsus used it in the treatment of jaundice and epilepsy, and the Arab physician, Avicenna, prescribed fasting for three to five weeks at a time.

In Germany, Dr. Adolph Mayer asserted that “fasting is the most efficient means of correcting any disease,” and Dr. Moeller wrote that “fasting is the only natural evolutionary method whereby through a systemic cleansing you can restore yourself by degrees to physiologic normality.”

History thus shows considerable evidence of scientific and clinical work done to determine the effects of fasting. The therapeutic measure of water fasting is not a new idea and has been recognized and studied by brilliant minds for centuries.

What things to keep in mind while preparing for water fasting?

Before anyone wants to try their hands at water wasting, it’s a good idea to learn more about the dangers and risks associated with water fasting. This is more important for those people who are suffering from Diabetes, Kidney disease, Pregnant and/or breastfeeding, Eating disorders.

Here are steps you need to take to safely practice water fasting for weight loss or better overall health.

1. Prepare your body:

For water fasting, it is really important that you prepare your body well. Especially if you have never fasted before in your life. The best way to prepare is to start reducing your meal portion sizes, or you could try replacing a meal with water. You can keep doing this for a few days to see how well your body is adapting the water fast.

2. Stick to 24–72 hours only:

You should only stick to 24-72 hours of water fasting without any medical supervision. More than 72 hours can be dangerous to your health. 

3. Best to try it during your weekend or day off:

Water fasting is not for everyone as it may cause weakness and dizziness in some people. It is best to try water fasting on your weekend or day off especially if your job requires a lot of physical and mental effort. 

4. Resist eating a big meal just after your fasting:

It is normal that you will be famished by the end of your water fast and will feel the urge to consume a large meal. But you should resist the urge to do that just after your fast as it may cause some adverse effects such as bloating or other digestive problems. Instead of doing that, you can opt to break your fast with a light meal. And best to increase the portion size gradually throughout the day.

What can you eat while water fasting?

You can only drink water for the duration of the fast.

What you cannot eat while water fasting?

It is a fast during which all food and drink except water are restricted. That means no coffee, no tea, no alcohol, no zero-calorie sports drinks, or any other beverage. This also means no food.

What are the potential benefits of water fasting?

The list of health benefits of water fasting are as follows:

It may promote autophagy:

“Auto” means self and “phagy” means eat making it to “self-eating.” In other words, autophagy is the body’s way of cleaning out damaged cells in order to regenerate newer and healthier cells. For instance, it may prevent the accumulation of damaged parts of your cells which can be a risk factor for many cancers. 

May help lower blood pressure:

It has been shown that medically supervised water fast may help people with hypertension lower their blood pressure.

May improve insulin and leptin sensitivity:

Insulin and leptin are two important hormones that affect the body’s metabolism. Insulin helps the body to store nutrients while leptin helps the body to feel satiety. Many research shows that water fasting can make your body more sensitive to leptin and insulin. Greater the sensitivity, more effective your bodily hormones.

For example, being more insulin sensitive means your body is more efficient at reducing its blood sugar levels. Meanwhile, being more leptin sensitive could help your body process hunger signals more efficiently, and in turn, lower your risk of obesity.

Helps you in getting a healthier skin:

Water fasting improves hydration and elasticity which in turn will get you a healthier skin. It also activates metabolic pathways that protect your body from oxidative damage and aging.

If you are struggling shedding weight. You can talk to us by taking this assessment: Click here

For more information click here
Scrambled eggs

How to make scrambled eggs restaurant style

Everyone who loves eggs knows the essence and taste of it. There are many ways to have eggs in your breakfast such as Omelette, scrambled eggs, boiled eggs, etc. One of the recipes that I love of eggs is the scrambled eggs. These eggs are soft, creamy and delicious in taste. It is a dish made from eggs stirred, whipped or beaten together while being gently heated, typically with salt, pepper, and butter.

Moreover, these scrambled eggs are an excellent source of good quality of protein and vitamins such as vitamin A, vitamin B12, vitamin B2, vitamin B5. Also, minerals such as phosphorous, selenium, zinc and calcium.

Check out quick tomato eggs recipe! tomato eggs in 15 minutes

If you follow the steps below, you’ll achieve restaurant-worthy results every time. The best scrambled eggs are cooked on low flame.

So, let’s quickly have a look at the recipe!

Preparation time: 5 minutes

Cooking time: 10 minutes

Total time: 15 minutes

Serving: 1

Ingredients:

  • Eggs-2
  • Butter/oil-1 tsp
  • Salt, to taste
  • Pepper-A pinch
  • Milk

Method of preparation:

  1. Firstly, crack eggs a bowl and add milk, salt and pepper and beat it until blended.
  2. Secondly, heat butter in nonstick pan over medium heat and pour in your egg mixture. As eggs begin to set, gently pull the eggs across the pan with a spatula, forming large soft curds.
  3. Furthermore, cooking, pulling, lifting and folding eggs until thickened and also make sure that no visible liquid egg remains.
  4. Finally, remove it from stove and serve it with a toast.

If you are struggling shedding weight. You can talk to us by taking this assessment: Click here

For more information click here

Chicken roll

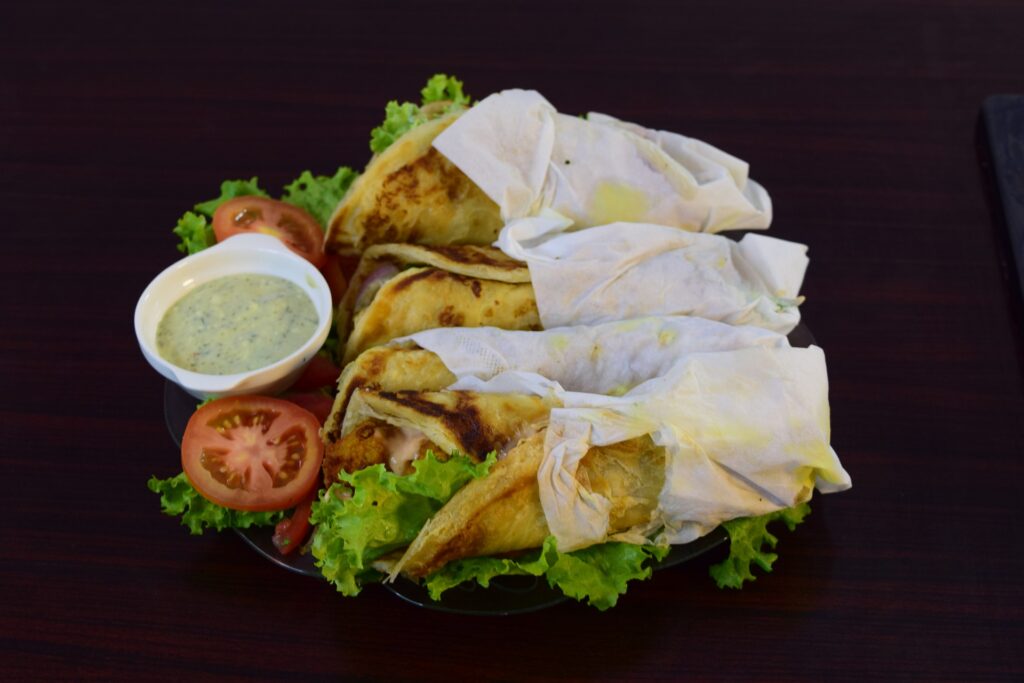
How to make Chicken roll with Roti at home

Rolls are quite popular across India and they are often a favorite snack, or suitable for lunch or dinner as well. The rolls are very easy to pack and carry and you can also take it to office or prepare it for your picnics or day trips. Here is homemade chicken roll recipe for you.

Chicken Roll is a delectable North Indian recipe made using wheat flour, stir-fried chicken and also a variety of vegetables with Indian spices rolled into a paratha. You can also utilize your leftover parathas or chapatis in making this chicken roll recipe.

This recipe is a must-try recipe for all chicken lovers. So, let’s have a look at the recipe!

Preparation time: 1 hour

Cooking time: 15-20 minutes

Total time: 1 h 15 mins-1 h 20 mins

Serving: 1

Ingredients:

  • Chapati/Paratha-1
  • Coriander leaves (chopped)-1 tbsp
  • Onion, chopped-1/2
  • Capsicum, chopped-1/2
  • Ginger-garlic paste-1 tsp
  • Chicken, boneless-1/2 cup
  • Tomato, chopped-1 small
  • Turmeric powder-1/4 tsp
  • Salt, to taste
  • Chilli powder-1 tsp
  • Chaat masala-1 tsp
  • Oil (to shallow fry)

Method of preparation:

  • Firstly, take a bowl and add chicken, ginger-garlic paste and salt in it. Mix them well and let it marinate for an hour.
  • Secondly, heat oil in a pan and once the oil is hot, add marinated chicken strips in it and cook for 2-3 minutes. Now, add chopped onion, capsicum and tomatoes in it and also add salt as per your taste. Mix everything well and saute for around 5 to 7 minutes and take out the chicken after it is well cooked on both sides and keep it aside.
  • Lastly, take the chapati or paratha place 3-4 tbsp chicken mixture in the middle of the it. Also, sprinkle some chaat masala on the top and form a roll.
  • Finally, serve them hot with chutney of your choice.

If you are struggling shedding weight. You can talk to us by taking this assessment: Click here

For more information click here

winter paratha

How to make winter stuffed paratha?

You must have tried many types of stuffed parathas. But have you tried our winter stuffed paratha. Not yet? Then should try this paratha recipe which surpasses all your expectations related to its taste and nutritional value.

Our winter stuffed paratha is super delicious. It is made with the goodness of wheat flour, spinach, carrot, beetroot, potato, coriander leaves, paneer, capsicum and also a perfect blend of Indian spices. It is a filling paratha recipe and has flavors of all vegetables, making it an ideal your breakfast, lunch or dinner.

Try this amazing variety of paratha which taste just like a pizza but a healthy version at that. Pizza paratha

This paratha recipe is easy and quick to make. So, let’s have a look at the recipe quickly!

Preparation time: 20 minutes

Cooking time: 20 minutes

Total time: 40 minutes

Serving: 3-4

Ingredients:

For outer layer:

  • Wheat flour: 1.5 cup
  • Spinach (blended): 1 cup
  • Salt, to taste
  • Oil: 1 tbsp

For stuffing:

  • Carrot (grated): 1/2 cup
  • Capsicum (chopped): 1/2 cup
  • Paneer (grated): 1/2 cup
  • Beetroot (grated): 1/4 cup
  • Potato (boiled and grated): 1/2 cup
  • Coriander leaves: 1/2 cup
  • Salt, to taste
  • Turmeric: 1 tsp
  • Red chili powder: 1.5 tsp
  • Amchoor powder: 1.5 tsp
  • Coriander powder: 1.5 tsp
  • Oil/ghee, as required for coating paratha

Method of preparation:

  • Firstly, blend spinach leaves with little water.
  • Secondly, in a mixing bowl, add flour, 1 tsp of oil and the blended spinach puree and required amount of water and knead the dough until it becomes smooth and set it aside.
  • Furthermore, in another mixing bowl, add the grated carrot, paneer, potato, beetroot, chopped capsicum and coriander. Also, add the spices such as salt, chili powder, garam masala, coriander powder and turmeric powder and mix well all the ingredients in the bowl.
  • Keep the tawa on the stove to heat it to cook the paratha.
  • Meanwhile, make a ball with the kneaded dough and press it in between your fingers to make it smooth. Then roll it between your palms to make it round and smooth and press the round dough ball and flatten it slightly. Also, dip the prepared dough ball into the dry flour and dust it from all sides and start to make small chapati in circular size.
  • Next, take at least 2-3 tablespoon of veggie mixture and put it in the middle of chapati and then close it and remove the extra dough, if any.
  • Now, again press it on the rolling board (chakla) and start making it a circular chapati with the help of roller (belan).
  • Once the chapati is ready, put it on the already hot tawa and flip it to other side once cooked from one side. Now, grease the cooked side with oil or ghee and flip it again to grease the other side.
  • Lastly,, once the paratha is cooked properly from both the sides, remove it from the tawa.
  • Finally, serve hot with curd or chutney of your choice!

If you are struggling shedding weight. You can talk to us by taking this assessment: Click here

For more information click here
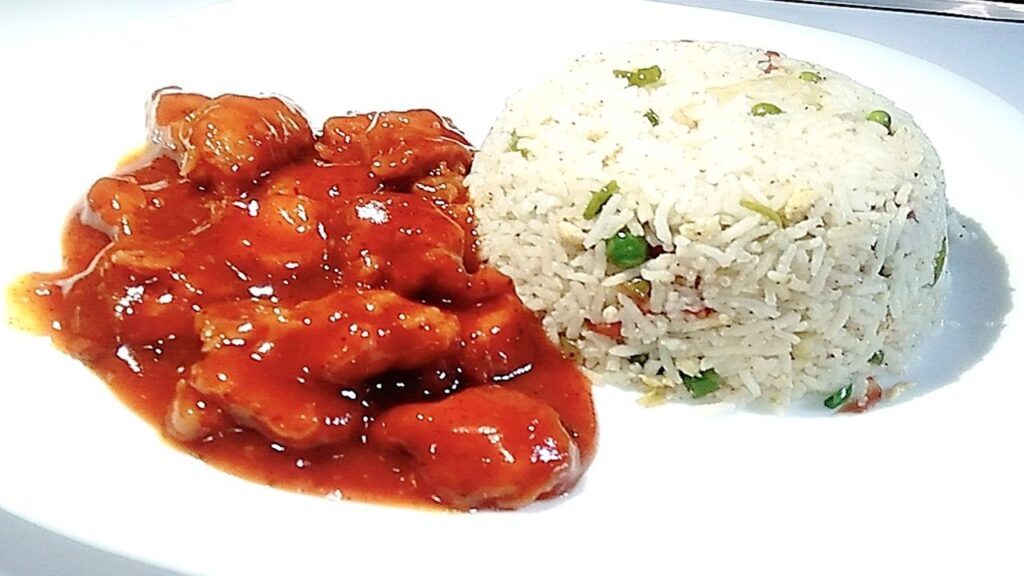
Herbed rice and munchurian

The indo-chinese recipe – Herb rice with paneer Manchurian

Herb rice with paneer Manchurian is a perfect combination to have in your lunch or dinner. This combination is not only delicious but also healthy and nutritious as well.

Herb rice is a delicious and also simple side dish, perfect for almost every meal. The use of fresh or dried herbs is to give this dish amazing flavor. On the other hand, paneer manchurian is an adapted version of chinese cuisine with its cooking techniques which meets the requirements of Indian taste.

Moreover, paneer is an excellent source of protein and calcium. And the different vegetables used for this combination are also good source of certain vitamins and minerals which makes this combination nutritious.

So, let’s dig into the recipe without any due!

Preparation time: 20 minutes

Cooking time: 40-45 minutes

Total time: 1 h to 1 h 5 minutes

Serving: 1-2

Ingredients for Herb rice:

  • Rice: 1 cup
  • Garlic, minced: 1 tsp
  • Mixed herbs: 1 tsp
  • Coriander leaves: 1 tbsp
  • Black pepper: 1/2 tsp
  • Salt, to taste

Method of preparation of Herb rice:

  • Firstly, steam the rice in cooker and keep it a bowl aside.
  • Secondly, heat oil in a pan, once it is hot enough, add minced garlic and saute it and then add chopped coriander, add steamed rice in the bowl.
  • Next, add salt, pepper and mixed herbs and mix well and cook for 1-2 minutes and remove it from the stove.

Ingredients for Paneer Manchurian:

  • Paneer (cubed)-1/2 cup
  • Maida-2 tbsp
  • Corn flour-1 tbsp
  • Red chilli powder-1.5 tsp
  • Salt, to taste
  • Oil-3-4 tbsp
  • Ginger-garlic paste-1 tsp
  • Onion (chopped)-1/2
  • Tomato puree-1/2 cup
  • Soya sauce-1 tbsp
  • Vinegar-1 tbsp
  • Salt, to taste
  • Spring onion (chopped)-1

Method of preparation of Paneer Manchurian:

  • Firstly, in a large mixing bowl, take maida and corn flour and further add add 1/2 tsp red chili powder and salt and mix well.
  • Secondly, add water slowly as required and make a smooth consistency batter.
  • Furthermore, add cubed paneer and coat well with batter and then shallow fry in hot oil till they turn golden brown.
  • Next, keep the fried paneer on a kitchen paper towel to remove excess oil.
  • Now, in a large kadhai, add oil and once hot enough, add ginger-garlic paste, onion and saute for a minute.
  • Furthermore, add tomato puree, soy sauce, vinegar, salt and chili powder and stir well till the sauce turns slightly thick.
  • Lastly, add the fried paneer cubes and chopped spring onions and give a good mix.
  • Finally, serve hot paneer manchurian with your herb rice.

If you are struggling shedding weight. You can talk to us by taking this assessment: Click here

For more information click here

Cauliflower and corn fritters

Easy to make Cauliflower and corn fritters as siders

Cauliflower and corn fritters are easy to make. These fritters are so delicious. I have made these fritters for a number of times for my family and friends. Now, I am sharing this recipe with you. Try this delicious recipe and let us know your views?

These cauliflower and corn fritters are so crispy and tasty that you will definitely crave them again. The taste of crispy cauliflower is mouth watering. On the other hand, the sweetness of corns is cherry on the top to these fritters.

Don’t forget to check our delicious chickpea paneer kebab recipe! paneer chickpea kebab

Grated cauliflower, sweet corn , onion, tomato, coriander leaves and fresh herbs are mixed together and shallow fried in a little oil until golden brown. These are perfect when served with some homemade chutney. So, let’s look at the recipe step-by-step!

Preparation time: 15 minutes

Cooking time: 15-20 minutes

Total time: 30-35 minutes

Serving: 3-4

Ingredients:

  • Cauliflower (grated)-1 head
  • Whole wheat or all-purpose flour-1/2 cup
  • Eggs (beaten)-2 (If you are vegetarian, add 2 tbsp of corn flour starch)
  • Garlic-ginger paste-1 tsp
  • Sweet corn (blanched)-1/4 cup
  • Onion (chopped)-1/4 cup
  • Tomato (chopped)-1/4 cup
  • Coriander leaves-2 tbsp
  • Green chili-2
  • Salt, to taste
  • Black pepper-1 tsp
  • Chaat masala-1 tsp
  • Oil-3-4 tbsp for shallow fry

Method of preparation:

  • Firstly, chop all the vegetables such as onion, tomato, coriander leaves and grate the cauliflower head and blanch the sweet corns until they become soft.
  • Secondly, take a big mixing bowls and add grated cauliflower, chopped onion, tomato, coriander leaves and corns in it.
  • Next, add wheat or all purpose flour, eggs, garlic-ginger paste, salt, black pepper in the bowl and stir until well combined and left untouched for 5 minutes.
  • Furthermore, heat a nonstick pan over medium-low heat and lightly coat it with oil and scoop out 2- to 3-tablespoon mounds of the cauliflower mixture into the pan, flattening it slightly with a spatula/ladle and spacing them at least 1 inch apart.
  • Lastly, cook the fritters for 2 to 3 minutes, flip them once cooked from one side and cook them from other side and cook until they’re golden brown. Transfer the fritters to the plate covered with tissues to soak excess oil.
  • Finally, serve them warm topped with yogurt or chutney of your choice.

If you are struggling shedding weight. You can talk to us by taking this assessment: Click here

For more information click here
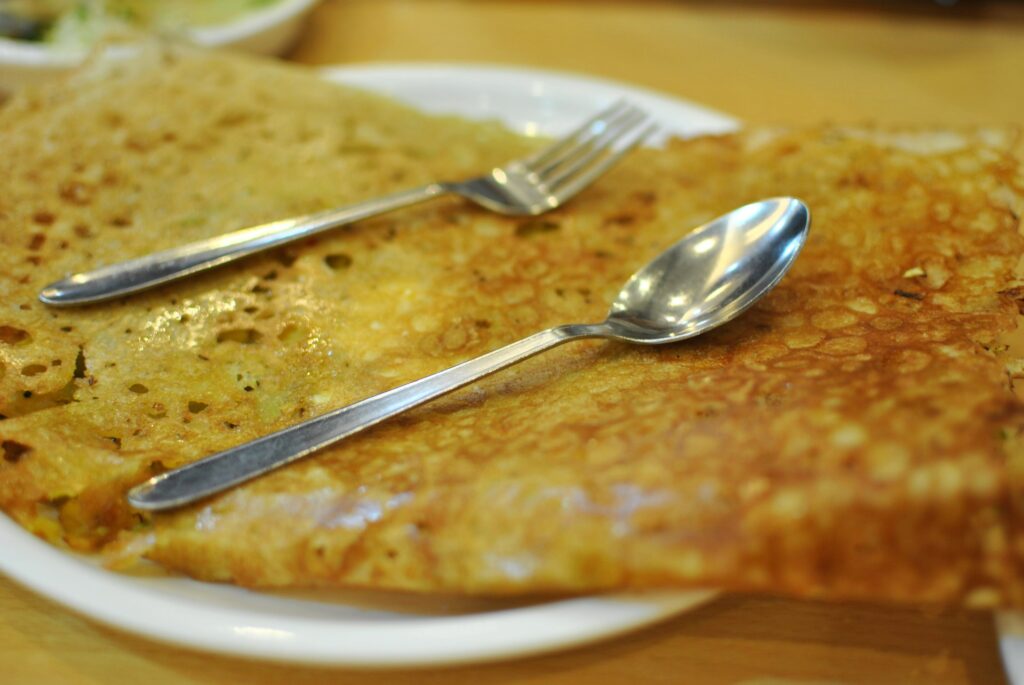
Palak paneer dosa

How to make Palak Paneer Dosa at home?

Everyone loves dosa, therefore it is time to create a north indian-south indian fusion of palak paneer dosa. This South Indian dish is not only very tempting but also delicious and nutritious. The dosas are prepared in many other ways instead of the traditional one like cheese dosa, chinese dosa, etc.

If you have got bored of having dosa the traditional way with chutney and sambar, then why not experiment with something new and delicious. We have brought you this palak paneer dosa which is visually appealing and appetizing as well. You can enjoy it as it is or with some homemade chutney of your choice.

How to make Palak Paneer Dosa at home?

This dosa is filled with the goodness of spinach and paneer. Spinach is a good source of vitamin A, Vitamin C, Vitamin K, iron, folate, and potassium. On the other hand, paneer is a rich source of protein and calcium.

This dosa is simple and quick to make. So, without any due, let’s start with the recipe!

Preparation time: 15 minutes

Cooking time: 30-35 minutes

Total time: 45-50 minutes

Serving: 3-4

How to make Palak Paneer Dosa at home?

Ingredients:

  • Dosa batter (readymade/rice-urad dal)-3 cup
  • Boiled spinach puree-1 cup
  • Paneer (cubed)-100 g
  • Salt to taste
  • Oil-2 tbsp
  • Onions chopped-1/2 cup
  • Green chillies-2
  • Garam masala-1 tsp
  • Cumin seeds-1 tsp
  • Tomato (chopped)-1/2 cup
  • Garlic-ginger paste-1 tsp
  • Cream-2 tbsp

Method of preparation:

  • Firstly, take dosa batter in a bowl, add salt, mix well and set aside for few minutes.
  • Meanwhile, for the masala filling, heat oil in a pan, add cumin seeds, green chili, ginger-garlic paste and chopped onion in it and saute until golden brown.
  • Next, add chopped tomato, salt, garam masala, spinach puree and mix well until the water is evaporated.
  • Furthermore, add paneer cubes in the pan and mix well again. Now, your dosa filling is ready. Keep it aside.
  • Next, to make dosa, spread oil on a non-stick tawa, spread a ladle full of batter to a thin round dosa and also drizzle some oil all around the dosa and let it cook till the underside is golden.
  • Lastly, spread the filling mixture on the dosa and roll the it and remove it from the tawa.
  • Finally, serve it with tomato chutney or coconut chutney.

How to make dosa batter?

Take 2 cup rice and 1 cup urad dal and soak them separately in water for 4-5 hours. Drain out excess water from dal and rice. Grind the rice and add water as per need for grinding rice. Now finely grind dal. Take out both the ingredients in a bowl and mix well. Allow the batter to ferment for at least 12 hours.

If you are struggling shedding weight. You can talk to us by taking this assessment: Click here

For more information click here

gooseberry

How to make Amla ki sabzi?

Everyone must have heard about the Amla dishes such as Amla pickles, murabba, juices, candy, etc. But have you ever made or eaten amla ki sabzi?

In winters, Amla is found in almost every market and in abundance. So, it is easily available for you. Amla is a power house of goodness. It is brimming with anti-oxidants such as vitamin C which is very good for skin and hairs and also for your strong immune system. Also, it is rich in vitamin A which is good for your eye sight. It is loaded with chromium which aids in reducing bad cholesterol and also helps stimulate insulin production which is really good for diabetics. So it is a good idea to use amla daily in your diet.

This recipe is very simple and quick to make and stays good for almost a week in your refrigerator. So, let’s quick look into the recipe!

Preparation time: 10 minutes

Cooking time: 10 minutes

Total time: 20 minutes

Serving: 3-4

Ingredients:

  • Amla (chopped into 4 pieces)– 8-10
  • Green chili –
  • Oil – 2.5 tbsp
  • Hing – 2 pinch
  • Cumin seeds – 1 tsp
  • Carom seeds – 1 tsp
  • Turmeric Powder – 1/2 tsp
  • Coriander powder – 1 tsp
  • Salt – As per taste

Amla ki sabzi banane ka tareeka:

  • Firstly, wash and cut the Amla into 4 pieces and remove their seed and chop green chili.
  • Secondly, take a frying pan and put oil in it and heat it. Once hot enough, add hing, cumin seed and carom seed in it.
  • After frying them, add turmeric powder, coriander powder to the frying pan and fry the mixture for at least 1 minute.
  • Now, add Amla, green chili and salt in the mixture. Stir fry it for few minutes and cover the frying pan with a lid and let it be on low flame for 5 to 6 minutes and stir in between occasionally.
  • Lastly, check if they are cooked and if its still hard, cover them again and let the frying pan be on low flame for another 3 to 4 minutes.
  • Finally, you can store them in the refrigerator and you can take them along with your rice or chapatis or use it as an instant pickle to increase the taste of your meals.

(Tip: You can also add some sugar or jaggery if you like it sweet)

If you are struggling shedding weight. You can talk to us by taking this assessment: Click here

For more information click here