Healthy Recipes

All healthy recipes are under this category. Try at your convenience.

Healthy eating means eating a variety of foods that give you the nutrients you need to maintain your health, feel good, and have energy.


These nutrients include protein, carbohydrates, fat, water, vitamins, and minerals. A healthy diet is essential for good health and nutrition.

It protects you against many chronic non-communicable diseases, such as heart disease, diabetes, and cancer. It can also boost a person’s mood and provide them with more energy.


A doctor or dietitian can provide tips on eating a more healthful diet.  If you take care of yourself, you can keep your cholesterol and blood pressure within a safe range.

This keeps your blood flowing smoothly, decreasing your risk of cardiovascular diseases.


Eating a variety of foods and consuming less salt, sugars, and saturated and industrially-produced trans-fats, are essential for a healthy diet

Healthy  Recipes foods nourish us with vitamins, minerals, protein, fiber, and healthy fat.


So, healthy recipes are made up of vegetables, fruits, whole grains, lean meats, legumes, low-fat or fat-free dairy, and healthy fats.

It’s a combination of these foods that give us the most nutritional bang for our caloric buck. Nutrition is important for everyone.


When combined with being physically active and maintaining a healthy weight, eating well is an excellent way to help your body stay strong and healthy.


Having foods & drink that are high in fat, sugar & salt have these often & in small amounts.

Nutritious recipes can include butter and sugar, just like healthy meals can include an indulgent dessert—

it’s all about moderation and the big picture.


HOW TO MAKE A QUICK AND EASY EGG MAYO SANDWICH

Egg mayo sandwich is a very healthy and tasty dish. Sandwiches are the most popular and quick breakfast option. It saves your time and also gives you enough calories. Sandwiches are liked by almost every person. There are soo many varieties of sandwiches available. This egg mayo sandwich is a super easy and protein-rich option for your breakfast. It is a tasty as well as a healthy snack option.

Ingredients for making egg mayo sandwich:

3 Eggs

1 tablespoon mayonnaise

4 slices of Multigrain bread

Salt

½ teaspoon black pepper

½ teaspoon chilli flakes

2-3 tablespoon coriander leaves

½ teaspoon herbs

Method to make egg mayo sandwich:

Firstly, boil the eggs for 10 minutes.

Put boiled eggs in cold water so they peel off easily.

Then, mash the eggs with a spoon and add the mayonnaise, coriander leaves, herbs, black pepper, chilli flakes, and salt.

Mix all the ingredients properly.

Now, put the mixture on the bread and toast it on a Tawa or toaster with some butter.

If preparing in the oven, preheat the oven for 3-4 minutes at 180 degrees. Grill according to your desired taste and texture.

And it is ready to serve.

Serve egg mayo sandwich within 2 hours of making or refrigerate it until used.

Preparation time: 8 minutes

Cooking time: 5 minutes

Total time: 13 minutes

Serving: 2

BENEFITS OF EGG MAYO SANDWICH:

  • Egg mayo sandwich is a protein-rich breakfast option and gives many health benefits
  • This sandwich provides a balance of carbohydrates, proteins, and fats.
  • You can also eat this sandwich for weight gain and as a post-workout meal.
  • Eggs are a very good source for intake of protein. It provides energy to the body and also improves good cholesterol levels in the body.
  • Omega-3-fatty acids are also present in eggs which promote a healthy cell membrane.
  • Mayonnaise is rich in vitamin a and also contains omega-3-fatty acids that are good for the heart.

HEALTH TIP:

  • Vegetarians can use corn or mushroom in place of eggs for the same mayonnaise dressing.
  • And, mayonnaise can be replaced with thick flavoured yoghurt.
  • Also, you can add some more vegetables like capsicum and onions to increase their nutritional value.
  • However, do not consume mayonnaise in excess as it can cause weight gain

Pro-tip: you can serve this sandwich with your choice of dip or chutney. We recommend mint-coriander chutney as it never disappoints!

If you are struggling to shed weight. You can talk to us by taking this assessment: Click here

For more information click here

HOW TO MAKE A QUICK AND EASY EGG MAYO SANDWICH Read More »

How To Make Classic Homemade Caesar Salad And Coleslaw Salad

Classic Caesar Salad

Caesar salad is basically a non-vegetarian salad invented in Tijuana, Mexico in the 1920s. It is one of the US’s most famous dishes. It has a seasoned dressing of anchovies, egg yolk, lemon juice, olive oil and parmesan cheese. Because, Caesar salad is a very popular dish hence, it is found on menu of most restaurants of America.

It is a combination of taste and flavours because it has crisp freshness of romain lettuce, crunchiness of croutons and savouriness of grated parmesan and creaminess of Caesar dressing.

INGREDIENTS OF CLASSIC CAESAR SALAD:

 6 anchovy fillets

1 small garlic clove

2 large egg yolks

2 tablespoon fresh lemon juice

¾ teaspoon mustard

2 tablespoon olive oil

½ cup vegetable oil

3 tablespoon finely grated parmesan cheese

Freshly ground black pepper

3 bread

3 romaine lettuce

Parmesan, for serving

CLASSIC CAESAR SALAD PREPARATION:

DRESSING:

Chop anchovy fillets and garlic finely with the knife  and make it a paste ,then put into a bowl.

Then put egg yolks, lemon juice and mustard in the bowl and whisk well.

After that add olive oil and vegetable oil gradually and whisk well until it turns into thick and glossy paste.

Then, put parmesan and whisk.

Finally, mix salt, pepper and more lemon juice as per taste.

HOW TO MAKE CROUTONS:

Cut  the bread into fine small pieces (you can also tear bread into small pieces).

Then, preheat oven to 375 degree.

Then, mix bread pieces with olive oil on a baking sheet.

Now, bake until turns golden, 10-15 minutes.

FINAL PREPARTION OF CLASSIC CAESAR SALAD:

Put whole romaine leaves in a large bowl. Shave the parmesan with a vegetable peeler and put it in the bowl.

Now, mix dressing, lettuce and croutons together until mix properly.

Then , add some parmesan on top of salad.

Your classic caesar salad is ready.

Finally , serve chilled or at room temperature.

SERVING SIZE: 4-6 serving

PREPARATION TIME: 30 minutes

TOTAL TIME: 30 minutes

TIPS:

Avoid it if serving it to very young, very old, pregnant or immune compromised because of the risk of salmonella in raw eggs.

And if you don’t want to use raw eggs, you can also replace it with mayonnaise or you can use pasteurized eggs.

If anchovies are not available, you can also use a teaspoon of Worcestershire sauce in the dressing.

Hope you like this recipe.

COLESLAW SALAD

When we talk about salad, there are many types of salads that we have not eaten but heard their name. Coleslaw salad is basically a cabbage salad. It’s called “koolsla” in Dutch .“Kool” means cabbage and “slas” means salad. This is a very popular dish in America. However, if we buy commercially prepared coleslaw it can have unhealthy ingredients like hydrogenated oils and a considerable amount of salt and sugar in it. So, it is a better option to prepare it at home with healthy ingredients to get the most health benefits. It is a very simple and tasty recipe.

INGREDIENTS:

  • finely chopped cabbage (red or green) 1/2
  • finely chopped carrot 1
  • grated onion 1/2
  • salt 1 teaspoon
  • sugar 2 teaspoons
  • black pepper 1 teaspoon
  • mayonnaise 1/2 cup (use veg mayo if you are vegetarian)
  • apple cider vinegar 1 tablespoon

METHOD OF MAKING COLESLAW SALAD

DRESSING PREPARATION: 

In a bowl, add sugar, salt, black pepper powder, apple cider vinegar, and mayonnaise altogether and mix well.

SALAD PREPARATION:

  • Now, put cabbage, carrot, and onion in the bowl and mix well with the dressing until dressing coats properly.
  • Then transfer it to a serving plate or bowl and serve chilled for better taste.

BENEFITS OF CABBAGE:

  1. Helps fight breast cancer because cabbage contains molecules called isothiocyanates which are especially known for their anti-cancer properties.
  2. A great antioxidant as it is rich in polyphenols which are recognized for their antioxidant property.
  3. It contains a good amount of essential fatty acids (EFAs) which help in fighting inflammatory conditions.
  4. A wonderful source of vitamin K which give strength to our bones.
  5. It has a great detoxification property and helps in weight loss.
  6. Also, it is high in fibers and rich in vitamin C.

TIPS FOR EATING COLESLAW SALAD

  • Alternatively, you can use mayonnaise in place of natural yogurt which provides equal creaminess and gives fewer calories.
  • Also, you can add thinly chopped vegetables of your own choice like apple, radish, or celery.
  • You can try different herbs and spices as they give you more flavor and nutritional richness.
  • It can also be consumed with french fries, sandwiches, barbeque meats, and hotdogs.
  • Avoid too much consumption because it can cause flatulence and bloat.

HOPE YOU LIKE THE RECIPES!

If you are struggling shedding weight. You can talk to us by taking this assessment: Click here

For more information click here

How To Make Classic Homemade Caesar Salad And Coleslaw Salad Read More »

Paneer stuffed parwal

Paneer Stuffed Parwal

Paneer stuffed parwal

Paneer Stuffed Parwal (Cottage Cheese Stuffed Pointed Gourd) is delicious and nutritious dish made from parwal and paneer. This side dish is easy and quick to make. Parwal is blanched and then stuffed with paneer filling and then sautéed. Some people find Parwal quite boring but trust me’ this Bharwan Parwal is quite unique in taste.

You may like to try our other similar recipes stuffed-paneer-moonglet

Ingredients for Paneer Stuffed Parwal

300 grams parwal (pointed gourd)
100 grams paneer crumbles
Medium size onion chopped fine
1 teaspoon ginger & garlic chopped fine (can use paste also)
2 small green chilli chopped fine
1 tablespoon lemon juice
2 tablespoon coriander chopped fine
1 teaspoon dhania powder (coriander)
½ teaspoon chilli powder
1/4 teaspoon haldi
½ teaspoon garam masala
Half teaspoon jeera powder
½ teaspoon jeera
Salt to taste
1+1 tablespoon oil

Method

  • Peel the parwal and blanch it. Make a slit and scrape out the flesh. Set aside.
  • Heat 1spoon oil in a pan: add jeera, and then add ginger, garlic, chilli, onion and saute for 2 to 3 minutes.
  • Add all the dry masala, salt, paneer, lemon juice and saute for 2 to 3 minutes.
  • Switch off the heat, add coriander and mix.
  • Now stuff all the parwlas with this paneer mixture.
  • Heat oil in a pan; transfer the parwals, add a pinch of salt  and saute for a minute, cover with a lid with water on it and cook for 5 minutes on low heat.
  • Open the lid and saute on high heat for 1 minute.
  • Serve

Health benefits of Pointed Gourd

Pointed Gourds are good source of minerals and vitamins like vitamin A, vitamin C, vitamin B1 etc. They have very less calories. If you are trying for weight loss, then Pointed Gourds may become your best friend. Regular consumption of Pointed Gourds may help us to get rid of many diseases. Pointed Gourds help us in controlling cholesterol. They are full of fibre and helps to immune our digestive system. They are natural blood purifier and keeps our blood clean and healthy.

Health benefits of Paneer

Paneer is rich in calcium content, and calcium is known to strengthen both the teeth and bones. Apart from this, the intake of calcium also helps in the smooth functioning of the nervous system and the heart muscles stay healthy. Also

  • It reduces the risk of cancer
  • Build better bones and teeth.
  • An essential component in weight loss programs.
  • Aids in the normal functioning of the digestive system.
  • Ideal food for diabetic patients.
  • Building a strong immune system.

For more weight loss recipes: Click here

Hope you like this recipe.

If you are facing issues in dropping your weight, please take this free-body type assessment: Click here

Paneer Stuffed Parwal Read More »

Oats Veggie Nutri Cutlets

VEGETABLE OATS CUTLET RECIPE

Oats Nutri Veggie Cutlet – A Healthy breakfast recipe, Give this easy Oats Cutlet Recipe a try!

Wondering how to make oats cutlet at home? This super quick and easy oats cutlet recipe will help. If you are always looking for a healthy breakfast recipe to try, then your search stops here. Never made cutlets before? Don’t worry, as this easy oats cutlet recipe with step by step instructions will help you. If you are looking for oats cutlet recipe without potatoes, you can use spinach and green peas instead. However, having potatoes in oats cutlet recipe actually gives it a much better form and taste. This North Indian breakfast recipe is prepared with boiled potatoes, ginger-green chilli paste, paneer, carrot and a mélange of spices that will be an absolute delight for your taste buds and can surely make you crave for more. This oats cutlet recipe is an easy-to-make nutritious dish that you can cook on occasions like kitty party, game night, and picnic. It tastes best, when had along with a hot cup of tea or coffee during the monsoon or winter season. Try this healthy oats nutri veggie cutlets and enjoy with your loved ones!

You can also try our chana-dal-cutlet recipe

Benefits –

Health benefits of Oats nutri Veggie Cutlet: Veg Cutlets, unlike potato tikkis, are a powerhouse of vitamins, minerals and nutrition. The soya granules are high on protein content, good source of omega-3 fatty acids. Soya granules help to increase bone density and aid digestion.

Also, Benefits include lower blood sugar and cholesterol levels, protection against skin irritation, and reduced constipation. In addition, they are very filling and have many properties that should make them a food helpful for weight loss.

Ingredients –

  1. 2-3 medium size raw banana (pressure cook for 1 whistle,cool,peel)
  2. 1/2 cup oats
  3. 3 tbsp soay granules (soak in warm water for 10 mins, squeeze)
  4. Three tbsp carrot (grated)
  5. 3 tbsp cabbage (grated)
  6. Three tbsp capsicum (grated)
  7. 2 tbsp onion (finely chopped)
  8. 3 tbsp roasted peanuts (peel & crush)
  9. 2 tsp flaxseeds (slightly roasted)
  10. Two tsp til (slightly roasted)
  11. 2-3 tsp ginger garlic paste
  12. 3 tbsp coriander leaves (finely chopped)
  13. 2-3 green chillies (finely chopped)
  14. 1/2 tsp red chillies
  15. Half tsp garam masala
  16. salt as per taste
  17. 1 lemon juice
  18. Vegetable oil as needed
  19. 2 tbsp oats (powdered0 as needed for dry coating
  20. Two tbsp corn flour as needed for dry caoting
  21. 1 tbsp fine rawa as needed for dry coating.

Method for making healthy oats nutri veggie cutlet –

  1. In a large mixing bowl, add the boiled peeled bananas, soya granules, oats, carrot, cabbage, capsicum, onion, ginger garlic paste.
  2. Also add coriander leaves, chilies, dry spices, salt as required, crushed peanuts, flaxseeds, til, and lemon juice.
  3. Mix well till evenly blended
  4. Taste and adjust seasoning
  5. Divide the mixture into 12-14 portions.
  6. Now Dampen your palms and shape each portion into oval or oblong shaped cutlets about half an inch thick.
  7. Mix corn flour and oats powder with 1 tbsp fine rawa
  8. Coat each cutlet in this dry mixture
  9. Press gently and dust off excess of flour mixture.
  10. Heat a non stick pan or flat tawa.
  11. Smear a little oil on the pan.
  12. Place the cutlets on the pan and cook on medium heat. On either side till done and crispy.
  13. Serve hot with mint chutney or ketchup

Your hot tempting breakfast/rainy season snack is ready to serve!!!

If you are struggling shedding weight. You can talk to us by taking this assessment: Click here

For more information click here

Oats Veggie Nutri Cutlets Read More »

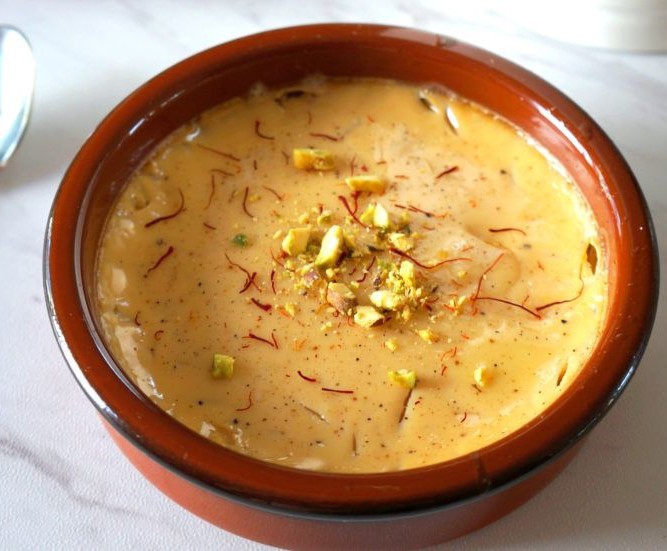
How to make Khajoor Mishti Doi

A Healthier version of wonderful and Famous Traditional Bengali Dessert

Khajoor Mishti Doi

What is Mishti Doi ?

Mishti Doi or Mithi Dahi is possibly the most popular and beloved sweet dish in Bengal, and arguably the state’s second most important culinary export after the roshogolla. Fans of this iconic Bengali dessert—fermented set yogurt sweetened with caramelized sugar—are found all over the subcontinent, including Bangladesh, and even further afield.

Mishti Doi is an essential part of a Bengali meal and is traditionally made for religious and festive occasions like Durga Puja, Bengali New Year (Pohela Baisakh), and weddings. In the Vedas, curd or yogurt is described as the food of the gods, which may explain why it is an essential part of religious rituals. Plus, this easy Mishti Doi recipe, chilled, is a delicious way to beat the heat and is a perfect thirst-quencher in a hot and humid climate.

Despite its immense popularity, Mishti Doi is rarely prepared at home, possibly because it is widely available in practically every mithai shop in every neighbourhood in Bengal. Also, it takes planning and you need to make it at least a day in advance before you can eat it.

Although the misti doi recipe requires minimal ingredients, and even though the process is fairly simple and hassle-free, you need patience to make this scrumptious sweet – it has a waiting time of around 12 hours for the yogurt to set.

Healthier Twist in Mishti Doi –

Khajur mishti doi is a healthy twist to the traditional Bengali sweet. As the name says healthy mishti doi with dates, is devoid of refined and sugar and made with dates.
To make Khajur mishti doi, you need to soak the dates in warm water for about half an hour. Then drain the water, deseed the dates and combine with water to make a smooth puree. Then boil the milk for 8 to 10 minutes and after cooling it slightly add the dates puree and curd for the mishiti doi to set. Pour into individual serving glasses or cups of your choice and allow it to set for 5 hours. Cooling milk in this healthy Bengali sweet for 10 minutes after boiling is very important as curd added in hot milk will not set the mishiti doi well. Similarly soaking the dates in the beginning in hot water is also important to get a uniform texture.

Healthy mishti doi with dates has been made with cow’s milk as it has slightly lower fat content than full-fat milk. If you wish you can make this sweet with low- fat milk also. That will bring down the fat content to almost nil. Turn to about half a portion of this comparatively healthy Indian sweet to satisfy your sweet tooth. You will not load your body with refined sugar and thus avoid inflammation too with this khajur mishti doi. While heart patients and others aiming to eat healthy sweet can include this healthy mishti doi with dates as an occasional treat, diabetics should avoid it because of the addition of dates. Kids also need not hesitate to indulge in this sweet delicacy.

Recipe how to make Khajoor mishti doi – Healthy Bengali sweet

Soaking Time: 30 minutes

Setting time: 8 to 10 hours

Preparation Time: 2 mins

Cooking Time: 10 mins

Total Time: 10 hours 42 minutes

Ingredients –


1/2 cup dates (khajur)
21/2 cups cow’s milk
1 tbsp whisked curds (dahi)
For The Garnish
a few saffron (kesar) strands and nuts of your choice (Almonds/pistachios)

Method –

  1. To make khajur mishti doi, combine the dates and enough hot water in a bowl, cover with a lid and keep it aside for 30 minutes.
  2. Drain, deseed the dates and put in a mixer jar.
  3. Add ¼ cup of water and blend well till smooth. Keep aside.
  4. Put the milk in a deep non-stick pan, mix well and boil on a medium flame for 8 to 10 minutes, while stirring occasionally.
  5. Cool slightly for approx. 10 minutes, while stirring occasionally,
  6. Add the dates puree and whisk Well keep aside
  7. Put the curds in a deep bowl and whisk well.
  8. Pour the milk-dates mixture in it and whisk very well.
  9. Pour the mixture into 5 individual cups or bowls, cover with a lid and keep aside in a warm place for atleast 8 to 10 hours or till set.
  10. Refrigerate the khajur mishti doi for atleast 1 hour and serve chilled garnished with saffron strands.
    Nutrient values per serving
    Energy 116 kacl
    Protein 5 gm
    Carbohydrates 15.6 gm

Health benefits of Khajoor Mishti doi

  • As the name says the ingredient that lends sweetness in this Bengali dessert is dates and not sugar. This substitution has been done to avoid the use of refined sugar which has many ill-effects
    on the body.
  • Curd is probiotic and thus healthy for gut too.
  • Curd lends 2 important nutrients calcium and protein. Both these are twin pillars of our bones.
  • Heart patients can enjoy this dessert They can opt for low-fat milk instead of cow’s milk if they wish to enjoy a completely fat-free delicacy.
  • For kids, on the other hand, this dessert is a healthy option too. Try serving them healthy sweets like this dates based mishti doi since childhood, so as to avoid developing their taste buds for
    sugar based sweets.

For more Healthier recipes: Click here

Hope you like this recipe.

If you are facing issues in dropping your weight, please take this free-body type assessment: Click here

How to make Khajoor Mishti Doi Read More »

How to make delicious stew at home

How to make delicious stew at home?

We all crave for some hot piping stew, be it vegetable stew or chicken or mutton stew. If you are looking for easy recipes for vegetable, chicken and mutton stew, you’ve landed on the right page. We’ve got you covered!

Follow this article to learn how to make easy and delicious vegetable, chicken and mutton stew!

Also, lean how to make chickpea soup!

Vegetable stew:

Vegetable stew can be made with lots of variations and vegetables. You can choose vegetables of your choice and your availability. Vegetable stew can be made with or without coconut milk or just with water or with water and milk. It depends on how you like to make it. 

Let’s get started with the recipe:

Preparation time: 5 minutes

Cooking time: 20 minutes

Total time: 25 minutes

Serving: 4 servings

Ingredients to make vegetable stew:

Oil-2 tbsp

Cinnamon: ¼ stick

Cloves: 3 

Cardamom pods: 1-2 pods

Curry leaves: ¼ kat

Onion: 1 big (sliced)

Potato: 1 big

Green chili-1 big (sliced) 

Carrot: 2 big

Green beans: 2-3 

Peas: ¼ cup

Masala powder: ½  tsp

Black pepper: ¼ tsp

Red chili powder: ¼ tsp

Rice flour: 1 tbsp

Salt: to taste

Water: 1 cup

Milk: ½ cup

Method of preparation:

  • Firstly heat oil in a pan, and when heated add all dry spices in it. Sauté for a few minutes and then add sliced onions and green chilies. Sauté until the onions become translucent.
  • Meanwhile add rice flour to the water and mix well. 
  • Furthermore add all the vegetables of your choice to the pan and sauté until tender. Cook on medium heat for 5-6 minutes while stirring.
  • When the vegetables become tender, add rice flour+ water mixture to it and mix all the ingredients well. 
  • Moreover add salt, black pepper, red chili powder and garam masala to the vegetables and mix well.
  • Furthermore, add water and milk to the pan and cook on medium heat for 1-2 minutes until the mixture comes to a boil.
  • Now, cover the pan with a lid and cook on low heat for 1-2 minutes and then serve hot after 5 minutes!

Chicken stew:

To make chicken stew all you need to add is chicken breast along with chicken broth to the above mentioned recipe of vegetable stew.

Let’s get started!

Preparation time: 10  minutes

Cooking time: 30 minutes

Total time: 40 minutes

Serving: 4 servings

Ingredients to make chicken stew:

Oil-2 tbsp

Cinnamon: ¼ stick

Cloves: 3 

Cardamom pods: 1-2 pods

Curry leaves: ¼ kat

Onion: 1 big (sliced)

Potato: 1 big

Green chili-1 big (sliced)

Garlic cloves: 3-4 minced 

Carrot: 2 big

Green beans: 2-3 

Peas: ¼ cup

Masala powder: ½  tsp

Black pepper: ¼ tsp

Red chili powder: ¼ tsp

Rice flour: 1 tbsp

Salt: to taste

Skinless chicken breast-1 ½ lb

Chicken broth-2-3 cup

Method of preparation:

  • Firstly heat oil in a pot, and when heated add all dry spices in it. Sauté for a few minutes and then add sliced onions and green chilies. Sauté until the onions become translucent.
  • Meanwhile add rice flour to the water and mix well. 
  • Furthermore add all the vegetables of your choice to the pot and sauté until tender. Cook on medium heat for 5-6 minutes while stirring.
  • When the vegetables become tender, add rice flour+ water mixture to it and mix all the ingredients well. 
  • Moreover add salt, black pepper, red chili powder and garam masala to the vegetables and mix well.
  • Now, add chicken breast to the pot along with chicken broth. Furthermore, cook the mixture on low heat until the chicken is no longer pink and the vegetables become tender.

(Pro-tip: you can also use shredded chicken or shred the chicken in the bowl while serving)

Serve hot!

Mutton stew:

To make mutton stew repeat all the above mentioned steps for chicken stew and replace chicken with 500 gms of mutton and add water in place of chicken broth.

If you are struggling shedding weight. You can talk to us by taking this assessment: Click here

For more information click here

How to make delicious stew at home? Read More »

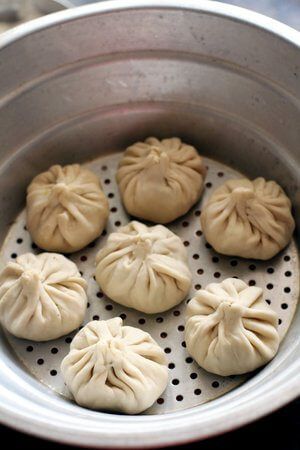
How to make easy homemade MOMOS using leftovers

JUGAAD RECIPE

HOMEMADE DELICIOUS MOMOS

About this trending and popular dish

MOMOS are bite-size dumplings made with a spoonful of stuffing wrapped in dough. Momos are usually steamed, though they are sometimes fried or steam-fried. Meat or vegetables fillings becomes succulent as it produces an intensively flavored broth sealed inside the wrappers.

Term momo is traditionally used in northern China for buns without stuffing. Momo is the colloquial form of the Tibetan word “mog mog”.The word mo means food related to flour.

Momo has become a delicacy in Nepal and Tibetan communities in Bhutan, as well as people of the Indian regions of Darjeeling, Ladakh, Sikkim, Assam, Uttarakhand, Himachal Pradesh and Arunachal Pradesh.

Now before coming over to recipe try not to waste food as many people around the globe sleep hungry. If in case you have done the excess cooking than we should conserve the leftovers and make something interesting out of it and avoid the habit of wasting food.

I did the same today and it turned out really well. Here’s the recipe:

For the filling of momos –

Take some oil, saute one onion, add any leftover subzi/ Paneer/ chicken you have. I used shredded chicken pieces from leftover chili chicken I made last night. You can also add some vegetables like peppers, mushrooms, beans etc. to this mixture.

For the chutney of momos –

  1. Char two tomatoes and soak 2-4 chillies in warm water for 10 minutes. In a blender, grind the two with some salt.
  2. In a small pan take some oil, add one minced garlic, 1 bulb of spring onion, chopped (You can take regular onion too) and little soy sauce. Grind again, if you feel the need.

Let’s prepare MOMOS –

1.Knead a dough using 1 cup of refined wheat flour.

2. Roll out very small and thin circles. place the filling, gather it and pinch from the top.

3. You can steam it if you have the equipment. And in case, if you don’t have one than use appe pan to make it. Maybe in appe pan it will loose the shape a little. But will taste so good !! you can deep fry too, but this version of steamed momos are much healthier.

Steamed MOMOS

Do try this super delicious and easy homemade momos recipe from leftover subzi/chicken/paneer at your home.

For more recipes: Click here

Hope you like this recipe.

If you are facing issues in dropping your weight, please take this free-body type assessment: Click here

How to make easy homemade MOMOS using leftovers Read More »

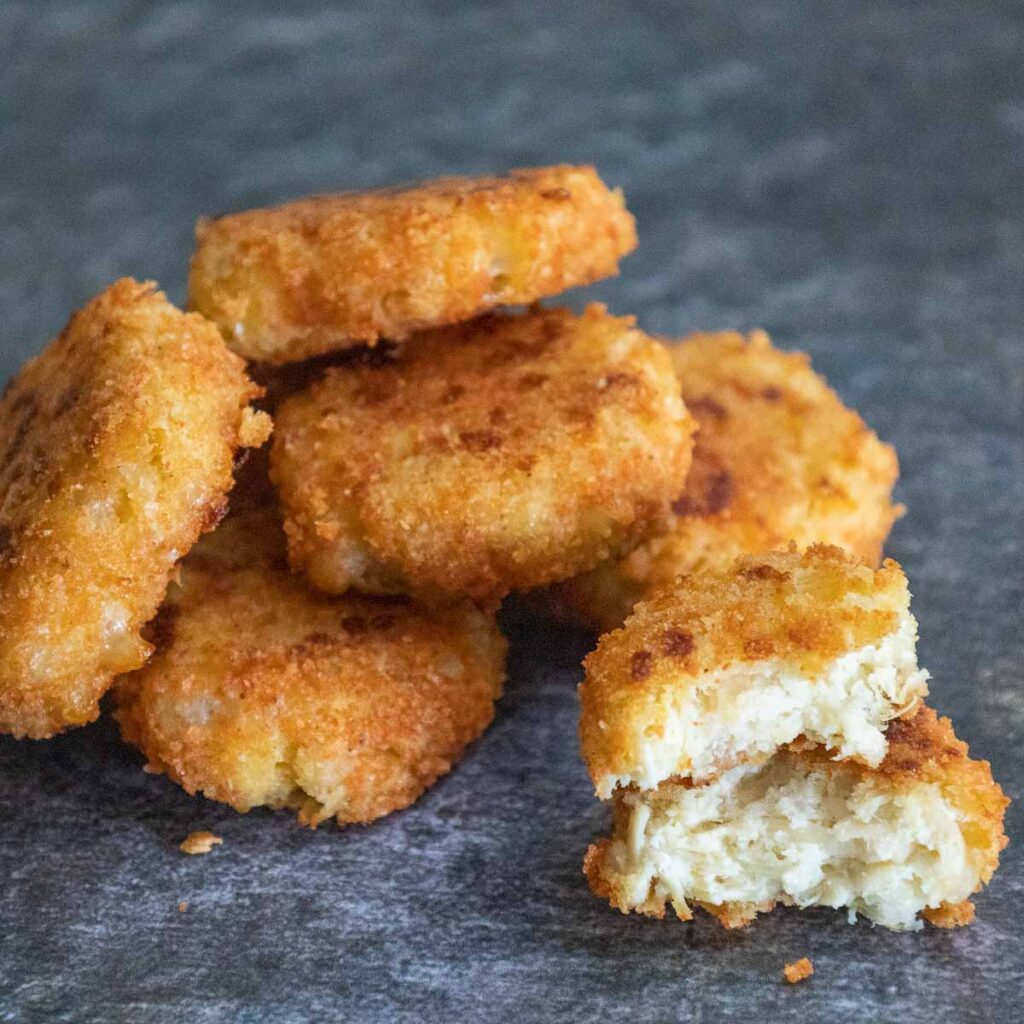
RECIPE FOR KETO CHICKEN NUGGETS

EASY KETO COOKING !!!

YUMMY KETO NUGGETS

This Keto Chicken Nuggets recipe is about to change the way you think about eating low carb! They are everyone’s favorite keto recipes made with simple ingredients found right in the kitchen, and it is the best way to enjoy a quick and easy lunch that fits the keto diet.

Homemade chicken nuggets are a super easy keto recipe to make using Chicken, shredded mozzarella cheese, almond flour and few spices. They are a recipe that the entire family will love and are far healthier than the fast food restaurant version of chicken nuggets.

Ingredients

  • 2 Eggs, Whisked
  • 4 Medium-Sized Chicken Breast
  • 1 Cup Psyllium husk (more if needed)
  • ½ Teaspoon Salt
  • ½ Teaspoon Garlic powder
  • ¼ Teaspoon Paprika (optional)
  • ¼ Teaspoon ground black Pepper
  • ½-1 Cup Oil For Frying

Super simple stuff, right? let’s dive into the recipe Now……

How to make keto chicken nuggets

  1. Chop your chicken breasts into small nugget-shaped pieces – and depending on how big you want them, that could be about 1½ to 2 inches thick. 
  2. Place the nuggets in a bowl, and set them aside.
  3. Now Mix your seasonings – the salt, garlic powder, paprika, and pepper – in a small bowl accordingly, until well-combined.
  4. After that, Sprinkle your seasoning mixture over your chicken, and stir until each piece is completely coated with it.
  5. Crack the eggs into a small bowl.
  6. Add the egg mixture to your bowl of chicken pieces. Now, Mix everything up until each chicken pieces are thoroughly coated in the egg wash.
  7. Add the psyllium husk in a separate bowl to make your breading. 
  8. Now all that’s left to do is to dip the chicken pieces in the breading, and coat evenly.
  9. After seasoning and breading the chicken nuggets appropriately, you can start frying them.
  10. Now after all this preparation, Heat your oil in a pan over medium-high heat, and fry the nuggets in batches until golden brown and fully cooked – and it should take about 3-5 minutes on each side to do this.

Note : By the way, it’s really important during this step not to overcrowd the pan- you’ll not only risk dropping the temperature of the oil but also will end up with greasy chicken nuggets.

Then, just serve on their own, or with some sugar free ketchup or your favorite dipping sauce and enjoy!

For more recipes: Click here

Hope you like this recipe.

If you are facing issues in dropping your weight, please take this free-body type assessment: Click here

RECIPE FOR KETO CHICKEN NUGGETS Read More »

How to make Paneer Jalfrezi

TEMPTING PANEER JALFREZI

What is Paneer Jalfrezi ?

Paneer Jalfrezi is an easy and healthy restaurant-style vegetable stir fry recipe made with cottage cheese, vegetables like bell peppers, and Indian spices. You can make this Spiced cottage cheese stir fry in just 15 minutes. Keto, Low carb, and Gluten-free.

The word ‘jalfrezi‘ comes from the Bengali language ‘jhal’ means hot or spicy, and ‘frezi’ means suitable for a diet.

This is a semi-dry curry recipe made with a mix of vegetables and paneer. Ensure to cut all vegetables and paneer lengthwise of the same size to make Veg Jalfrezi similar to what is served in Indian restaurants.

Ingredients for Paneer Jalfrezi

  • Paneer: Homemade fresh paneer always tastes best. However, you can buy from market as well. Also, the paneer should cut lengthwise.
  • Vegetables: All three colored bell peppers (if available) cut length-wise. You can also use other vegetables like carrot, beans, mushrooms.
  • Onion: Dice the onion lengthwise.
  • Ginger and garlic: Mince them finely.
  • Tomato: Diced the tomato lengthwise.
  • Tomato puree: Used ½ cup of tomato puree prepared from 1 large tomato.
  • Spices: 1/4 tsp turmeric, 1/2 tsp red chili powder, 1/2 tsp coriander powder, and 1/4 tsp garam masala.
  • Oil or ghee: 1tbsp
  • Lemon juice: Squeeze juice of half lime into the stir-fry for added flavor.
  • Coriander leaves: for garnish.

How to make Paneer Jalfrezi

  1. In a Pan, heat oil. Once the oil is hot, add cumin seeds and let them sizzle.
  2. Then add sliced onions, minced ginger, garlic and sauté for 2-3 minutes on medium heat until light brown.
  3. Next, add the spices like turmeric powder, red chili powder, coriander powder, salt, a splash of water (So that masala would not burn) , and sauté the masala on medium-high heat for another minute.
  4. Add the bell peppers and continue sautéing them till they are tender and cooked. 
  5. Add sliced tomato and tomato puree and sauté for a minute until the tomatoes soften.
  6. Finally, add the paneer, garam masala, and toss well to coat with all the spices.
  7. Cover and simmer for 2-3 minutes.
  8. Lastly, squeeze from fresh lime juice and sprinkle some freshly chopped coriander leaves.

AND IT’S READY TO SERVE

You can serve this dish with chapati, naan, paratha, kulcha, pulao, rice, poori, zeera rice.

Tips & Variations

  1. If you have store-brought paneer, then soak paneer in hot water for 15 minutes to keep them soft.
  2. Do not overcook the veggies else they will turn mushy.
  3. You can increase the quantity of paneer and vegetables accordingly to your preference
  4. If you have leftover paneer jalfrezi, you can use it as a filling for making Paneer Frankie Roll.

If you are struggling shedding weight. You can talk to us by taking this assessment: Click here

For more information click here

How to make Paneer Jalfrezi Read More »

How to make Bombay Grilled Sandwich at home

How to make Bombay Grilled Sandwich at home?

We all crave for some easy and quick sandwich recipes. Well, Bombay grilled vegetable sandwich is not only tasty but super easy to make. You no longer have to think about your breakfast or evening snacks because this recipe, right here will leave you craving for more sandwiches!

Bombay grilled sandwich is loaded with vegetables and goodness of nutrients. Moreover, it is so wholesome and yummy. 

You can add your choice of vegetables as per your preference to the mixture of this sandwich. But to make authentic Bombay grilled sandwiches, we recommend you to follow the recipe for all the taste and delight!

Let’s get started with the recipe!

Preparation time: 10 minutes

Cooking time: 5 minutes

Total Time: 15 minutes

Serving: 2

(to increase the servings, please adjust the quantities of the ingredients accordingly and follow the below-mentioned steps)

Also learn how to make Paneer spinach corn sandwich!

Ingredients to make Bombay Grilled Sandwich:

Bread: 4 slices

Tomato: 1 small

Potato: 1 boiled (medium)

Onion: 1 small

Cucumber: 1

Cheese slice: 2

Butter: 2 tablespoons

Salt: to taste

Chaat masala: ¼ tsp

To make green chutney:

Mint leaves: handful

Coriander leaves: handful

Garlic cloves (optional): 3-4

Green chilli: 2 small 

Method of preparation:

  • Firstly, to prepare this tempting sandwich, peel and cut the vegetables. Slice the vegetables round after washing and peeling. Also slice the boiled potato. 
  • Secondly, wash and chop mint leaves and coriander leaves to make green chutney. Now, add green chilli along with garlic cloves with mint and coriander leaves to a blending jar. Add enough water and blend to make green chutney. You can adjust the water quantity according to the consistency of the chutney. (also add a pinch of salt and fresh lemon juice for better taste!)
  • Now, it’s time to prepare the sandwich. To one slice of bread, spread butter and over it spread mint-coriander chutney. Furthermore, palace the vegetable slices over the slice and sprinkle salt and chaat masala over it. Once done, add the cheese slice or grated cheese and cover with the other slice of bread.
  • Lastly, grill the sandwich for 2-3 minutes and serve hot!

Pro-tip: you can serve this sandwich with your choice of dip or chutney. We recommend mint-coriander chutney as it never disappoints!

Do try this recipe out and enjoy!

If you are struggling shedding weight. You can talk to us by taking this assessment: Click here

For more information click here

How to make Bombay Grilled Sandwich at home? Read More »