Mehar Jamil

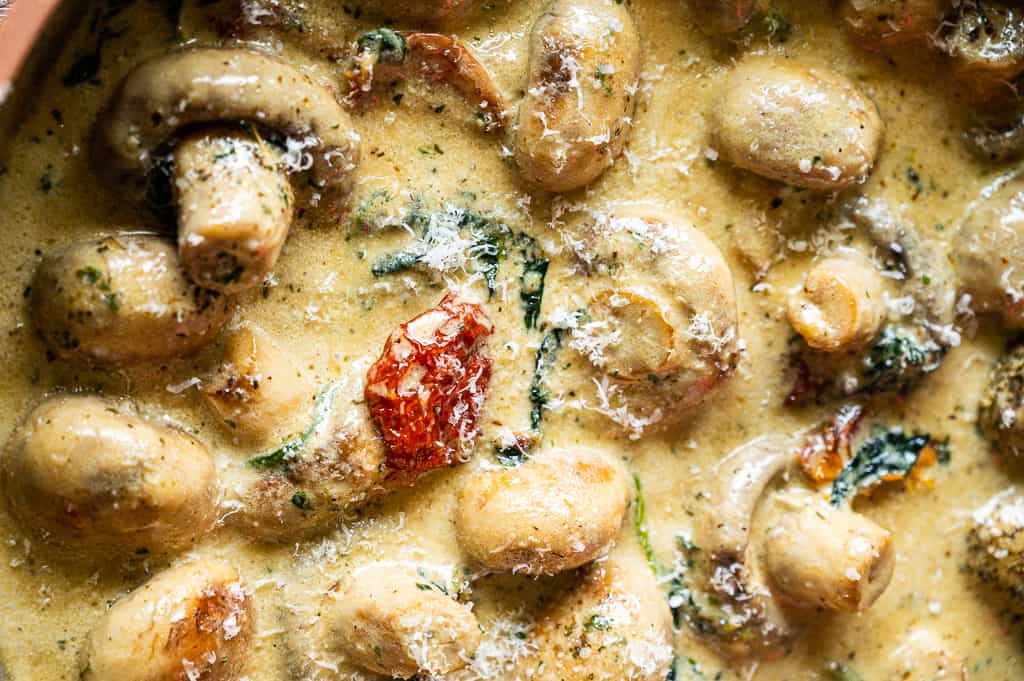
How to make keto garlic butter mushrooms

Garlic butter mushrooms is the perfect keto-friendly side dish which can be prepared under 20 minutes. Serve with your favorite meats, including steak & chicken, and enjoy this delicious dish at only 6 net carbs per serving! The Creamy Keto Garlic butter Mushrooms are a savory side dish that you can eat while following the keto diet. Follow this recipe to enhance the taste of mushrooms with flavorful ingredients, including cream cheese, minced garlic, and butter.

Try our other low carb keto recipe as well keto samosa, keto parmesan chicken, keto creamy brussels

INGREDIENTS

  • 16 baby Button mushrooms cleaned and trimmed
  • 2 tbsp unsalted butter
  • 2 tbsp garlic, minced
  • 1 cup heavy cream
  • 2 tbsp cream cheese
  • 1/4 cup parmesan cheese
  • 1/2 tsp dried oregano
  •  dried thyme as per taste
  • 1/2 tsp ground pepper
  • salt to taste
  • parsely, to garnish optional

METHOD

  • Heat a large skillet; add butter on a medium heat. 
  • Once the butter has melted add the minced garlic and fry them for 1 minute until a nice aroma comes.
  • Add the cleaned mushrooms and saute for 4-5 minutes until tender and coated with butter sauce.
  • Stir in the heavy cream, cream cheese, salt, pepper, dried oregano and thyme. Close with lid and cook for 5 minutes until the sauce thickens.
  • Finally add the parmesan cheese and simmer the sauce for a minute.
  • Add some chopped fresh parsley and transfer the creamy garlic mushrooms to a bowl and serve.

For more recipes: Click here

If you are facing issues in dropping your weight, please take this free-body type assessment: Click here

Easy recipe of Creamed Brussels Sprouts

Creamed Brussels sprouts with garlic and parmesan is an easy and tender recipe. The perfect comfort food. At just 5.2g net carbs per serving these keto Brussels sprouts are keto-friendly and a sure fire way to eat more green vegetables.

You’ll find that creamed Brussels sprouts are usually served during the fall and winter months, as that’s typically when Brussels are in season. It’s the perfect side dish for chicken and other winter warmer dinners.

INGREDIENTS

  • 500gm Brussels sprouts
  • 1 tablespoon butter
  • ⅓ cup (80 ml) heavy whipping cream
  • 55 g cream cheese softened
  • ½ cup pre-shredded/grated mozzarella
  • 1 clove garlic minced
  • 1 teaspoon mustard sauce
  • salt and pepper to taste
  • 2 tablespoon parmesan cheese

METHOD

  • Pre-heat your oven to 190°C/375°F. Remove the stems and loose leaves from your Brussels sprouts. Then cut then in half.
  • Next, melt the butter in a cast-iron skillet or another oven-safe skillet over medium-high heat on the stove. When the butter is melted mix in all the remaining ingredients except the parmesan cheese and Brussels sprouts.Mix until all the cheese has melted and the sauce is smooth and creamy.
  • Toss the Brussels sprouts in the cheese sauce until they are completely coated. Sprinkle the parmesan cheese over the top then place the whole skillet in the oven.
  • Cook uncovered on the middle rack for 15-20 minutes or until the sprouts are tender and the top is a golden brown. Remove from the oven and serve.

For more recipes: Click here

If you are facing issues in dropping your weight, please take this free-body type assessment: Click here

How to make Keto Parmesan Chicken

Keto parmesan chicken is a super and tasty dish for keto diet followers because of how crispy and flavorful it is. You can enjoy it on a salad too. It tastes like something you would order from a fine Italian restaurant without the expenses price tag.

The secret to the delicious “Italian” flavor, crispy crust and gorgeous color is (obviously) parmesan cheese. The cheese adheres to the chicken and when melted in the pan, gives the chicken a beautiful golden and crispy crust that is to die for. Lets start our recipe of keto parmesan chicken.

you can also try our other keto recipe like keto fish, easy keto chicken recipes, keto nuggets

INGREDIENTS

  • 500gm chicken breasts 2-3 chicken breasts
  • 1 teaspoon Italian seasoning or seasoning of choice
  • 1/2 teaspoon garlic powder
  • Pinch of salt and pepper
  • 1 cup grated or zested parmesan cheese
  • 1/2 cup almond flour 
  • 2 eggs
  • 3 tablespoons olive oil or butter or oil of choice

METHOD

  • Lay the chicken breasts out on a cutting board and cut in half horizontally. Generously season with Italian seasoning (or seasoning of choice), garlic powder, salt, and pepper; Set aside.
  • Combine the parmesan cheese and almond flour in a medium shallow bowl. In another bowl, whisk the eggs.
  • Dip the chicken breasts into the egg mixture then into the parmesan mixture. shake off the excess breading. Repeat until all the chicken cutlets are covered.
  • Heat oil or butter in a large NON-STICK heavy duty pan. Add chicken cutlets in a single layer and cook for 5-6 minutes on each side, until golden and crispy. Be sure not to flip until the parmesan is golden on the first side or it will slide off. Repeat with remaining chicken cutlets

your keto parmesan chicken is ready to serve with keto ketchup

If you are struggling shedding weight. You can talk to us by taking this assessment: Click here

For more information click here

How to make keto Thai curry

Keto Thai curry is a savior for all keto diet followers. Thai cuisines is popular amongst the entire continent. Thai curries differ from Indian curries because they are typically lighter, whereas Indian curries are traditionally thicker and more hearty.

This keto Thai coconut keto curry recipe perfectly marries the flavors of hearty red curry with light and creamy coconut milk. The additional of chicken, basil, and lime helps bolster this dish into a well-rounded low-carb meal perfect for lunch or dinner.

You can also try our other keto recipes like keto samosa, keto avocado baked chips

INGREDIENTS

  1. 1 can full-fat coconut milk or 250-200ml Homemade coconut milk
  2. 1 tsp red curry paste 
  3. 2 cloves garlic, minced 
  4. 1 lime, juiced 
  5. 2 fresh Thai chilies or normal chilies , chopped (remove seeds for less heat) 
  6. 500gm boneless, skinless chicken thighs, flattened OR 250gm paneer/tofu
  7. 1 tbsp coconut oil
  8.  ½ red bell pepper, cut into strips 
  9. 1- 1/2 yellow or green bell pepper, cut into strips 
  10. ½ cup chicken stock
  11. 1 bunch fresh Thai basil or normal basil, chopped 
  12. 2 tbsp unsweetened coconut flakes or grated coconut

METHOD

  1. Marinate the chicken: Shake the can of coconut milk vigorously or Use fresh homemade coconut milk. In a mixing bowl, whisk together ¼ cup of the coconut milk, the red curry paste, garlic, lime juice, and Thai chilies. Add the chicken and toss to coat. Allow to marinate for 5 minutes.
  2. Make the curry: In a large sauté pan, heat 1 tablespoon of coconut oil over medium-high heat, then add the bell peppers and sauté for 2 to 3 minutes. Put the marinated chicken and any remaining marinade in the pan and sauté for 3 to 4 minutes, then pour in the chicken stock and simmer for 5 minutes.
  3. Whisk the remaining coconut milk, half of the Thai basil, peppers and the coconut flakes into the pan and allow to simmer for about 3 minutes, until the chicken is tender.
  4. Add salt to taste, about half a teaspoon or as per taste. Give it a stir, then cover it and let the veggies and chicken cook.
  5. Thai curry is ready to serve.

You can also store leftovers in an airtight container in the refrigerator for up to 4 days.

For more information click here

If you are struggling shedding weight. You can talk to us by taking this assessment: Click here

Easy 15 min recipe of homemade Sukhdi

Sukhdi Recipe is also referred as Gud Papdi Recipe in India. It is very quick, authentic Gujarati sweet made with just 3 ingredients: Ghee, Wheat Flour and Jaggery(Gud). Sukhadi is very soft, melt in mouth texture.

INGREDIENTS

  • 1½ cups whole wheat flour
  • ½ cup jaggery
  • ⅔ cup ghee
  • 2 tbsp desiccated coconut (optional)

METHOD

  1. First prepare the plate to set the sukhdi. You need to grease the bottom of plate by ghee.
  2. Put ghee into large non-stick pan. And melt it on slow flame. When ghee is slightly hot (bubbles are started to form), add flour wheat flour.
  3. Stir with spatula, the mixture looks like thick paste and feels heavy while you are stirring it.
  4. Now roast the flour into ghee, if ghee is not enough to roast the flour, you can add more. First add 1 tbsp, then if you still required then add one tbsp one by one.
  5. Stir it continually on medium heat for 4-5 minutes, then slow the flame and keep starring.
  6. Now its tricky part. How you would know the flour is perfectly roasted? If The flour’s color gets darker, It gets very nice aroma and Its become lighter than before.
  7. Now turn off the gas. Let it be cool for just 1-2 minutes, not more than that. After this add jaggery, quickly mix it with flour. Add desiccated coconut if you like. Now quickly set the mixture into greased plate. And flatten the surface well.
  8. Now using knife slice it into desired shape (square or diamond). Now let it be cool completely.
  9. After it cools down completely, remove the pieces gently and serve.

Tips of making Sukhdi Recipe

  • First thing is quantity of ghee (clarified butter), you must take 2/3 amount of ghee as against flour. So if you take 1 cup flour, take 2/3 cup ghee. It helps to roast flour perfectly, and also give it melt in mouth texture to sukhdi.
  • Second point is which type of jaggery, you are using for this recipe. There are lots of varities of jaggery available in the market.
    1. If you have block of jaggery, first grate it, and take measurement according and after roasting the flour, switch of the flame, and immediately add into mixture so it mixes well with flour, and you cannot found small chunks of jaggery in sukhdi
    2. If you have organic jaggery that comes in lumpy form while you buy from market, after roasting the flour, switch of the flame, wait for 2-3 minutes. Let the mixture cool down not completely, but little, than add this kind of jaggery and mix it well. If you add jaggery at early stage then it will melt and starts to boil, result will be hard and chewy sukhdi.

For more information click here

If you are struggling shedding weight. You can talk to us by taking this assessment: Click here
How to make Tamatar Makai Nu Shaak

Tamatar Makai nu Shaak is a vegan curry made of fire roasted tomatoes and sweet corn. Tomatoes and Corns are roasted on an open flame, charring them and adding a smoky flavor. The corn and tomatoes are pureed and cooked along with spices to make the base of the curry. And then pureed sweet corn is added for the slight sweetness and texture. You can also Add grated paneer in the dish to make it protein rich. Tamatar Makai nu shaak is vegan and gluten free. People from Jain community can also eat this as it has no onion garlic in it.

Ingredients –

  1. 3 Tomatoes
  2. 100 gm Paneer
  3. 1 cup Sweet Corn
  4. 2 Tbsp Oil
  5. 1 tsp Cumin seeds (Jeera)
  6. 0.5 tsp Turmeric Powder
  7. 1 tsp Coriander Powder
  8. 1 tsp Cumin Powder
  9. 1-2 tsp Red Chilli Powder
  10. 2 Tbsp Coriander leaves, chopped
  11. Salt to taste
  12. Water as required

You can also try our other interesting and tasty recipes like Methi khakhra, Suran subzi, Kashmiri paneer chaman

Method of making Tamatar Makai nu Shaak –

1. Grill the whole tomatoes and Corn over an open gas flame until the skin is charred. Or grill the tomatoes and Corn in an oven for 20 mins. Turn them every 7-8 mins.
2. Allow the tomatoes to cool, then peel and puree them. Also peel the corn from cob and puree them. Add a little water to help the blending if required.
3. Heat oil in a pan and add the cumin seeds
4. Once the cumin seeds brown slightly, add the diced tomatao and fry until it turns light brown
5. Now Add the tomato puree and add the red chilli powder, turmeric powder, cumin powder and coriander powder.
6. Cook until the oil separates or for 8-10 mins on low flame while stirring frequently. Now add corn paste and cook further for few minutes.
7. Add water to achieve the desired consistency and cook for another 2 mins
11. Add the salt, Grated paneer and few leftover kernels of corn and simmer for 5 min
12. Serve hot

Enjoy our Tamatar amaki nu shaak with different parathas or Roti!!

For more recipes: Click here

If you are facing issues in dropping your weight, please take this free-body type assessment: Click here

How to make Methi Khakhra at home

Methi Khakhra is a traditional Gujarati snack which is healthy, crispy and delicious on its own or with pickle or curd. The secret of making best diet methi khakhra lies in rolling thinnest possible roti and cooking on low heat while continuously pressing it with wooden press or folded cloth. Methi Khakhra is a simple dish with minimal ingredients and great flavour.

Ingredients

  1. 1 cup wheat flour (for dough) and 1/2 cup for dusting
  2. 2 tbsp Kasoori methi (dried fenugreek leaves)
  3. Salt as per taste
  4. 1 tsp Cumin powder
  5. Water
  6. 1/4 tsp asfoetida
  7. 1tbsp cooking oil

You can also try our other recipe of Handvo, Baked methi muthia, Makhana bhel

Method

  1. Mix 1 cup whole-wheat flour, kasoori methi, 1 teaspoon oil and salt in a bowl.
  2. Add water as required and knead smooth and soft dough like chapati/phulka roti dough. Cover it with a plain muslin cloth and let it rest for 15-20 minutes.
  3. Grease its surface with 1 teaspoon oil, divide it into 6 equal parts and give them a shape of ball.
  4. Take one ball, press it and coat it with dry whole-wheat flour.
  5. Roll it out into very thin circle (like chapatti) on a wooden board (chakla/patlo). Dust dry wheat flour as mush as required to prevent dough from sticking to board. Roll it out as thin as possible.
  6. Heat thick tava or non-stick griddle on low heat. Put chapatti on it and cook for 20-30 seconds. After 20-30 seconds, turn it and press it using wooden press or folded thick cloth. Press down each part of chapati with it to make sure that no bubbles appear and cook for around 40-50 seconds.
  7. Flip it and repeat same process of pressing and cooking with wooden press/folded cloth until it becomes crispy. Make sure to cook on low heat to roast it evenly without any dark brown spots.
  8. Prepare remaining khakhras.
  9. Cool them for 10-15 minutes at room temperature and store in airtight container

Tip – You can also use 2 teaspoons ginger-garlic paste for nice ginger-garlic flavor.

For more recipes: Click here

If you are facing issues in dropping your weight, please take this free-body type assessment: Click here

Know more about Rheumatoid Arthritis

Rheumatoid arthritis (RA) causes joint inflammation and pain. It happens when the immune system doesn’t work properly and attacks the lining of the joints, called the synovium. The disease commonly affects the hands, knees or ankles, and usually the same joint on both sides of the body, such as both hands or both knees.

What is rheumatoid arthritis?

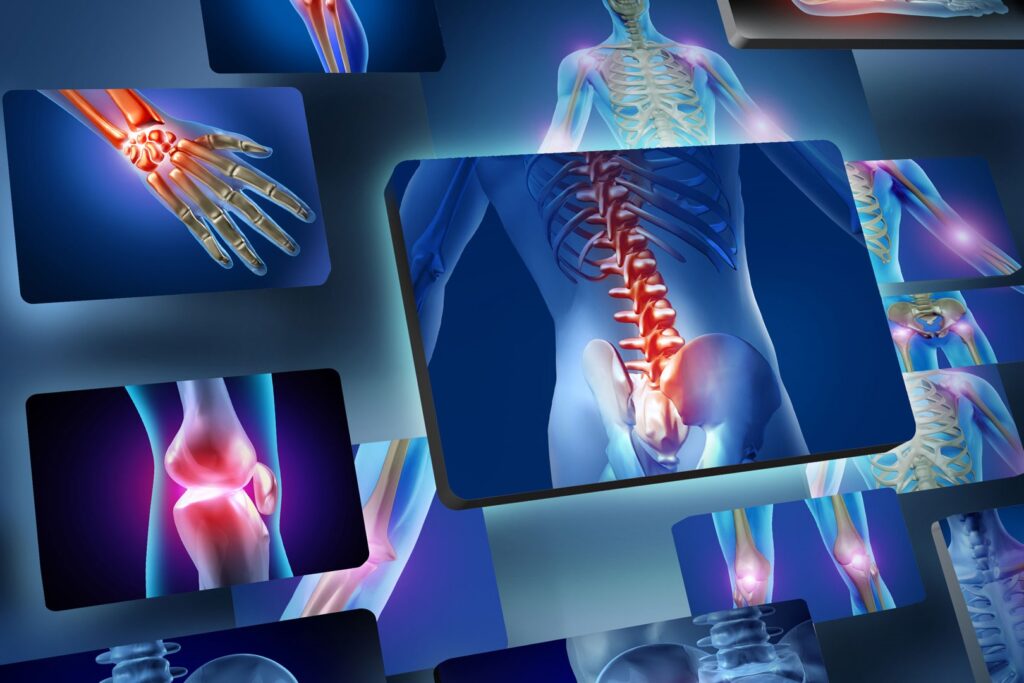
Rheumatoid arthritis (RA) is an autoimmune disease that is chronic (ongoing). It occurs in the joints on both sides of your body, which makes it different from other types of arthritis. You may have symptoms of pain and inflammation in your:

  • Fingers
  • Hands
  • Wrists
  • Knees
  • Ankles
  • Feet
  • Toes

Uncontrolled inflammation damages cartilage, which normally acts as a “shock absorber” in your joints. In time, this can deform your joints. Eventually, your bone itself erodes. This can lead to the fusion of your joint (an effort of your body to protect itself from constant irritation).

Specific cells in your immune system (your body’s infection-fighting system) aid this process. These substances are produced in your joints but also circulate and cause symptoms throughout your body. In addition to affecting your joints, rheumatoid arthritis sometimes affects other parts of your body, including your:

  • Skin.
  • Eyes.
  • Mouth.
  • Lungs.
  • Heart.

Age of onset of Disease

RA usually starts to develop between the ages of 30 and 60. But anyone can develop rheumatoid arthritis. In children and young adults — usually between the ages of 16 and 40 — it’s called young-onset rheumatoid arthritis (YORA). In people who develop symptoms after they turn 60, it’s called later-onset rheumatoid arthritis (LORA).

Causes for RA

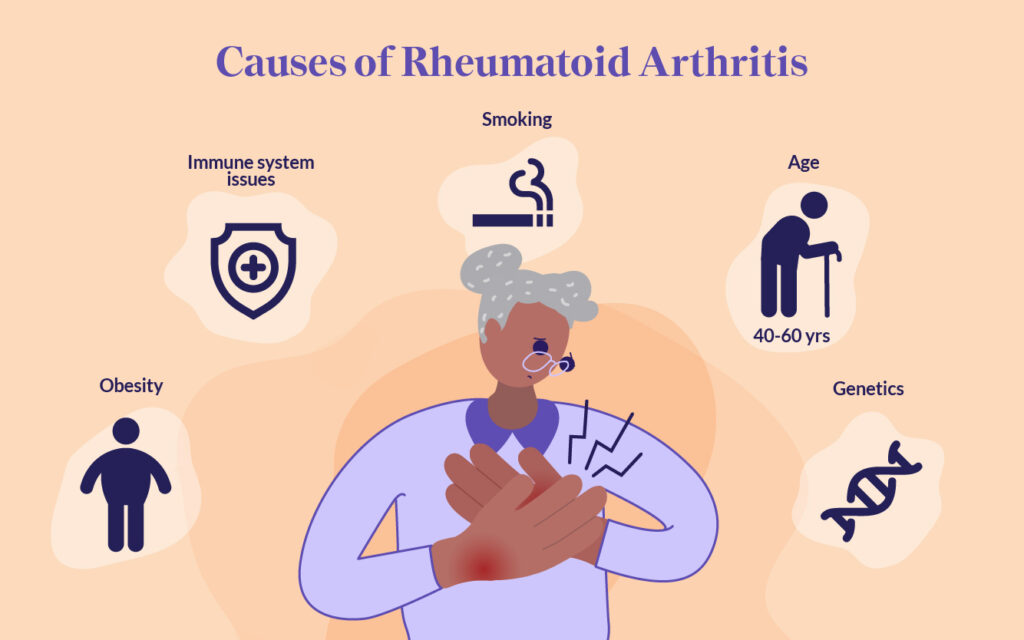
In a healthy person, the immune system fights invaders, such as bacteria and viruses. With an autoimmune disease like RA, the immune system mistakes the body’s cells for foreign invaders and releases inflammatory chemicals that attack those cells. Tn RA, it attacks the synovium, the tissue lining around a joint that produces a fluid to help the joint move smoothly. The inflamed synovium gets thicker and makes the joint area feel painful and tender and look red and swollen, and moving the joint may be difficult. Some other causes include smoking, Obesity and Age too.

Symptoms for Rheumatoid Arthritis

In the early stages, people with RA may not see redness or swelling in the joints, but they may experience tenderness and pain.
These symptoms are clues to RA:

  • Joint pain, tenderness, swelling or stiffness that lasts for six weeks or longer.
  • Morning stiffness that lasts for 30 minutes or longer.
  • More than one joint is affected.
  • Small joints (wrists, certain joints in the hands and feet) are typically affected first.
  • The same joints on both sides of the body are affected.

Many people with RA get very tired (fatigue) and some may have a low-grade fever. RA symptoms may come and go. Having a lot of inflammation and other symptoms is called a flare. A flare can last for days or months

Diagnosis

Rheumatologists diagnose people with rheumatoid arthritis based on a combination of several factors. Doctors do a physical exam and ask you about your medical history and symptoms. Your rheumatologist will order blood tests and imaging tests.

The blood tests look for inflammation and blood proteins (antibodies) that are signs of rheumatoid arthritis. These may include:

  • Erythrocyte sedimentation rate (ESR) or “sed rate” confirms inflammation in your joints.
  • C-reactive protein (CRP).
  • About 80% of people with RA test positive for rheumatoid factor (RF).

Some of the imaging tests to diagnose bone health may include:

  • X-rays.
  • Ultrasounds.
  • Magnetic resonance imaging (MRI) scans.

What are the diagnostic criteria for rheumatoid arthritis?

  • Inflammatory arthritis in two or more large joints (shoulders, elbows, hips, knees and ankles).
  • Inflammatory arthritis in smaller joints.
  • Positive biomarker tests like rheumatoid factor (RF) or CCP antibodies.
  • Elevated levels of CRP or an elevated sed rate.
  • Your symptoms have lasted more than six weeks.

Health Effects

  • Eyes – Dryness, pain, inflammation, redness, sensitivity to light and trouble seeing properly.
  • Mouth – Dryness and gum inflammation, irritation or infection. 
  • Skin – Rheumatoid nodules — small lumps under the skin over bony areas. 
  • Lungs – Inflammation and scarring that can lead to shortness of breath and lung disease.
  • Blood vessel – Inflammation of blood vessels that can lead to damage in the nerves, skin and other organs.
  • Blood – A lower than normal number of red blood cells. 
  • Heart – Inflammation can damage the heart muscle and the surrounding areas.
  • Painful joints also make it hard to exercise, leading to weight gain. Being overweight may make people with RA more likely to develop high cholesterol, diabetes, heart disease and high blood pressure.

MANAGEMENT AND TREATMENT

What are the goals of treating rheumatoid arthritis?

The goals of RA treatment are to:

  • Stop inflammation or reduce it to the lowest possible level (put disease in remission).
  • Relieve symptoms.
  • Prevent joint and organ damage.
  • Improve function and overall well-being.
  • Reduce long-term complications.

How is rheumatoid arthritis treated?

Joint damage generally occurs within the first two years of diagnosis, so it’s important to see your provider if you notice symptoms. Treating rheumatoid arthritis in this “window of opportunity” can help prevent long-term consequences.

Treatments for rheumatoid arthritis include lifestyle changes, therapies, medicine and surgery. Your provider considers your age, health, medical history and how bad your symptoms are when deciding on a treatment.

Will changing my diet help my rheumatoid arthritis?

When combined with the treatments and medications your provider recommends, changes in diet may help reduce inflammation and other symptoms of RA. But it won’t cure you. You can talk with your doctor about adding good fats and minimizing bad fats, salt and processed carbohydrates. No herbal or nutritional supplements, like collagen, can cure rheumatoid arthritis. These dietary changes are safer and most successful when monitored by your rheumatologist.

But there are lifestyle changes you can make that may help relieve your symptoms. Your rheumatologist may recommend weight loss to reduce stress on inflamed joints.

People with rheumatoid arthritis also have a higher risk of coronary artery disease. High blood cholesterol (a risk factor for coronary artery disease) can respond to changes in diet. A nutritionist can recommend specific foods to eat or avoid to reach a desirable cholesterol level.

Four stages of rheumatoid arthritis

  • Stage 1: In early stage rheumatoid arthritis, the tissue around your joint(s) is inflamed. You may have some pain and stiffness. If your provider ordered X-rays, they wouldn’t see destructive changes in your bones.
  • Stage 2: The inflammation has begun to damage the cartilage in your joints. You might notice stiffness and a decreased range of motion.
  • Stage 3: The inflammation is so severe that it damages your bones. You’ll have more pain, stiffness and even less range of motion than in stage 2, and you may start to see physical changes.
  • Stage 4: In this stage, the inflammation stops but your joints keep getting worse. You’ll have severe pain, swelling, stiffness and loss of mobility.

Difference between

Rheumatoid arthritis vs. osteoarthritis

Rheumatoid arthritis and osteoarthritis are both common causes of pain and stiffness in joints. But they have different causes. In osteoarthritis, inflammation and injury break down your cartilage over time. In rheumatoid arthritis, your immune system attacks the lining of your joints.

Rheumatoid arthritis vs. gout

Rheumatoid arthritis and gout are both painful types of arthritis. Gout symptoms include intense pain, redness, stiffness, swelling and warmth in your big toe or other joints. In gout, uric acid crystals cause inflammation. In rheumatoid arthritis, it’s your immune system that causes joint damage.

GENERAL DIETARY GUIDELINES FOR RHEUMATOID ARTHRITIS

Food Items To Limit – The food stuff that limits calcium absorption should be limited.

  1. Phytates: They easily bind to calcium therefore limiting its availability for absorption. Try not to eat phytate-containing foods like whole wheat, oats, and rice,black beans,kidney beans, soy beans, peanuts, and lentils, walnuts, almonds, and sesame seeds, potatoes, turnips, beets and carrots with dairy products.
  2. Oxalates: Found in sweet potatoes, spinach and  beetroot. Very reactive molecules. Bind to calcium therefore reducing its absorption. Interfere with calcium storage in cells. Don’t eliminate these foods, just be aware that they are not the best providers of calcium.
  3. Alcohol: Interferes with vitamin D activation by the liver and kidneys. Inhibits vitamin D activating enzymes in the liver. It is a diuretic therefore it increases calcium excretion through urine. Increases Parathyroid hormone (PTH) levels and therefore decreases calcium reserves in the body. Try to limit your alcohol intake.
  4. Caffeine: It is believed that caffeine decreases calcium absorption by interfering with vitamin D absorption. Caffeine is also a diuretic therefore it increases calcium excretion in the urine.

Do’s:

  1. Include high calcium rich foods (beans, milk, cheese, tofu, fish, dry fruits)
  2. Eat fresh, alkalizing vegetables and fruits every day, preferably organic like green leafy vegetables, Cruciferous vegetables, Olives, Onion, Garlic and all Citrus fruits like Orange, lemon, grapefruit (chakotra).
  3. Prefer home made foods over outside foods.
  4. Do check for iodine content on food labels.
  5. Include omega-3 rich foods such as fish, walnuts, almonds, flax seeds, olive oil, canola oil.

Don’ts

  1. Avoid consumption of caffeinated products.
  2. Limit the intake of phosphorus containing foods- red meat, soft drinks. Never consume Iron rich foods along with calcium rich foods as that might lead to malabsorption.
  3. Foods with high levels of oxalic acid such as spinach, collard greens, and sweet potatoes prevent calcium absorption. So don’t consume calcium rich foods along with these foods.
  4. Don’t smoke – RA is probably caused by a combination of the genes you are born with and certain events in your life that trigger those genes to become active. One of those triggers may be smoking.
  5. Don’t be a couch potato – Unless your joints are very inflamed, you need to get up and exercise. Studies show that aerobic and strengthening exercises can help reduce the pain and stiffness of RA.
  6. Don’t drink alcohol –  if you are taking RA medications before checking with your doctor. Although moderate drinking may have some health benefits for people with RA, certain RA medications do not mix well with alcohol. These include the common RA drug methotrexate and nonsteroidal anti-inflammatory drugs (NSAIDs).
  7. Don’t spend all your time indoors – Your body needs Vitamin D 
  8. Don’t take fish oil supplements before checking with your doctor. There is some evidence that the omega-3 fatty acids found in coldwater fish may be good for people with RA. Eating fish is fine, but taking high doses of supplements could interfere with several common medications and cause dangerous side effects.

Food Items You Can Easily Consume in Rheumatoid Arthritis

  1. Cereals & cereal products: Ragi, bajra, whole wheat flour. Pulses & Legumes: Lentils, peas, kidney beans, chickpeas, toor daal, soy beans.
  2. Fruits & Vegetables: Custard apples, chikoos, apple, white jamun, grapes, lemons, oranges, raw mangoes, carrots, beetroots, bottle gourd, bitter gourds, spinach, colocasia (arbi), drumsticks, yam, taro, tapioca, coriander leaves, celery, spring onions, garlic, ginger.
  3. Milk & milk products: Milk liquid, curd, cottage cheese, ghee, chhach, lassi, custard.
  4. Meat, Fish & Poultry: Sweet and salt water fishes, eggs, Chicken (lean and/or fowl).
  5. Nuts & Oils: Almonds, raisins, pista, walnuts, vegetable oil, mustard oil.
  6. Milk products, yogurt etc.,

For more information click here

If you are struggling shedding weight. You can talk to us by taking this assessment: Click here

How to make healthy Quinoa with Almonds and feta cheese

Quinoa with almonds and feta cheese is very easy recipe which can be prepared in just 30 minutes. Even a beginner can make it easily. It works great as a packed lunch for work or school. You can also serve it as a side dish with chicken. This is a low FODMAP recipe.

Lets start our recipe now, You can also try our other recipe like Quinoa Salad, Quinoa Pulao

Ingredients:

  • 1 tbsp Olive Oil / Seasme oil / Coconut Cold press oil
  • 1 tsp Ground Coriander
  • ½ tsp Turmeric
  • 300g Quinoa, rinsed
  • 50g toasted Almond flakes
  • 100g Feta cheese, crumbled
  • Handful Parsley, roughly chopped
  • ½ lemon, juiced

TIP – You can also add Boiled Chickpeas and Kidney beans if you are not looking for low carbohydrate option.

Method:

  1. In a large frying pan, heat the oil and add the ground coriander and turmeric.
  2. Fry for about 1 minute to release the aromas.
  3. Add the quinoa and fry for another minute. The quinoa will make a light popping sound.
  4. Add the water, turn heat down, and simmer for about 10-15 minutes.
  5. When the water has reduced completely, take off the heat. When the quinoa is cooked, a white halo will be visible around each grain.
  6. Cool slightly.
  7. Add the remaining ingredients and mix through.
  8. You can serve this hot or cold.

Enjoy your Quinoa with almonds and feta cheese 🙂

If you are struggling shedding weight. You can talk to us by taking this assessment: Click here

Hopefully you like our recipe. For more such information and recipes click here

Easy Steps of making Keto Avocado chips

Avocado chips are perfect blend of crispy, Healthy and tasty option for snacking. They taste like guacamole in chip form. They are also gluten-free and low carb. Here is the easy recipe for these healthy chips.

This entire recipe contains 7gm protein and 4gm carbohydrate

Ingredients

  • 1 large ripe avocado
  • 3/4 cup freshly grated Parmesan
  • 1 tsp lemon juice
  • 1/2 tsp garlic powder
  • 1/2 tsp Italian seasoning
  • Salt as per taste
  • Freshly ground black pepper

Preparation

  1. Step 1 – Preheat oven to 325° and line two baking sheets with parchment paper. In a medium bowl, mash avocado with a fork until smooth. Stir in Parmesan, lemon juice, garlic powder, and Italian seasoning. Season with salt and pepper.
  2. Step 2 – Place heaping teaspoon-size scoops of mixture on baking sheet, leaving about 3” apart between each scoop. Flatten each scoop to 3″ wide across with the back of a spoon or measuring cup. Bake until crisp and golden, about 25- 30 minutes, then let cool completely. Serve at room temperature.

TIPS

  • You will need to bake the avocado chips on parchment paper or silicone baking mats. This will ensure that your chips will easily come off once baked.
  • The parmesan cheese is key to this recipe working. Do not reduce the amount of cheese used in this recipe. The cheese is what is allows these chips to crisp up.
  • You also need to make sure the cheese is evenly spread across the batter. If you have portions of your chip that are just avocado and no cheese, then that part of your chip will not crisp up.
  • Make sure to add lemon juice to the batter. When avocados are baked, they will start to develop a bitter flavor. The lemon masks the bitterness.
  • Your chips need to be very thin to crisp up. I don’t recommend trying to make the chips thicker. You will need a longer baking time and the avocado will become very bitter with the longer baking time.
  • You want to bake until the cheese is golden brown. This is when you know the chips are crispy. If you underbake the chips, they will still be green and soft. And If you bake them too long and the chips turn a dark brown, the cheese has burned and the chips will be bitter.

If you are struggling shedding weight. You can talk to us by taking this assessment: Click here

For more information click here